

In my previous article I described how to create tables, establish relationships and add screens (http://www.c-sharpcorner.com/uploadfile/18ddf7/searching-multiple-parameters-in-lightswitch-2012-part-1/)
This article describes how to add a query for a table and add a data item as well as add a button.
Step 1
Right-click on the Student Table and choose "Add Query".
Step 2
The Query designer appears. In that add the filter by providing the information and here I have set the name to "StudentFilter". 
Step 3
To add the query to the editable grid screen, go to the menu bar and click on "Add Data Item".
The Add Data Item dialog box appears. In that choose the "Query Radio Button" and then select the StudentFilter option and provide a name.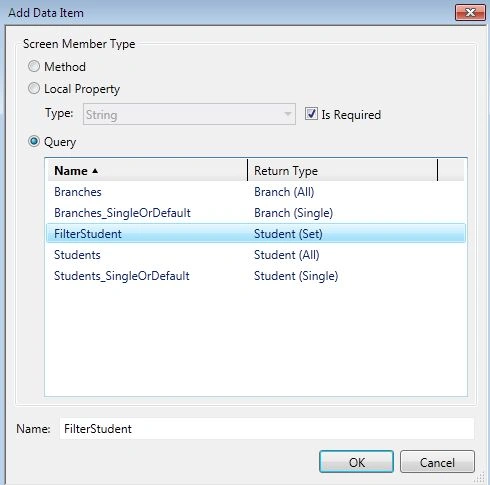
Delete the existing Grid from the screen.
And drag the FilterStudent query to the Screen. Now the screen designer will look like: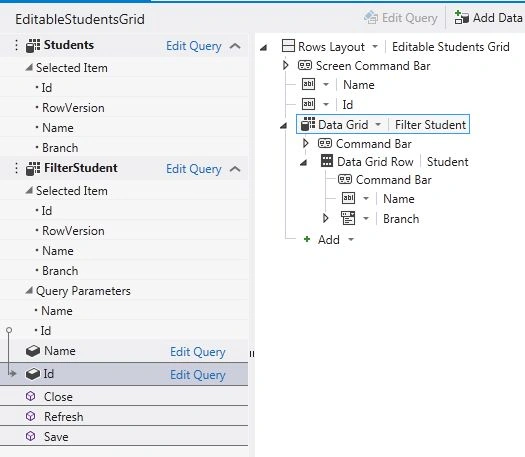
Step 4
Now we will add two data items.
One is the StuNameParam.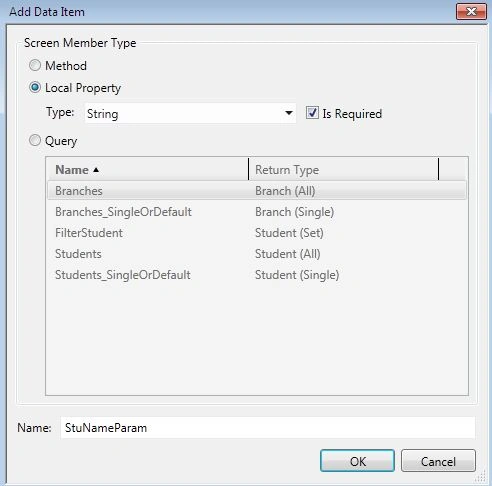
The other one is the BranchParam.
As we click OK these data items will be added to the Screen Designer.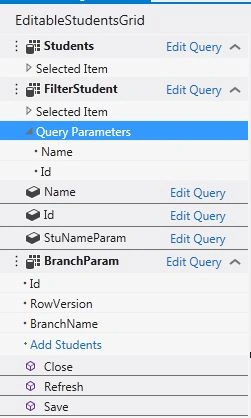
Step 5
To add a Model Window, we first need to click on the "Add" and then select a new group from the drop down list.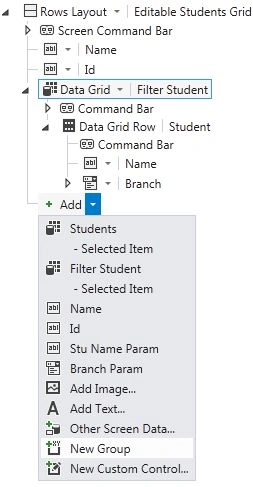
Now click on the "Row Layout" dropdown list and choose the "Modal Window" option.
After adding the Modal Window, drag both data items (StuNameParam and BranchParam).
Step 6
We will also add two buttons, one to open the window and the other to close the window.

The open window button and close window button will be added.
Right-click on the buttons and choose "Edit Execute Method" for both buttons.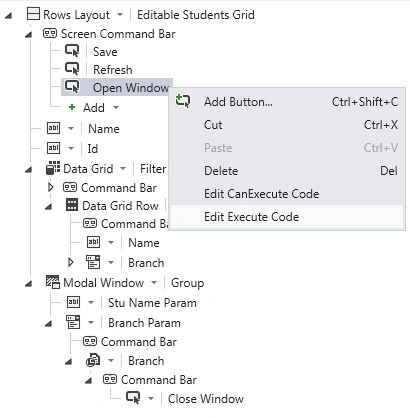
The Edit Execute Method for the close button is shown in the following figure: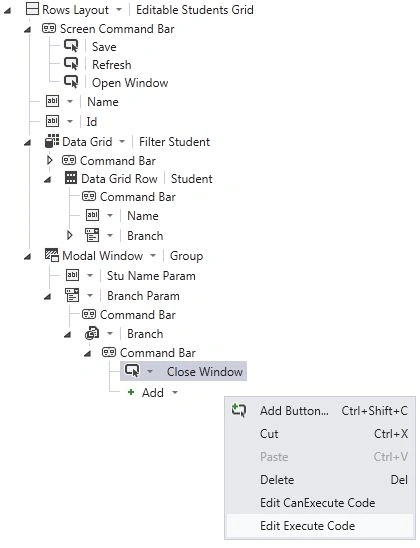
The code editor appears; in it provide the information for both the buttons.
using System;
using System.Linq;
using System.IO;
using System.IO.IsolatedStorage;
using System.Collections.Generic;
using Microsoft.LightSwitch;


Join the conversation! Your thoughts help the community grow.