

Introduction
The CI/CD (Continuous Integration/Continuous Deployment) is a star of the modern DevOps environment. It allows you to automate the building, testing, and deployment of applications. With Continuous Integration (CI), systems will trigger the build source and run test suites on each change or code checked in. If the build is passed at all the stages, it automatically deploys to multiple stages such as staging or production environments using a release pipeline. It is referred to as Continuous Delivery (CD). You can add multiple stages of software package validation.
In my previous articles, I explained about creating a build pipeline and release pipeline for Angular apps. The process of creating the build pipeline and release pipeline are nearly the same for all technologies but the tasks are different. In my last article, I explained how to create a release pipeline and host application on Azure App service. In this article, I will explain how to set up a CD pipeline for the Cloud Foundry application.
The Cloud Foundry is an open-source platform for cloud computing developed by VMWare but now it is owned by Pivotal Software. The Cloud Foundry allows you to deploy, scale, and maintain your application faster and secure and easier. It can be referred to as PaaS (Platform as a Service). Most of the cloud such as Azure, IBM, etc. support Cloud foundry applications. It provides a choice of underlying infrastructure including Kubernetes.
In this article, I will demonstrate how to deploy an application to Cloud Foundry using the Azure continuous delivery pipeline. I am taking an example of the IBM Cloud Foundry application.
Prerequisites
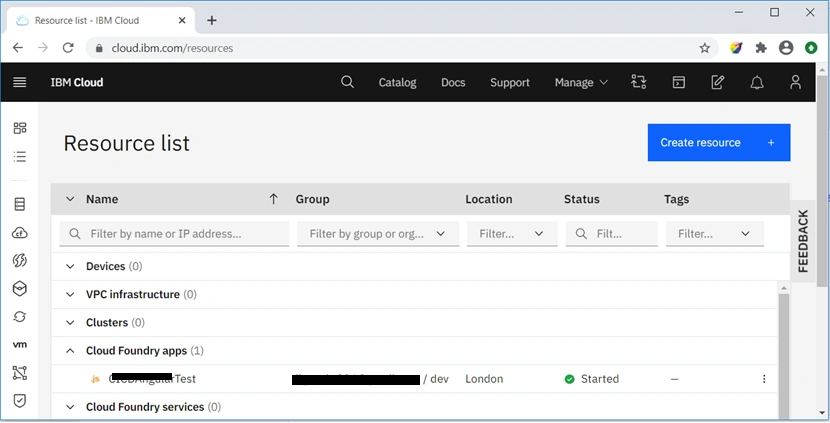
- You must set up the Cloud foundry app on the IBM cloud
- You must have an account for Azure DevOps account
- Repo and required branches must be set
- Build pipeline must be created (Refer to my previous article to create a build pipeline)
Installing Cloud Foundry Extension to Azure DevOps
The Cloud Foundry extension allows you to push our application build to any Cloud Foundry platform.
By default, Could the Foundry extension not be available on the Azure DevOps portal? It can be installed from the Azure DevOps marketplace. To install it, click on the "shopping bag" icon in the right corner of the portal and select “Browse marketplace”.
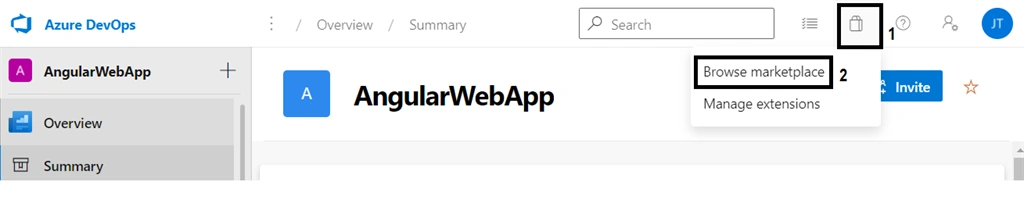
It redirects you to the market place where you can search and install the Cloud Foundry extension.
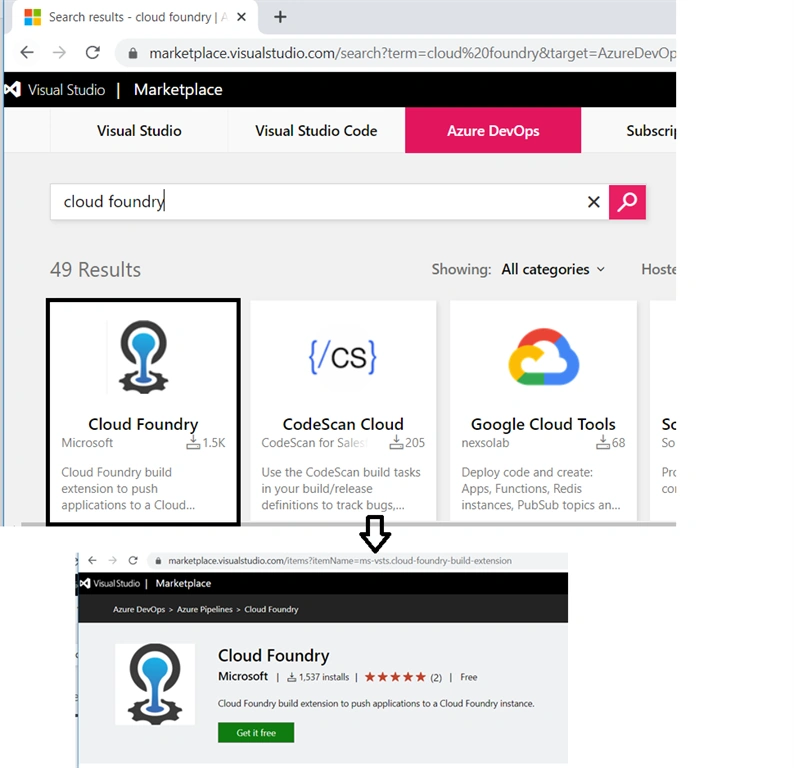
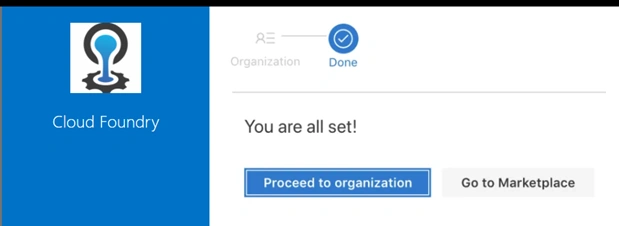
Click on “Get it free” to install the Cloud Foundry extension. When click this button it asks you to select the organization and click on download.
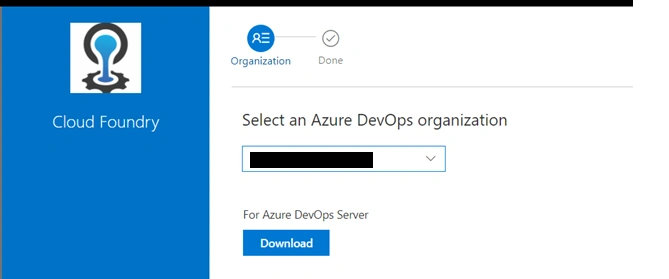
It downloads and installs the CF extension for the elected organization and then clicks on “Proceed to the organization”.
Configure Service Endpoint for Cloud Foundry extension
The service endpoint is a connection of external and remote services to exec tasks for for a remote deployment. To create a service endpoint, click on "Project settings" >> "Service connections" and click on "New service connection".
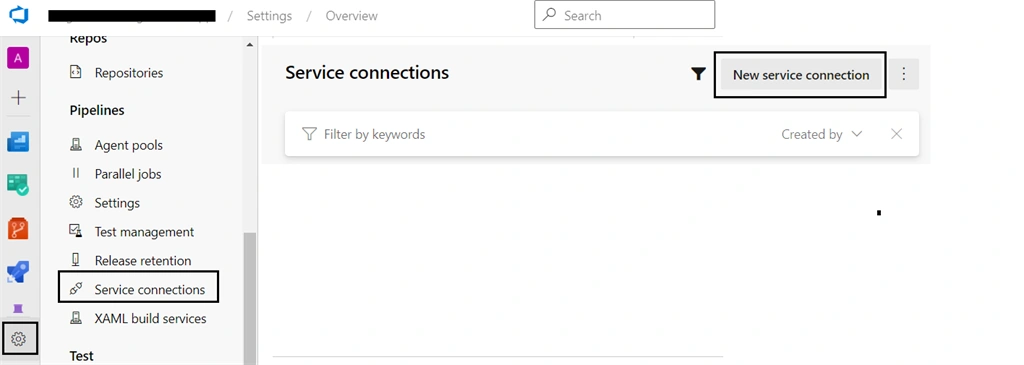
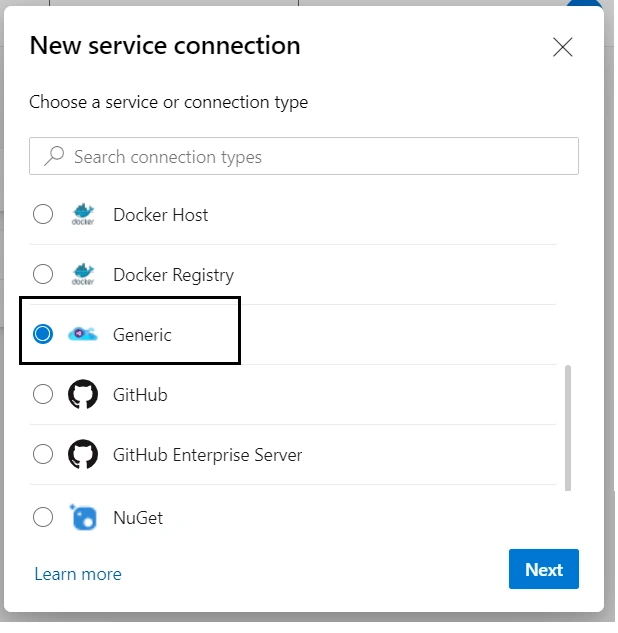
There are many built-in service connections available such as Azure cClassic Azure Service bus, docker host, etc. Select the "Generic" service connection and click on the Next button.
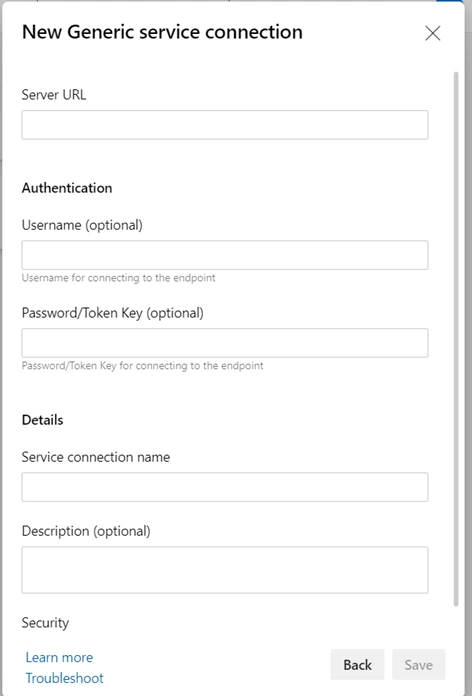
Now, you need to enter the following information related to your Cloud Foundry application
- Service URL: it is the endpoint where you want to push your application.
- Username / Password: optionally provide the user name/password to connect to emote service.
- Service Connection name: name of the connection.
- Description: optionally provide a service description.
Click on save to save the service configuration.
Create a release pipeline
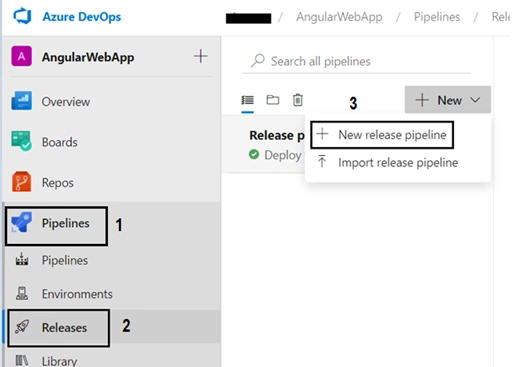
To create a new release pipeline, click on Pipelines >> Releases and select "New release pipeline".
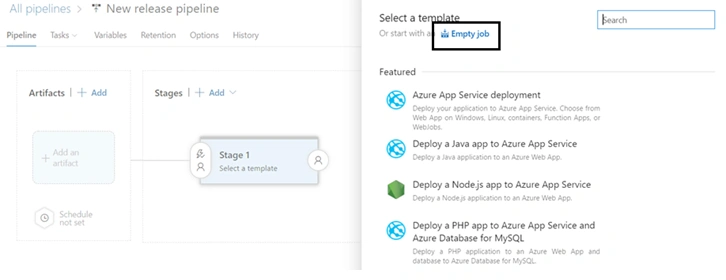
It redirects to a template screen where you can select the template. To customize the template, select "Empty job". Here, you can select artifacts and stages. The artifact is a deployable component of the application and it can be produced by your build pipeline (Continuous Integration). The release pipeline deploys your artifact to multiple stages (also refer as environments such as staging, production, etc.)
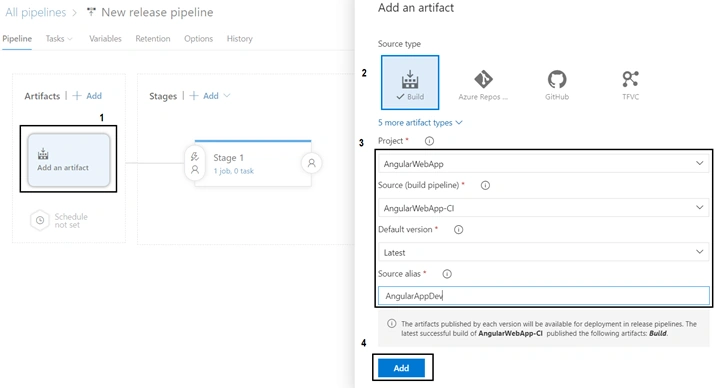
To add an artifact, click on “Add an artifact” and you need to provide the following information.
- Source type: it is a source of the artifact. There are multiple options for source types such as Build, Azure Repos, Github, eetc Here, I have selected the “Build” option.
- Project: The name of the project contains the artifacts.
- Source (build pipeline): Name of the build pipeline.
- Default version: default version that deploys on stages.
- Source alias: name of the identifier.
Click on the “Add” button to add an artifact.
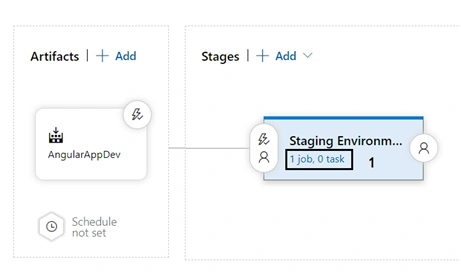
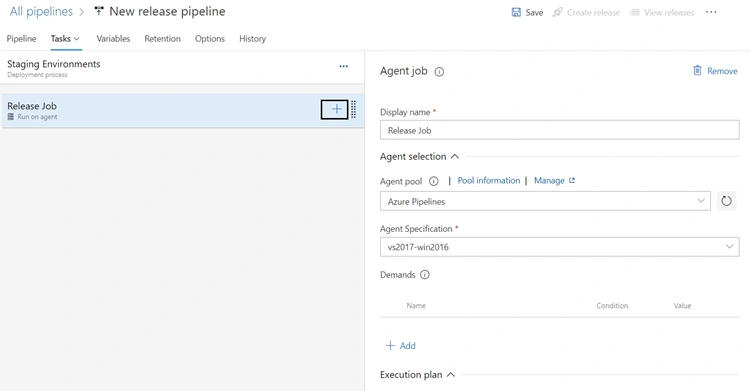
The next step is to add a job and task to the Stage. One job under the stage has been created by default. You can add multiple jobs and multiple tasks under the job. To edit the default job, click the job link under the stage.
The job is the logical group of tasks that define the run-time target oforwhich ta ask can be executed. When you select a job, you can find certain settings under the agent job section such as Display name, Agent pool, Agent specification, Demands, Execution plan, Artifact download, etc. The Agent specification contains the runtime environment on which the task can be executed.
You can add one or more tasks under the agent job. To add a task, click on “+” ointhe agent job section.
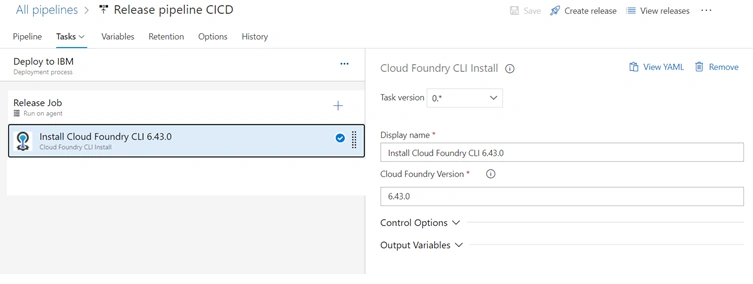
To run the Cloud Foundry commands such as “CF login”, “CF push” etc. Could Foundry CLI (Command-line interface) must ibeinstalledon the build machine so your task would be installed Cloud Foundry CLI? This task is a part of the Cloud Foundry extension.
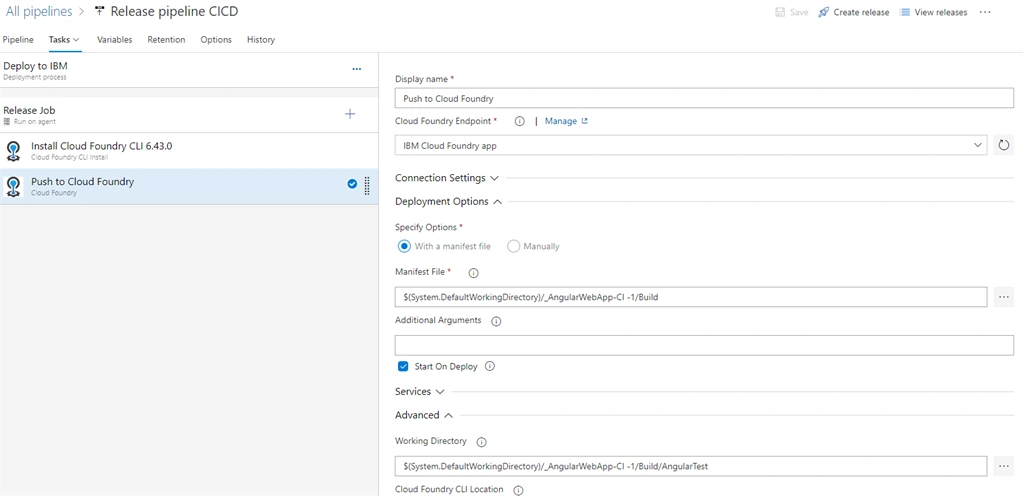
Next, the task is to configure “Push to Cloud Foundry”. In the “Push to Cloud Foundry” task, you need to configure the following settings.
- Display name: task name.
- Cloud Foundry Endpoint: Service endpoint that you have created for Cloud Foundry.
- MManifestFile: It is a path of the manifest file containing Cloud Foundry deployment options.
- Working Directory: Path for building directory.
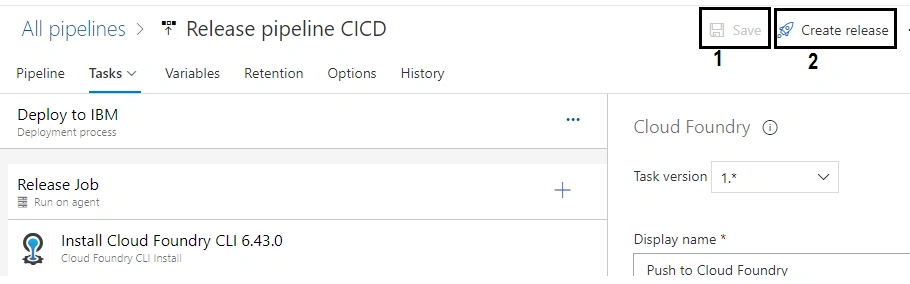
Now click on “Save” to save the stage information and settings. You can test your release pipeline on an old build. To run the release pipeline manually, click on the “Create release” button.
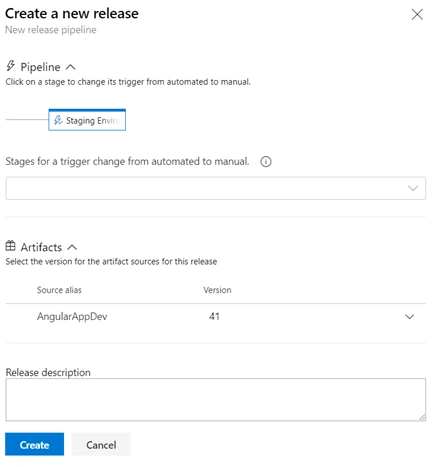
When you trigger the release pipeline manually, you have to define certain properties such as the artifact version, and then click on the “Create” button.
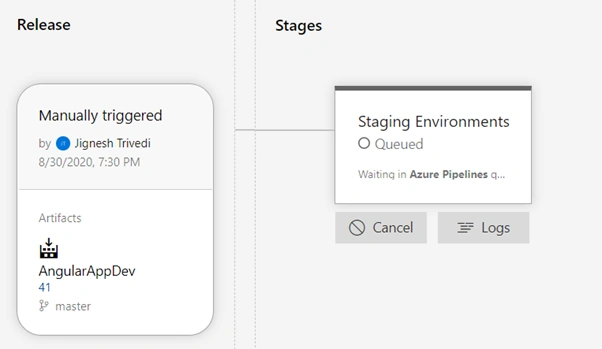
Once you create a release, you can see the current status on the stage.
You can also view the logs and status of each task of release. To view the log and status, click on “Logs”. This option is available on the hover of the stage. Here, you can see the default task and custom task with their status. The log is very important for diagnosis.
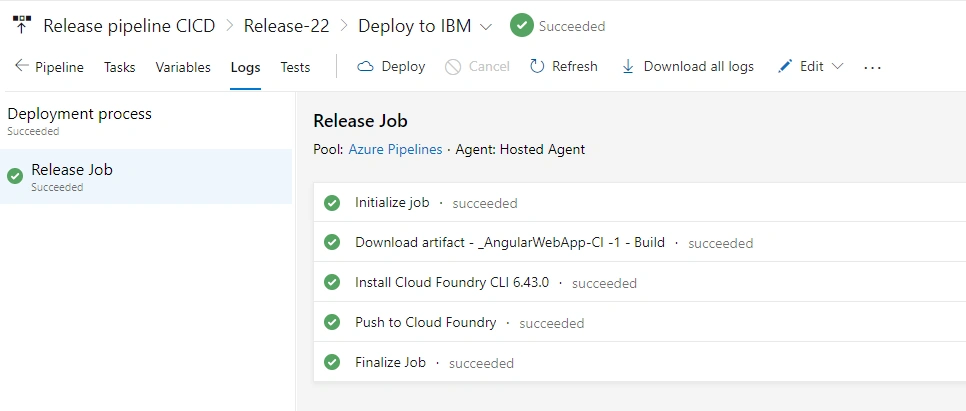
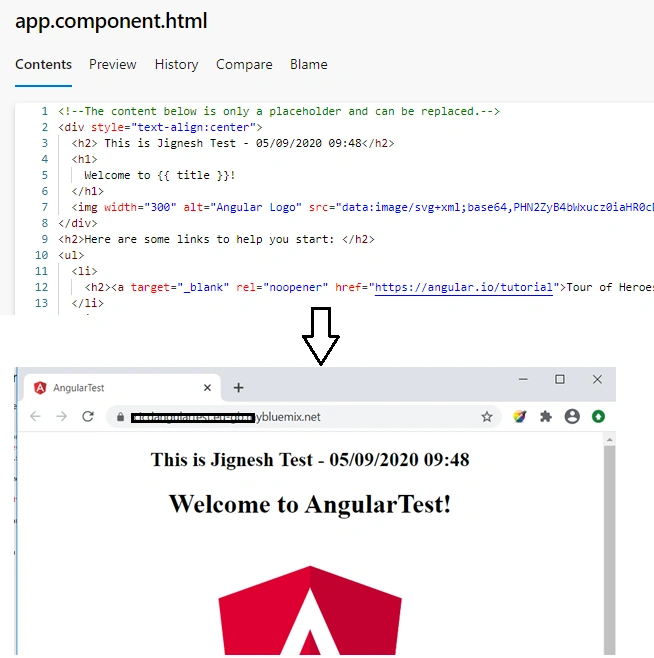
Once all tasks under the job have run successfully, your application is hosted on IBM Cloud Foundry.
Summary
In this article, you learned how to create a release pipeline using Azure DevOps and host your application to IBM Cloud Foundry. However, this process is nearly the same for all cloud that supports Cloud Foundry.
Join the conversation! Your thoughts help the community grow.