

Today I will talk about the flyout for the setting pane in the Windows Store Apps. Usually the user used the standard SettingFlyout to apply the setting in the application. The standard SettingFlyout is open from the right side window when the mouse is tapped in the right-bottom corner of the window. It also consists in the back button at the top.
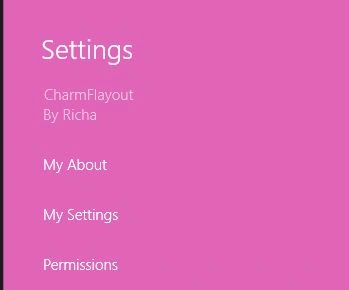
But, you can also also integrate an application setting UI with this standard SettingCharm to configure your own application. The developer can put their own setting options and are able to customize the settingcharm of Windows 8. Now, when the user opens the setting charm it will display a customized setting flyout for the application.
In this article I will show you how to add a Setting Charm Flyout to a Windows Store Application by using the ApplicationSettings API.
To create another Setting Charm Control you should use the followng.
Step 1
Create a blank application using C#.
Step 2
You need to add a CharmFlyout library in the application.
- Go to Solution Explorer.
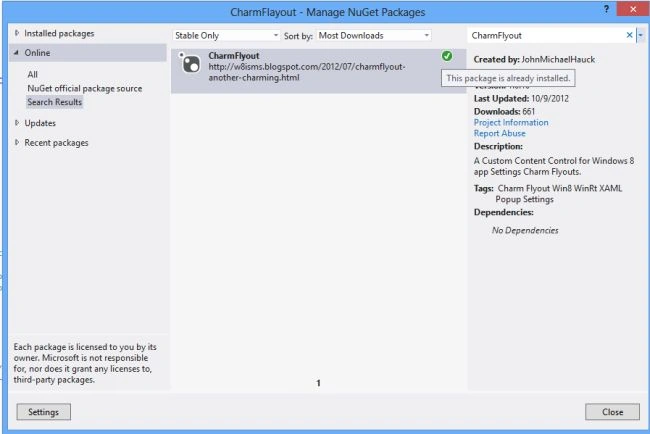
- Right-click on the References and select Manage NuGet Packages.
- Install the NuGet Package Manager if you have not already.
- Click Online. Search for CharmFlyout.
- Then, click Install.
Step 3
Add the namespace of the CharmFlyoutLibrary in the MainPage.XAML; see:
xmlns:cfo="using:CharmFlyoutLibrary"
Step 4
Now to add the CharmFlyout Control using XAML:
<Page
x:Class="CharmFlayout.MainPage"
xmlns="http://schemas.microsoft.com/winfx/2006/xaml/presentation"
xmlns:x="http://schemas.microsoft.com/winfx/2006/xaml"
xmlns:local="using:CharmFlayout"
xmlns:d="http://schemas.microsoft.com/expression/blend/2008"
xmlns:mc="http://schemas.openxmlformats.org/markup-compatibility/2006"
xmlns:cfo="using:CharmFlyoutLibrary"
mc:Ignorable="d">
<Grid Background="{StaticResource ApplicationPageBackgroundThemeBrush}">
<StackPanel>
<Button x:Name="asdf" Content="Show SettingFlyout" Click="asdf_Click_1"></Button>
</StackPanel>
<cfo:CharmFlyout x:Name="cfoAbout"
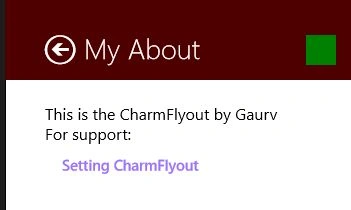
Heading="My About"
HeadingBackgroundBrush="#FF4E0000">
<StackPanel>
<ListView>
<ListViewItem>Select Theme</ListViewItem>
<ListViewItem>My Setting</ListViewItem>
</ListView>
</StackPanel>
<cfo:CharmFlyout.Logo>
<Rectangle
Fill="Green"
Width="30"
Height="30" />
</cfo:CharmFlyout.Logo>
</cfo:CharmFlyout>
<cfo:CharmFlyout
Varesh TuliPosted Oct 9, 2012, 11:41 PM
Nice article to understands Windows Store Apps using C#