

SharePoint components, like web parts, normally interact with the SharePoint assets like lists, libraries, content types, etc. In full trust solutions, we deploy these SharePoint assets along with a web part in a single deployable package (.wsp).
Similarly, SharePoint Framework (SPFx) client-side web parts do interact with the underlying lists and libraries in SharePoint site. These SharePoint assets need to be provisioned along with the client-side solution package. SharePoint framework toolchain allows us to package and deploy SharePoint assets with client-side solution packages.
In this article, we will explore how we can package together the SharePoint assets needed for SPFx web parts.
SharePoint Assets
SharePoint assets is a generic term referring to the basic building blocks of SharePoint that constitutes fields, content types, list instances.
Fields (Site Columns)
A field is a metadata that describes the property or attribute of the object we want to represent. For example, an Employee can be represented with ID, Name, Department, etc. Each field has a specific type such as text, number, Boolean, etc.
Below is an example of a field representing a number.
A field is a metadata that describes the property or attribute of the object we want to represent. For example, an Employee can be represented with ID, Name, Department, etc. Each field has a specific type such as text, number, Boolean, etc.
Below is an example of a field representing a number.
- <Field ID="{060E50AC-E9C1-4D3C-B1F9-DE0BCAC300F6}"
- Name="SPFxAmount"
- DisplayName="Amount"
- Type="Currency"
- Decimals="2"
- Min="0"
- Required="FALSE"
- Group="SPFx Columns" />
Content types
Content Type is a reusable collection of site columns. Below is an example of content type that uses site column.
Content Type is a reusable collection of site columns. Below is an example of content type that uses site column.
- <ContentType ID="0x010042D0C1C200A14B6887742B6344675C8B"
- Name="Cost Center"
- Group="SPFx Content Types"
- Description="Content types from SPFx">
- <FieldRefs>
- <FieldRef ID="{060E50AC-E9C1-4D3C-B1F9-DE0BCAC300F6}" />
- </FieldRefs>
- </ContentType>
List instance
List instance is pre-defined SharePoint list with a well-known identifier. We can add, update, and delete items from a list.
List instance is pre-defined SharePoint list with a well-known identifier. We can add, update, and delete items from a list.
- <ListInstance
- FeatureId="00bfea71-de22-43b2-a848-c05709900100"
- Title="SPFx List"
- Description="SPFx List"
- TemplateType="100"
- Url="Lists/SPFxList">
- </ListInstance>
List instance with custom schema
We can create our own schema to define fields, content types, and views for list instance. Use CustomSchema attribute in ListInstance element to reference the custom schema.
We can create our own schema to define fields, content types, and views for list instance. Use CustomSchema attribute in ListInstance element to reference the custom schema.
- <ListInstance
- CustomSchema="schema.xml"
- FeatureId="00bfea71-de22-43b2-a848-c05709900100"
- Title="SPFx List"
- Description="SPFx List"
- TemplateType="100"
- Url="Lists/SPFxList">
- </ListInstance>
Create SPFx Solution
Open the command prompt. Create a directory for SPFx solution.
 Custom Schema
Add schema.xml file as your custom schema.
Always specify unique GUID for feature ID.
Open the command prompt. Create a directory for SPFx solution.
- md spfx-provisionspassets
Navigate to the above-created directory.
- cd spfx-provisionspassets
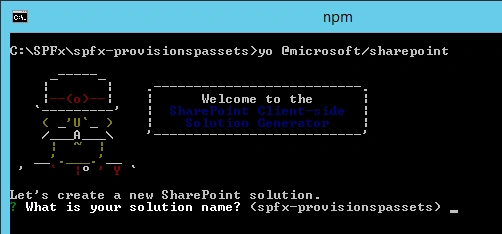
Run Yeoman SharePoint Generator to create the solution.
- yo @microsoft/sharepoint
Yeoman generator will present you with the wizard by asking questions about the solution to be created.
Solution Name
Hit Enter to have the default name (spfx-provisionspassets, in this case) or type in any other name for your solution.
Hit Enter to have the default name (spfx-provisionspassets, in this case) or type in any other name for your solution.
Selected choice - Hit enter
Target for component
Here, we can select the target environment where we are planning to deploy the client webpart, i.e., SharePoint Online or SharePoint OnPremise (SharePoint 2016 onwards).
Here, we can select the target environment where we are planning to deploy the client webpart, i.e., SharePoint Online or SharePoint OnPremise (SharePoint 2016 onwards).
Selected choice - SharePoint Online only (latest)
Place of files
We may choose to use the same folder or create a subfolder for our solution.
We may choose to use the same folder or create a subfolder for our solution.
Selected choice - the same folder
Deployment option
Selecting Y will allow the app to be deployed instantly to all sites and will be accessible everywhere.
Selecting Y will allow the app to be deployed instantly to all sites and will be accessible everywhere.
Selected choice - N (install on each site explicitly)
Type of client-side component to create
We can choose to create client side webpart or an extension. Choose the WebPart option.
We can choose to create client side webpart or an extension. Choose the WebPart option.
Selected choice - WebPart
Web part name
Hit Enter to select the default name or type in any other name.
Hit Enter to select the default name or type in any other name.
Selected choice - ProvisionSPAssets
Web Part description
Hit Enter to select the default description or type in any other value.
Hit Enter to select the default description or type in any other value.
Selected choice - Provision SharePoint Assets with SPFx
Framework to use
Select any JavaScript framework to develop the component. Available choices are (No JavaScript Framework, React, and Knockout)
Select any JavaScript framework to develop the component. Available choices are (No JavaScript Framework, React, and Knockout)
Selected choice - No JavaScript Framework
Yeoman generator will perform scaffolding process to generate the solution. The scaffolding process will take a significant amount of time.
Once the scaffolding process is completed, lock down the version of project dependencies by running the below command.
Once the scaffolding process is completed, lock down the version of project dependencies by running the below command.
- npm shrinkwrap
In the command prompt, type the below command to open the solution in code editor of your choice.
- code .
Add SharePoint Assets to Solution
Step 1
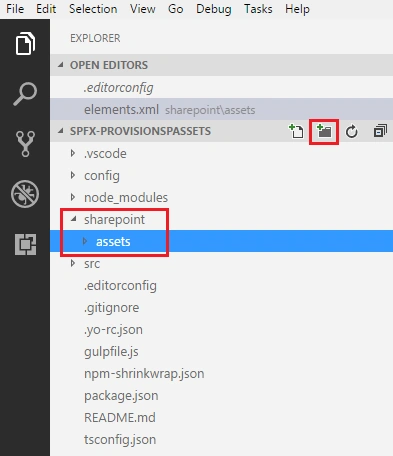
Create a folder hierarchy as sharepoint\assets.
 Step 2
Add a file elements.xml under sharepoint\assets folder.
Create a folder hierarchy as sharepoint\assets.
Add a file elements.xml under sharepoint\assets folder.
- <?xml version="1.0" encoding="utf-8"?>
- <Elements xmlns="http://schemas.microsoft.com/sharepoint/">
- <Field ID="{060E50AC-E9C1-4D3C-B1F9-DE0BCAC300F6}"
- Name="SPFxAmount"
- DisplayName="Amount"
- Type="Currency"
- Decimals="2"
- Min="0"
- Required="FALSE"
- Group="SPFx Columns" />
- <Field ID="{943E7530-5E2B-4C02-8259-CCD93A9ECB18}"
- Name="SPFxCostCenter"
- DisplayName="Cost Center"
- Type="Choice"
- Required="FALSE"
- Group="SPFx Columns">
- <CHOICES>
- <CHOICE>Administration</CHOICE>
- <CHOICE>Information</CHOICE>
- <CHOICE>Facilities</CHOICE>
- <CHOICE>Operations</CHOICE>
- <CHOICE>Sales</CHOICE>
- <CHOICE>Marketing</CHOICE>
- </CHOICES>
- </Field>
- <ContentType ID="0x010042D0C1C200A14B6887742B6344675C8B"
- Name="Cost Center"
- Group="SPFx Content Types"
- Description="Sample content types from web part solution">
- <FieldRefs>
- <FieldRef ID="{060E50AC-E9C1-4D3C-B1F9-DE0BCAC300F6}" />
- <FieldRef ID="{943E7530-5E2B-4C02-8259-CCD93A9ECB18}" />
- </FieldRefs>
- </ContentType>
- <ListInstance
- CustomSchema="schema.xml"
- FeatureId="00bfea71-de22-43b2-a848-c05709900100"
- Title="SPFx List"
- Description="SPFx List"
- TemplateType="100"
- Url="Lists/SPFxList">
- </ListInstance>
- </Elements>
We are provisioning 2 fields - content type and list instance, with custom schema. FeatureId in the ListInstance represents the ID of feature which contains list definition. The featureId mentioned in the XML represents the ID for custom list definition.
Add schema.xml file as your custom schema.
- <List xmlns:ows="Microsoft SharePoint" Title="Basic List" EnableContentTypes="TRUE" FolderCreation="FALSE" Direction="$Resources:Direction;" Url="Lists/Basic List" BaseType="0" xmlns="http://schemas.microsoft.com/sharepoint/">
- <MetaData>
- <ContentTypes>
- <ContentTypeRef ID="0x010042D0C1C200A14B6887742B6344675C8B" />
- </ContentTypes>
- <Fields></Fields>
- <Views>
- <View BaseViewID="1" Type="HTML" WebPartZoneID="Main" DisplayName="$Resources:core,objectiv_schema_mwsidcamlidC24;" DefaultView="TRUE" MobileView="TRUE" MobileDefaultView="TRUE" SetupPath="pages\viewpage.aspx" ImageUrl="/_layouts/images/generic.png" Url="AllItems.aspx">
- <XslLink Default="TRUE">main.xsl</XslLink>
- <JSLink>clienttemplates.js</JSLink>
- <RowLimit Paged="TRUE">30</RowLimit>
- <Toolbar Type="Standard" />
- <ViewFields>
- <FieldRef Name="LinkTitle"></FieldRef>
- <FieldRef Name="SPFxAmount"></FieldRef>
- <FieldRef Name="SPFxCostCenter"></FieldRef>
- </ViewFields>
- <Query>
- <OrderBy>
- <FieldRef Name="ID" />
- </OrderBy>
- </Query>
- </View>
- </Views>
- <Forms>
- <Form Type="DisplayForm" Url="DispForm.aspx" SetupPath="pages\form.aspx" WebPartZoneID="Main" />
- <Form Type="EditForm" Url="EditForm.aspx" SetupPath="pages\form.aspx" WebPartZoneID="Main" />
- <Form Type="NewForm" Url="NewForm.aspx" SetupPath="pages\form.aspx" WebPartZoneID="Main" />
- </Forms>
- </MetaData>
- </List>
Package Assets as part of Solution
We have created the assets and custom schema. We need to package these files as part of the solution.
Step 1
Open package-solution.json file under config folder.
Step 2
Include feature framework definition for solution package.
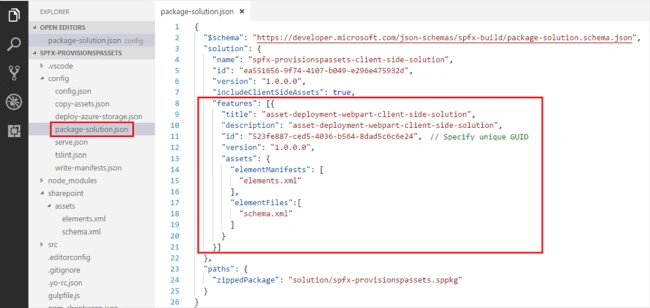
We have created the assets and custom schema. We need to package these files as part of the solution.
Step 1
Open package-solution.json file under config folder.
Step 2
Include feature framework definition for solution package.
- {
- "$schema": "https://developer.microsoft.com/json-schemas/spfx-build/package-solution.schema.json",
- "solution": {
- "name": "spfx-provisionspassets-client-side-solution",
- "id": "ea551656-9f74-4107-b049-e296e475932d",
- "version": "1.0.0.0",
- "includeClientSideAssets": true,
- "features": [{
- "title": "asset-deployment-webpart-client-side-solution",
- "description": "asset-deployment-webpart-client-side-solution",
- "id": "523fe887-ced5-4036-b564-8dad5c6c6e24", // Specify unique GUID
- "version": "1.0.0.0",
- "assets": {
- "elementManifests": [
- "elements.xml"
- ],
- "elementFiles":[
- "schema.xml"
- ]
- }
- }]
- },
- "paths": {
- "zippedPackage": "solution/spfx-provisionspassets.sppkg"
- }
- }
Deploy and Test
Step 1
Package your client-side solution by running the below command.
Package your client-side solution by running the below command.
- gulp bundle
Step 2
Create a solution package by running the below command.
Create a solution package by running the below command.
- gulp package-solution
This command will create package (.sppkg) inside sharepoint/solution folder.
Step 3
Deploy the package to the app catalog,
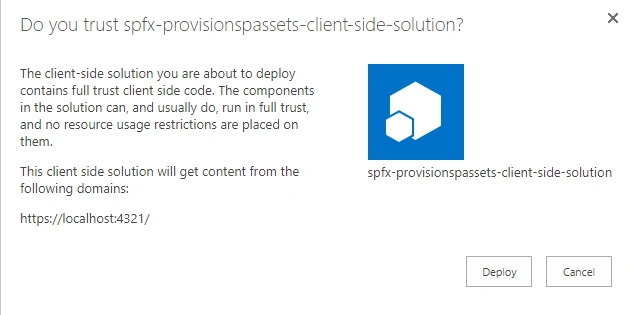
Deploy the package to the app catalog,
Step 4
Click Deploy.
Step 5
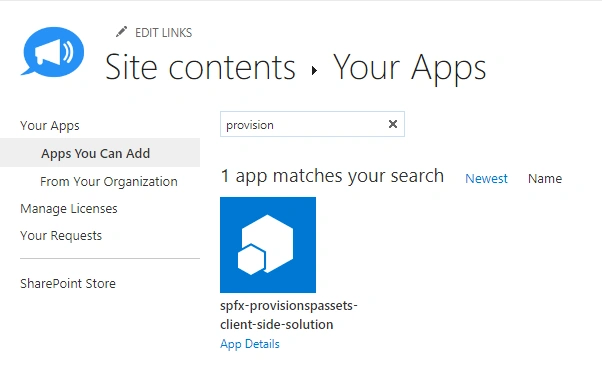
Open SharePoint site, click “Add an app”.
Step 6
Install the app.
 Step 7
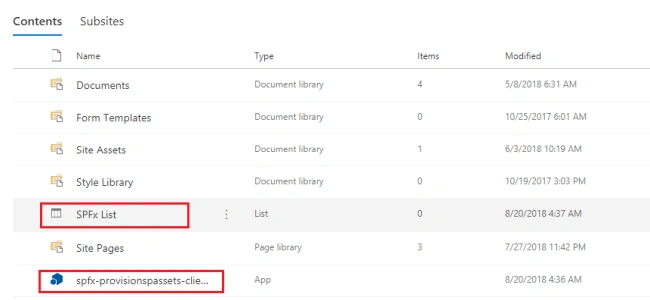
When installation finishes, refresh the page. The site should have “SPFx List” provisioned.
Click Deploy.
Step 5
Open SharePoint site, click “Add an app”.
Step 6
Install the app.
When installation finishes, refresh the page. The site should have “SPFx List” provisioned.
Step 8
Open “SPFx List”, it should have our content type with site columns inside it.
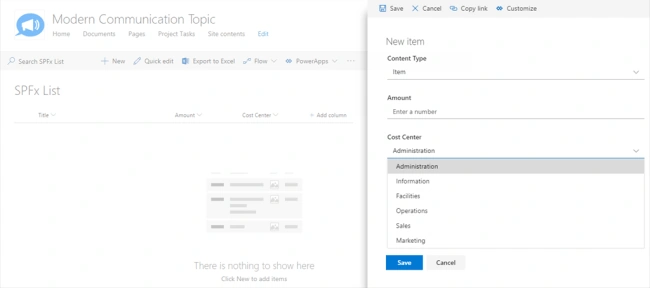
Open “SPFx List”, it should have our content type with site columns inside it.
Summary
SharePoint assets can be provisioned using SPFx. We can define the needed structure to provision on the SharePoint site, which can be utilized by SPFx web parts.
SharePoint assets can be provisioned using SPFx. We can define the needed structure to provision on the SharePoint site, which can be utilized by SPFx web parts.
DevanandPosted Nov 22, 2018, 1:35 PM
When adding webpart at site contents page am getting "Something went wrong pls try again" the reason behind is while adding date time into the elements.xml its trigerring the same error <Field ID="{1511BF28-A787-4061-B2E1-71F64CC93FD5}" Name="DateOpened" DisplayName="Date Opened" Type="DateTime" Format="DateOnly" Required="FALSE" Group="Financial Columns"> <Default>[today]</Default> </Field>