

Introduction
Xamarin is a platform to develop cross-platform and multi-platform apps (for example, Windows phone, Android and iOS). In Xamarin platform, the code sharing concept is used. In Xamarin Studio, Visual Studio is also available.
Xamarin is a platform to develop cross-platform and multi-platform apps (for example, Windows phone, Android and iOS). In Xamarin platform, the code sharing concept is used. In Xamarin Studio, Visual Studio is also available.
Prerequisites
- Xamarin Studio.
- Xcode.
The steps given below are required to be followed in order to create a SQLite database in Xamarin iOS, using Xamarin Studio.
Step 1
Go to Xamarin Studio.
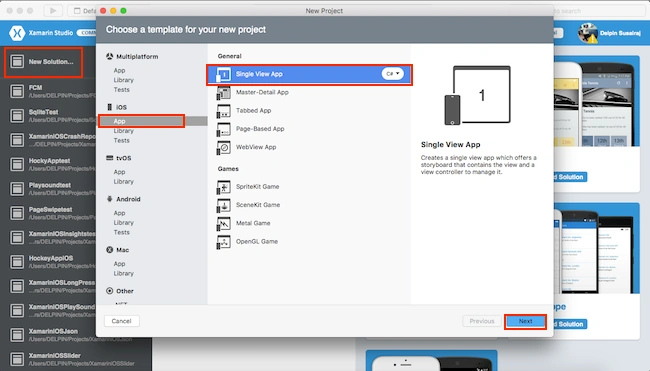
Click New Solution—> select iOS—>select App--> Choose single View App. Afterwards, click Next.
Step 2
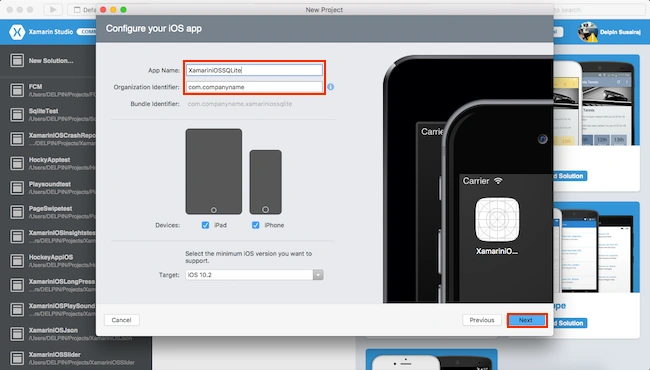
In this step, configure your app. Give the app name (Ex:sample), Organization Identifier. Afterwards, click Next.
Step 1
Go to Xamarin Studio.
Click New Solution—> select iOS—>select App--> Choose single View App. Afterwards, click Next.
Step 2
In this step, configure your app. Give the app name (Ex:sample), Organization Identifier. Afterwards, click Next.
Step 3
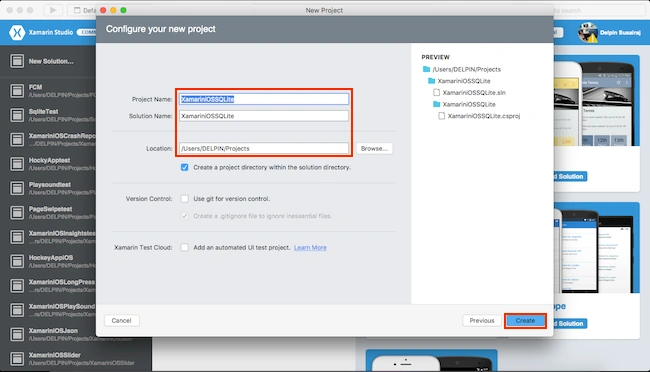
In this step, give your project name (Ex: Sample) and solution name (Ex: Sample). Give the path of your project. Afterwards, click Create.
Step 4
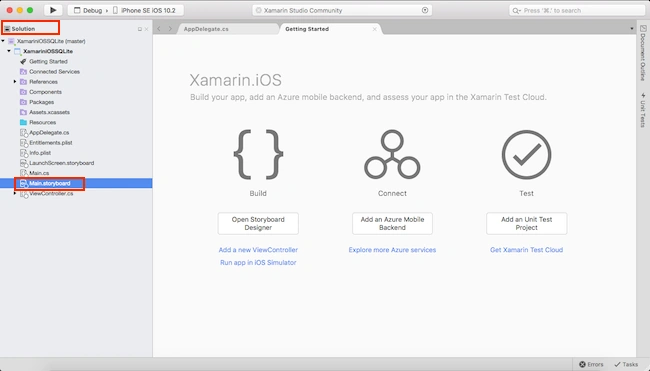
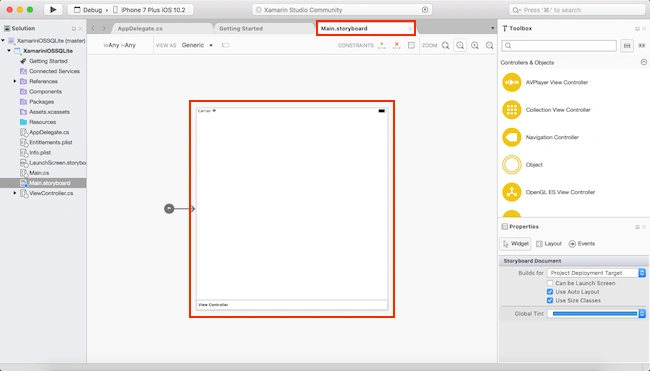
Subsequently, go to the solution. In the solution, get all the files and sources in your project. Now, select Main.storyboard and double click to open Main.storyboard page.
In this step, give your project name (Ex: Sample) and solution name (Ex: Sample). Give the path of your project. Afterwards, click Create.
Step 4
Subsequently, go to the solution. In the solution, get all the files and sources in your project. Now, select Main.storyboard and double click to open Main.storyboard page.
Step 5
After opening the Main.storyboard, you can design the page, as per your desire.
Step 6
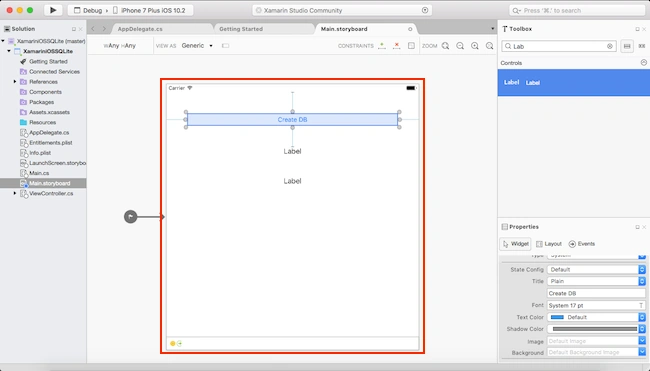
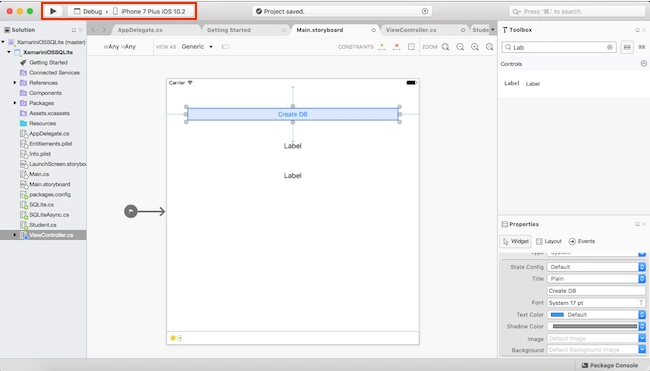
In this step, design your app, using storyboard and Toolbox.
Button(btnCreateDB)
Label(lblDbName)
Label(lblDbPath)
Step 7
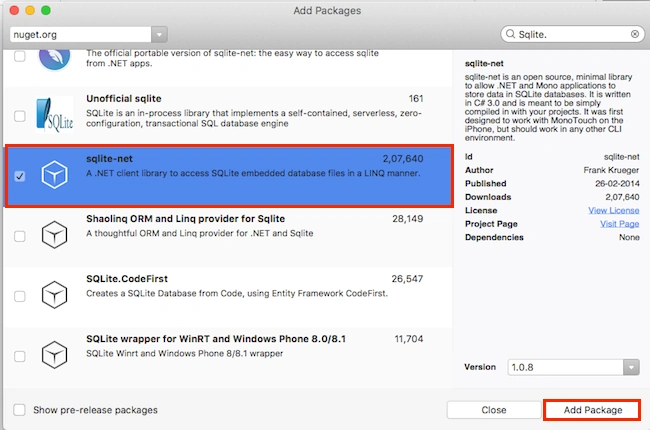
In this step, add one package in your project.
- sqlite.net
Go to Solution Explorer—>Package—>Add Package.
Now, choose Mobile sqlite.net crashes and select Version. Afterwards, click Add Package.
Now, choose Mobile sqlite.net crashes and select Version. Afterwards, click Add Package.
Step 8
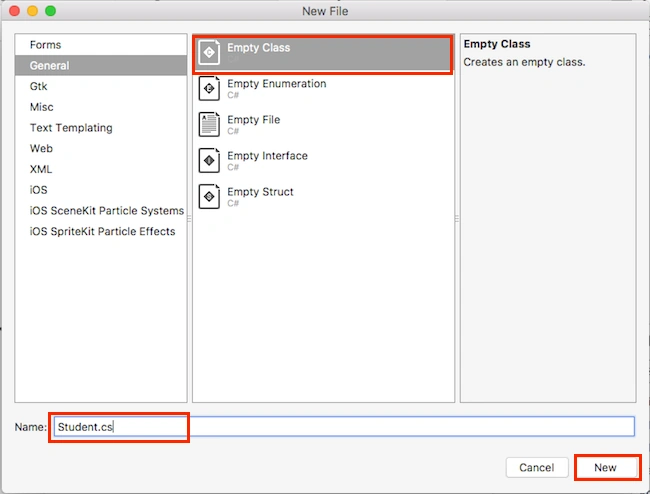
In this step, add one class file name called (Student.cs).
This class is called Student Table.
Step 9
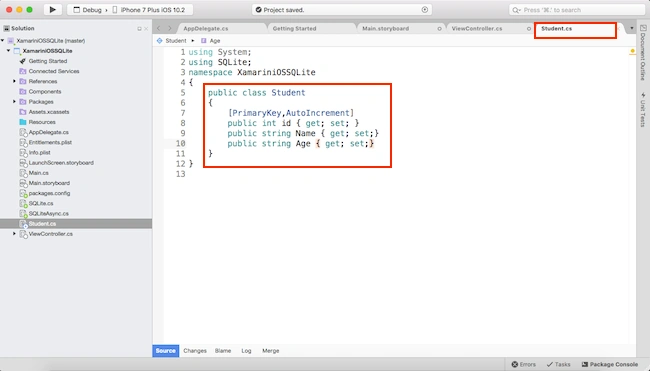
In this step, go to the Student.cs page. Write the code given below.
Student.cs
- using System;
- using SQLite;
- namespace XamariniOSSQLite {
- public class Student {
- [PrimaryKey, AutoIncrement]
- public int id {
- get;
- set;
- }
- public string Name {
- get;
- set;
- }
- public string Age {
- get;
- set;
- }
- }
- }


Mohamed ElqassasPosted May 25, 2017, 1:33 PM
Great, Thanks for sharing!