
Introduction
CyberSource is a payment gateway solution for businesses for online payment processing. In this article we will learn how to create an account on CyberSource.
Description
Step 1
Login using CyberSource Test account.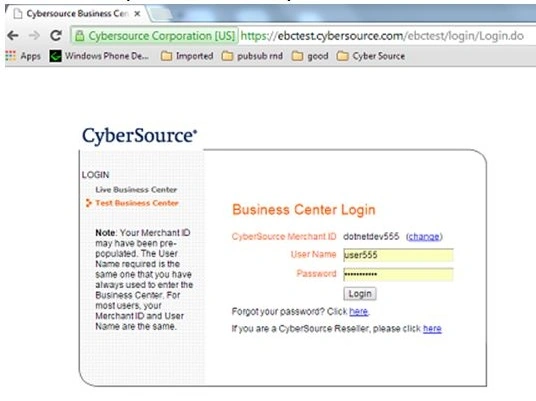
Step 2
After successful Login find the Secure Acceptance in Tools and Settings tab.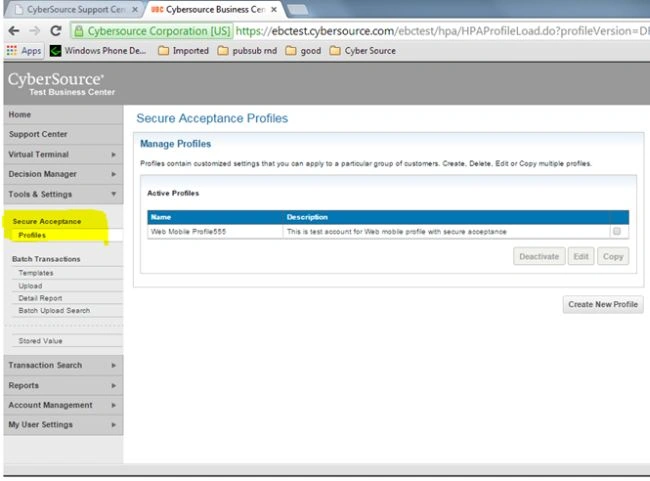
Step 3
Create a profile by clicking on the Create New Button.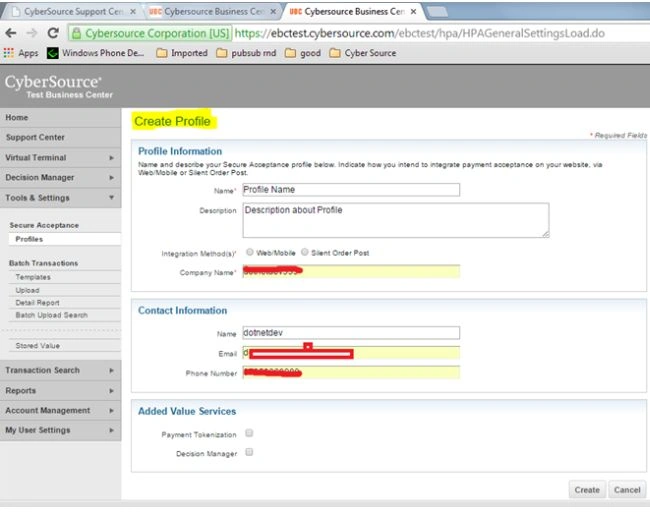
Step 4
Fill in all the required details and click the Save Button.
After successful creation of the profile the user can view all the configuration settings and then click on that profile.
Click General Settings to view the ProfileID and last inserted profile description.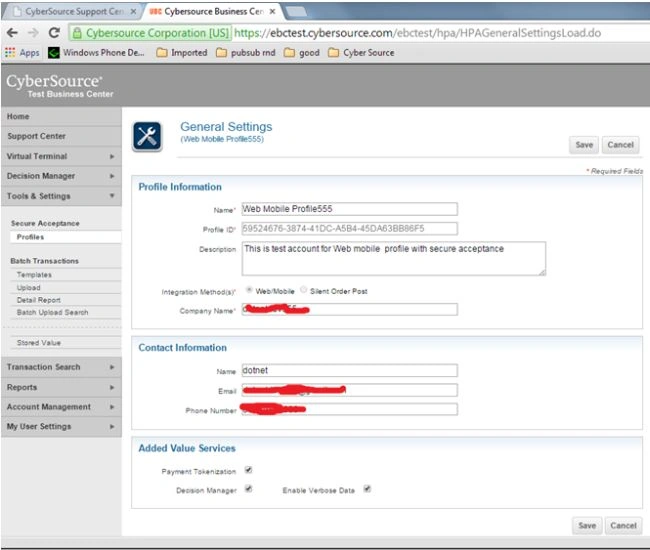
Step 5
Click Payment Setting of Profile for configuring the payment.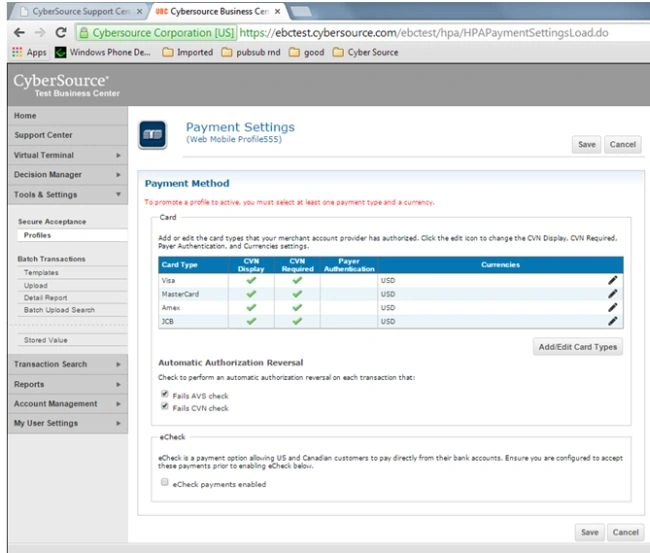
Step 6
Click Add/Edit Card type and then select all the card types supported in the transaction.
Step 7
For a selected card type select the supported currency and CVN related configuration and then save all these settings.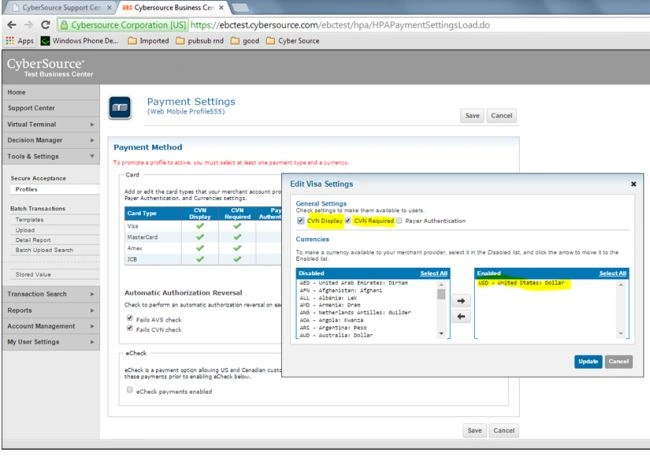
Step 8
After successfully saving Payment Setting, click the Security Tab and then click Create New Key, fill in the form and save.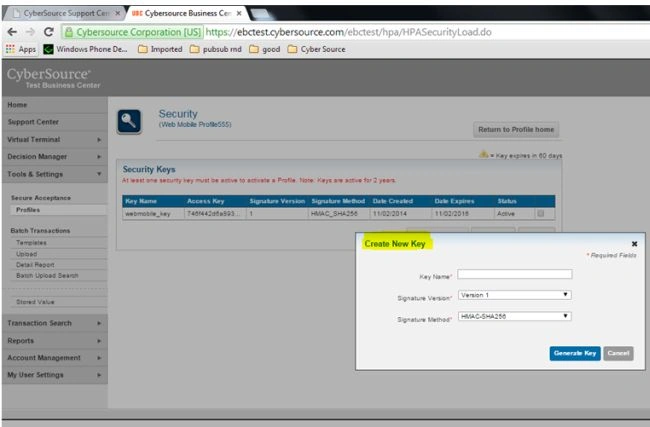
Step 9
Click the last saved key that shows Access key and Secret key that is used when configuring the Secure Acceptance API in Website.
Step 10
After saving the Security Settings, click the Payment Form and go through it.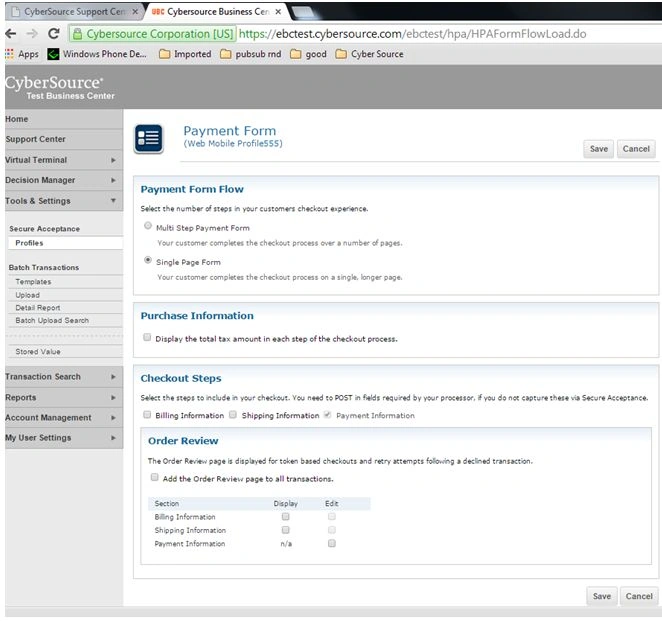
Step 11
After saving the payment form, click the Customer Response Pages and fill in the URL for the Transaction Response Page and Customer Redirect after checkout (after the Cancel User Redirection link) and then save this setting.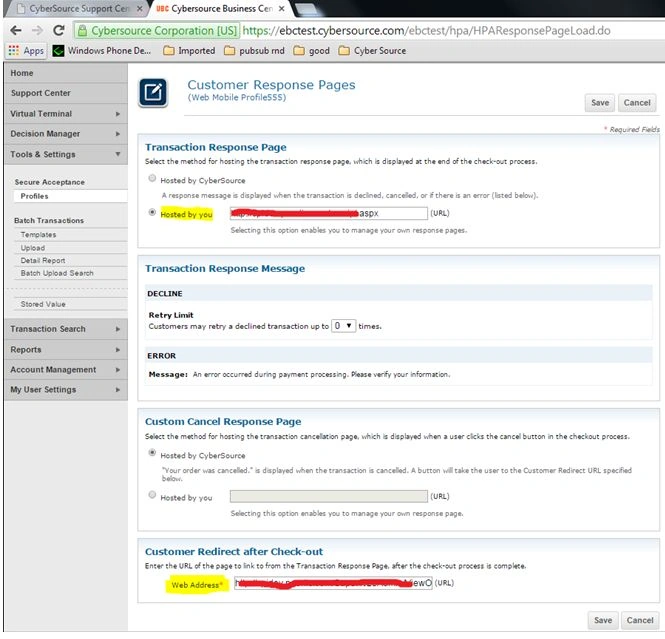
Step 12
After saving all the settings click the Promote to Active button and if any error occurs then fill in the required settings. After activating the profile we can use this profile info like ProfileID, Access Key, Secret key, and so on in the Projects' Web.Config file.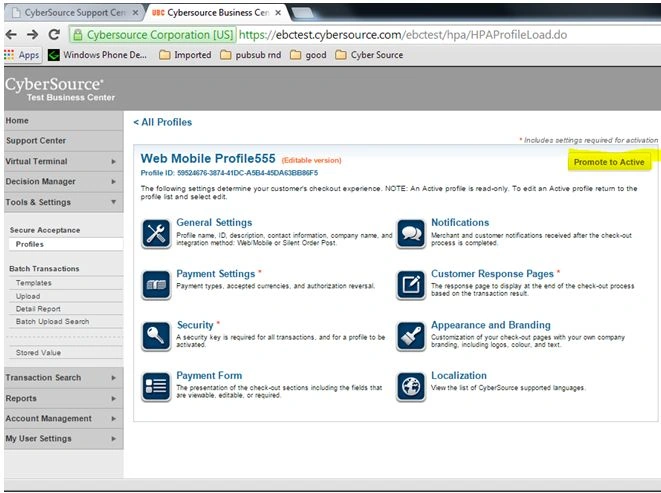
Step 13
After configuring this required parameter in the project, if you want to view all the transactions made using this account and/or profile id thne click Secure Acceptance Search on the Transaction Search tab and search based on Search Range and then click the Search Button.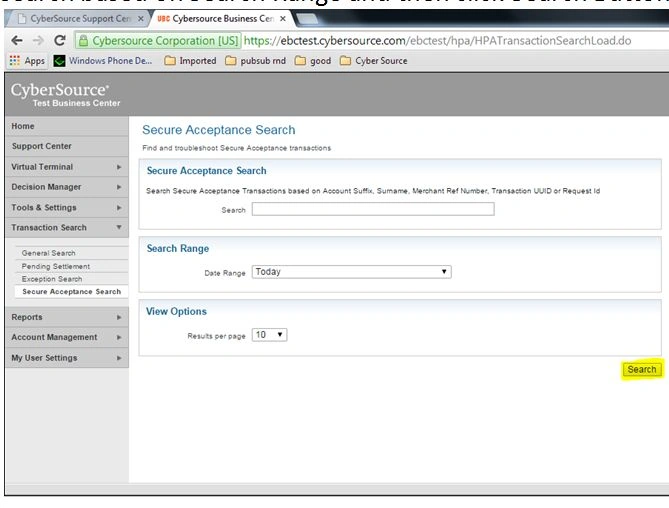
Step 14
After clicking on the Search button you can view the results based on the selected Search Range and debug or track successful as well as failed transactions with details. 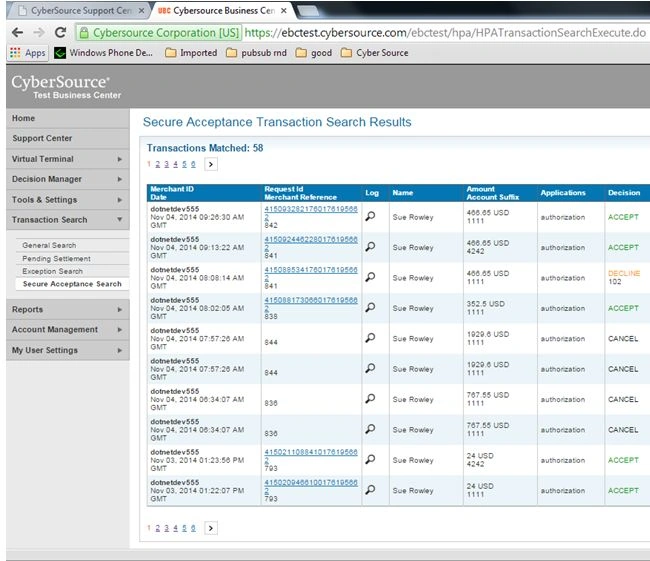
Conclusion
Previously we saw the Indian Payment gateway Payu Money. This article provided a step-by-step guide to another CyberSource Secure Acceptance Payment Gateway with snapshot for each step. I hope you enjoy.

Step-by-Step Guide For CyberSource Secure Acceptance
Join the conversation! Your thoughts help the community grow.
Sign in to leave a comment
It is the same account you read, post and publish with — and you will come straight back to this page.
Sajeesh KPPosted Mar 27, 2024, 1:22 PM
Hi, Any idea about custom paymnet page integration with cybersource payment gateway ? From a .net page we will send the transaction details to securesource paymnet gateway and the receipt need to get a receipt page in our application ... is it possible ?
Cam TranPosted Jan 4, 2019, 8:00 PM
Thanks for this guide. I would like automatic payment order with visa card through flex tokenize. Could you please for me that idea? I referenced https://developer.cybersource.com/api/reference/api-reference.html, but I didn't work.
Vanama DineshPosted Nov 22, 2017, 2:16 AM
Can you please provide the sample solution in MVC for redirecting to cybersource payment gateway and getting the response to customize [email protected]
Gopi ChandPosted Jul 1, 2015, 1:23 PM
Nice work
Sibeesh VenuPosted Jul 1, 2015, 6:46 AM
Good one.