

Introduction
There are many challenges we face for consuming a Web API because it contains various methods such as - GET, POST, PUT, DELETE. All these methods contain various types of parameters like model, string, int, etc. We don’t know what exact properties we need to pass in the model parameter and what are the relevant ones. These are the major challenges for a developer and so we need proper documentation to solve this problem. That’s why we choose Swagger, also known as OpenAPI. It provides all such benefits like interactive documentation, client SDK generation, and API discoverability. In this article, I am explaining a few basic configurations of Swagger in ASP.NET Core applications. We can add more additional features on the Web API using Swagger. For that, just read the reference document that I have mentioned in the Reference section.
Before reading this article, you must read the articles given below for ASP.NET Core knowledge.
We have tested the Swagger documentation application in the latest VS 2019. So, please check the following steps to kickstart the initial process of installation.
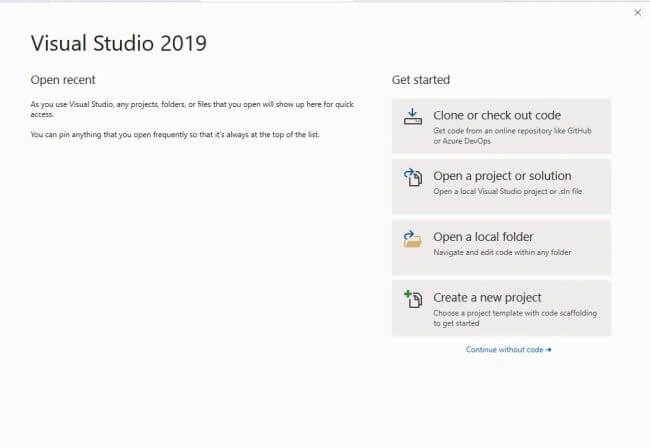
Open Visual Studio 2019 and click on "Create a new project".
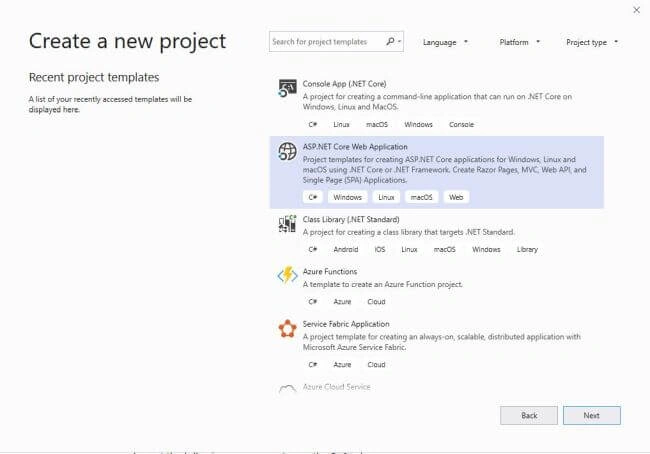
Click on ASP.NET Core Web Application.
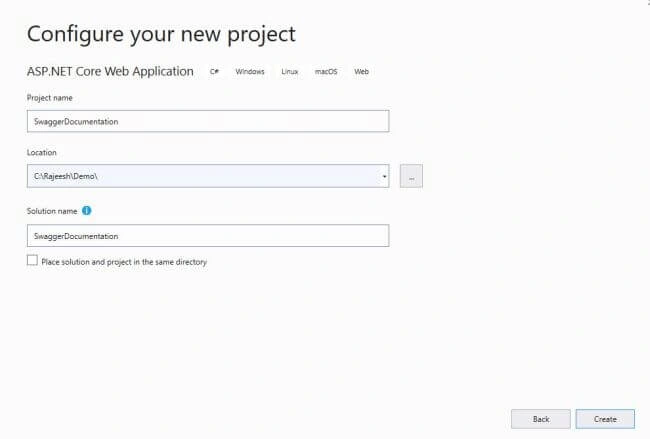
Provision your new project and give the appropriate name and the location to be saved.
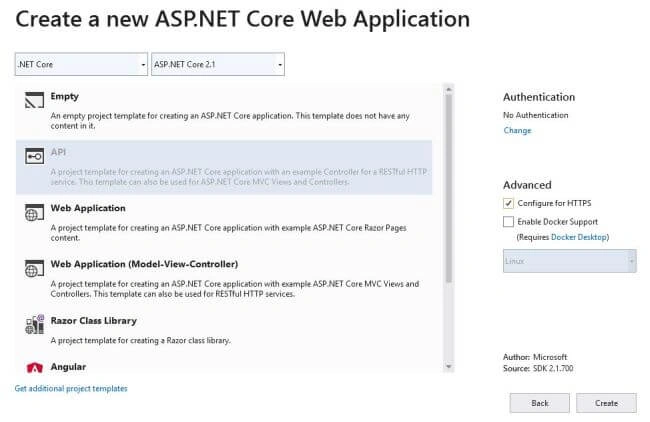
Choose API and click on the "Create" button on the right side.
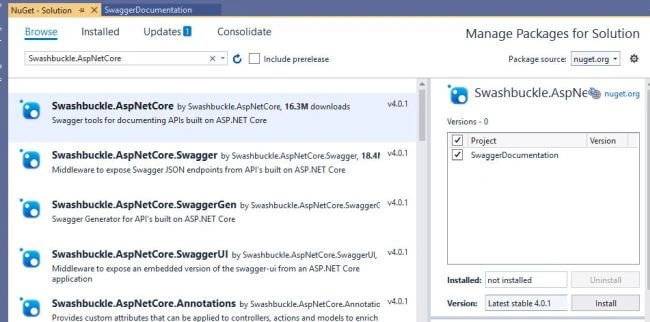
Open "Tools -> NuGet Package Manager -> Manage NuGet Packages for Solution…" and click the Browse tab. Search for "Swashbuckle.AspNetCore" in the search bar and install it.
Model
We are going to create an Employee model for demo purposes.
- namespace SwaggerDocumentation.Model
- {
- public class Employee
- {
- /// <summary>
- /// Employee id
- /// </summary>
- public int id { get; set; }
- /// <summary>
- /// Name of the employee.
- /// </summary>
- public string Name { get; set; }
- /// <summary>
- /// Employee personal address.
- /// </summary>
- public string Adress { get; set; }
- /// <summary>
- /// Department unit of the employee.
- /// </summary>
- public string Department { get; set; }
- }
- }
API Version Separation
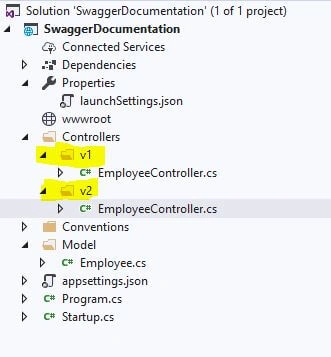
In future, if we are planning to release multiple versions of an API, then, for better readability we can create a version folder for the API creation. This will help us to differentiate multiple versions in the API side and Swagger documentation. In the following screenshot, we have created two folders - one is "v1" ( Version 1 ) and another one is "v2" ( Version 2 ). Obviously, v2 will contain the latest version comparing to v1.
API Controller
We have created "EmployeeController" as the API controller in our application. Here we can see at the route level the API path is set as "api/v1/[controller]" because when you hit Swagger it will first check the controller level then it will take two identical controller names as “Employee”. This will create an ambiguous issue in the HTTP request controller level, for that reason we have added two different request paths for both versions, v1 & v2.
- using System.Collections.Generic;
- using Microsoft.AspNetCore.Mvc;
- using SwaggerDocumentation.Model;
- namespace SwaggerDocumentation.Controllers.v1
- {
- [Route("api/v1/[controller]")]
- [ApiController]
- public class EmployeeController : ControllerBase
- {
- // GET: api/v1/Employee
- [HttpGet]
- public List<Employee> EmployeesDetails()
- {
- List<Employee> employees = new List<Employee>
- {
- new Employee
- {
- Name = "Rajeesh",
- Department = "Development",
- Adress = "Menoth Parambil"
- },
- new Employee
- {
- Name = "Arokia",
- Department = "R/D",
- Adress = "Trichy Central"
- },
- new Employee
- {
- Name = "Vijay",
- Department = "Cloud",
- Adress = "MP Gowliyar"
- },
- };
- return employees;
- }
- // GET: api/v1/Employee/5
- [HttpGet("{id}", Name = "Get")]
- public Employee EmployeeDetailsInformation(int id)
- {
- List<Employee> employees = new List<Employee>
- {
- new Employee
- {
- id = 1,
- Name = "Rajeesh",
- Department = "Development",
- Adress = "Menoth Parambil"
- },
- new Employee
- {
- id = 2,
- Name = "Arokia",
- Department = "R/D",
- Adress = "Trichy Central"
- },
- new Employee
- {
- id = 3,
- Name = "Vijay",
- Department = "Cloud",
- Adress = "MP Gowliyar"
- },
- };
- return employees.Find(x => x.id == id);
- }
- // POST: api/v1/Employee
- [HttpPost]
- [ApiExplorerSettings(GroupName = "v1")]
- public void Post([FromBody] string value)
- {
- }
- // PUT: api/v1/Employee/5
- [HttpPut("{id}")]
- public void Put(int id, [FromBody] string value)
- {
- }
- // DELETE: api/v1/ApiWithActions/5
- [HttpDelete("{id}")]
- public void Delete(int id)
- {
- }
- }
- }
IControllerModelConvention
In the ASP.NET Core MVC, we have application model and it will define convention abstractions that provide a simpler way to customize the behavior of the models without overriding the entire model. In a simpler way, we are modifying our app to follow different conventions from the default MVC behavior. The following method is clearly describing that it will take the last name of the "namespace" and it considers it as the group name of the API Version. So, in this case, we can easily separate out versions when we maintain multiple versions of APIs in the application. The "GroupName" can be declared as globally and locally, but in multiple API version cases, we can go with the global scenario.
- public class ApiExplorerVersionConvention : IControllerModelConvention
- {
- public void Apply(ControllerModel controller)
- {
- var controllerNamespace = controller.ControllerType.Namespace; // e.g. "Controllers.v1"
- var apiVersion = controllerNamespace.Split('.').Last().ToLower();
- controller.ApiExplorer.GroupName = apiVersion;
- }
- }
- // POST: api/v1/Employee
- [HttpPost]
- [ApiExplorerSettings(GroupName = "v1")]
- public void Post([FromBody] string value)
- {
- }
Middleware
We need to inject swagger service in the ASP.NET Core application using the middleware in startup class. Then only can we access the entire swagger service in our application.
ConfigureServices ( Inside the Startup.cs )
ConfigureServices method gets called by the runtime so we can use this method to register the services to the container in the application. First of all, we need to add "ApiExplorerVersionConvention" convention in the MVC service like the following way.
- services.AddMvc(x => x.Conventions.Add(new ApiExplorerVersionConvention()));
Configure ( Inside the Startup.cs )
Configure method gets called by the runtime and we use this method to configure the HTTP request pipeline. We are going to enable the generated Swagger as a JSON endpoint in the middleware and it will serve to the request.
- app.UseSwagger();
- app.UseSwaggerUI(c =>
- {
- c.SwaggerEndpoint("/swagger/v1/swagger.json", "My API V1");
- c.SwaggerEndpoint("/swagger/v2/swagger.json", "My API V2");
- });
launchSettings.json
In launchSettings.json we can setup swagger as the launch URL. This is not mandatory to give because for the demo we have given the launch URL as swagger. Otherwise, in middleware, we have SwaggerEndpoint "/swagger/v1/swagger.json" so you can enter in the browser like "http://localhost:44392/api/swagger".
- {
- "$schema": "http://json.schemastore.org/launchsettings.json",
- "iisSettings": {
- "windowsAuthentication": false,
- "anonymousAuthentication": true,
- "iisExpress": {
- "applicationUrl": "http://localhost:62460",
- "sslPort": 44392
- }
- },
- "profiles": {
- "IIS Express": {
- "commandName": "IISExpress",
- "launchBrowser": true,
- "launchUrl": "swagger",
- "environmentVariables": {
- "ASPNETCORE_ENVIRONMENT": "Development"
- }
- },
- "SwaggerDocumentation": {
- "commandName": "Project",
- "launchBrowser": true,
- "launchUrl": "api/values",
- "applicationUrl": "https://localhost:5001;http://localhost:5000",
- "environmentVariables": {
- "ASPNETCORE_ENVIRONMENT": "Development"
- }
- }
- }
- }
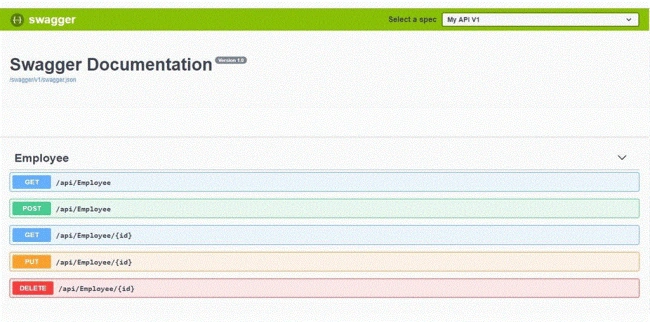
Output
Reference
Summary
From this article, we have learned the Web API documentation using Swagger & ASP.NET Core With Visual Studio 2019. I hope this article is useful for all the ASP.NET Web API beginners.
James ParkerPosted Sep 15, 2019, 2:04 PM
I had to add the following code in Sartup.cs --> ConfigureServices to get this to work: services.AddSwaggerGen(c => { c.SwaggerDoc("v1", new Info { Title = "NetChex API", Version = "v1" }); c.SwaggerDoc("v2", new Info { Title = "NetChex API", Version = "v2" }); }); In addition, the Swagger url that works for me is: https://localhost:44372/swagger/ (not https://localhost:44372/api/swagger/) Please advise
Denis OsipenkoPosted Jun 29, 2019, 11:50 AM
Thank you so much!
Jignesh KumarPosted Jun 26, 2019, 8:51 PM
It's informative, thanks for sharing
Amit MohantyPosted Jun 26, 2019, 2:15 AM
Nice article !!!