

Create a new ASP.Net MVC 3 application with an empty web application. While creating the project check the radio button "UnitTest".
Step 2:
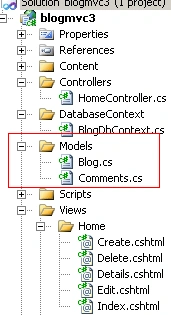
Now under the "Model" folder create two classes.
- Blog
- Comments
Step 3:
Now In the Blog Class Copy the following code:
public class Blog
{
[Key]
public int BlogId { get; set; }
[Required(ErrorMessage = "BlogName is required")]
public string BlogName { get; set; }
[Required(ErrorMessage = "Description is required")]
[StringLength(120, ErrorMessage = "Description Name Not exceed more than 120 words")]
public string Description { get; set; }
public string Body { get; set; }
public virtual List<Comments > Comments_List { get; set; }
}
See here is the validation of each property. And also hold the list of comments. That means 1 blog contains many posts. So that is a one to many relationship.
The "Virtual" keywords means it will make the relationship.
Step 4:
Now in the Comments class write the following code:
public class Comments
{
[Key ]
public int CommentId { get; set; }
public string Comment { get; set; }
//[ForeignKey]
public int BlogId { get; set; }
public virtual Blog Blog { get; set; }
}
See here we also have the object reference of the "blog" class. Before that I have used the virtual key word.
Step 5:
Now it's time to make the entity class by which the database and the table will create.
Create a "DatabaseContext" folder under the project. After that create a class named "BlogDbContext.cs" under the folder. This class is an entity class.
Step 6:
Now make a reference for the Entity Framework by clicking "Add Reference" under the project.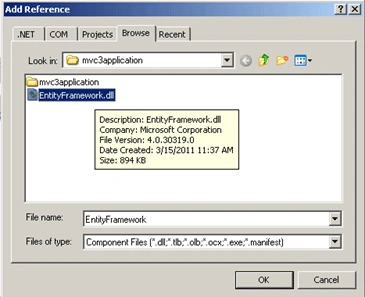
In my project I had already provided the dll. Without this dll the table cannot be created in the database by object class mapping.
Now paste the following code into the "BlogDbContext" class:
using System;
using System.Collections.Generic;
using System.Linq;
using System.Web;
using System.Data.Entity;
using blogmvc3.Models;
namespace blogmvc3.DatabaseContext
{
public class BlogDbContext:DbContext
{
public DbSet<Blog> Blog { get; set; }
public DbSet<Comments> Comments { get; set; }
}
}
See here in the Dbset we are passing a blog class and a comments class. The Dbset will create a table automatically with a relation in the database.
The Namespace "System.Data.Entity" is very important for that.
Step 7:
Now we have to configure the "web.config" file for the connection string. The web.config file is under the Main Solution Project. Not the Project web.config file.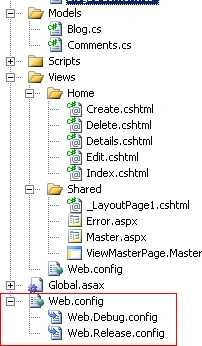
Now paste the following connection string into the web.config file.
<connectionStrings>
<add name="BlogDBContext" connectionString="data source=.;Database=Blogdb;Trusted_Connection=true;" providerName="System.Data.SqlClient" />
</connectionStrings>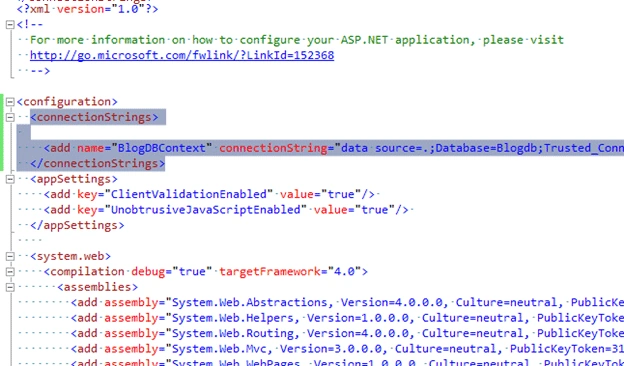
Step 8:
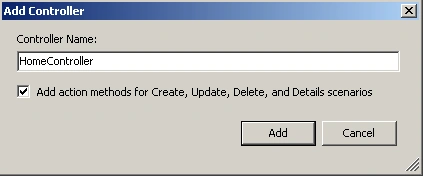
Now create a Controller Class named "HomeController" under the "ControllerFolder. After that check the
"Add action for create.update,delete.." so it will automatically create the action mrthod in the Controller class.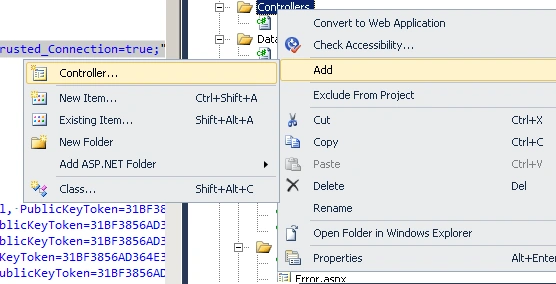
Step 9:
Now in the "HomeController" Class first create an object of the "BlogDbContext" Class .
BlogDbContext _db = new BlogDbContext();
After that in the Index Method write the following code:
public ActionResult Index()
{
return View(_db.Comments .ToList ());
}
Step 10:
Now create a master page in the Razor engine under the "shared" folder. Give it the name "_LayoutPage1.cshtml". 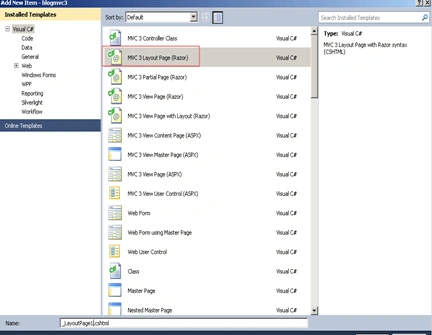
After that paste the following code there:
<!DOCTYPE html>
VicPosted Mar 22, 2013, 5:40 AM
Hi i am new to this webgrid. I had created a webgrid and everything works fine. If I want to apply scrolling properties to that webgrid than how to do that keeping the header in fixed position on the top?? Thanks
Patel ChiragPosted Jun 12, 2012, 5:28 PM
<div id="logindisplay"> @*@Html.Partial("_LogOnPartial")*@ </div> What is code does, specially i bit confuse for @*@Html.Partial("_LogOnPartial")*@ whether is it comment or what? I really appreciate if you give me quick help. Thanks, Chirag