

Introduction
I am creating an article series about the use of Stored Procedures with the Entity Framework 6. In the first part, we saw how to create the Stored Procedure and how to map that Stored Procedure with the entity data model. In the second part, we have created a web application and done the CRUD operations using the Entity Framework with a Stored Procedure.
You can check out the previous articles of this series with the following links:
- Working with Stored Procedures using Entity Framework Part 1
- Working with Stored Procedures using Entity Framework Part 2
In this part, we will move further and deal with the details of the data and do some operations in it. So, let's begin with the following sections:
- Applying Membership Functionality
- Working with Application
- Running the Application
Applying Membership Functionality
In this section, we will implement the login functionality in the application. To do this use the following procedure:
Step 1
In the Solution Explorer, select the project and add a new folder, Account.
Step 2
Add a web form to the folder and paste the following code in the form:
- <div class="navbar navbar-inverse navbar-fixed-top">
- <div class="container">
- <div class="navbar-header">
- <button type="button" class="navbar-toggle" data-toggle="collapse" data-target=".navbar-collapse">
- <span class="icon-bar"></span>
- <span class="icon-bar"></span>
- <span class="icon-bar"></span>
- </button>
- <p class="navbar-brand" runat="server">College Lead Tracker</p>
- </div>
- </div>
- </div>
- <div class="col-md-4">
- </div>
- <div class="mind">
- </div>
- <div class="container body-content">
- <div class="row">
- <div class="log col-md-12">
- <section id="loginForm" class="col-md-4 ">
- <div class="form-horizontal">
- <hr />
- <div class="form-group">
- <div class="col-md-10">
- <asp:TextBox runat="server" ID="UserID" CssClass="form-control" placeholder="User Name" />
- <asp:RequiredFieldValidator runat="server" ControlToValidate="UserID"
- CssClass="text-danger" ErrorMessage="The UserID field is required." />
- </div>
- </div>
- <div class="form-group">
- <div class="col-md-10">
- <asp:TextBox runat="server" ID="Password" TextMode="Password" CssClass="form-control" placeholder="Password" />
- <asp:RequiredFieldValidator runat="server" ControlToValidate="Password" CssClass="text-danger" ErrorMessage="The password field is required." />
- </div>
- </div>
- <div class="form-group">
- <div class="col-md-offset-2 col-md-10">
- <asp:Button runat="server" Text="Log in" ID="Login" OnClick="Login_Click" CssClass="btn btn-info" />
- </div>
- </div>
- </div>
- <p class="text-danger">
- <asp:Literal runat="server" ID="FailureText" />
- </p>
- </section>
- </div>
- </div>
- <hr />
- <footer>
- <p>© <%: DateTime.Now.Year %> - College Details App</p>
- </footer>
- </div>
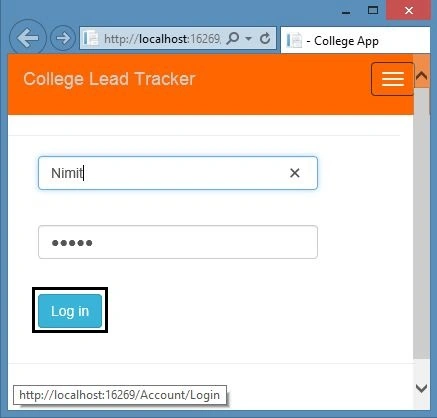
After using the code the page will look such as the following:

Step 3
In the code behind replace the code with the following code:
- using CollegeDataLibrary;
- using System;
- namespace CollegeDetailsApplication.Account
- {
- public partial class WebForm1 : System.Web.UI.Page
- {
- CollegeDataOperations obj = new CollegeDataOperations();
- protected void Page_Load(object sender, EventArgs e)
- {
- }
- protected void Login_Click(object sender, EventArgs e)
- {
- Check_LoginDetails();
- Reset();
- }
- //This method is used to check the login details
- void Check_LoginDetails()
- {
- try
- {
- string UserName = UserID.Text;
- string UserPassword = Password.Text;
- bool Result = obj.GetLoginDetails(UserName, UserPassword);
- if (Result == true)
- {
- Session["UserName"] = UserName;
- Response.Redirect("~/College/CollegeDetails.aspx");
- }
- else
- {
- FailureText.Text = "Invalid User Name or Password!!";
- }
- }
- catch (Exception ex)
- {
- FailureText.Text = ex.Message;
- }
- }
- void Reset()
- {
- UserID.Text = "";
- Password.Text = "";
- }
- }
- }
Step 4
You can also implement the registration functionality here.
Working with Application
So far we have done the CRUD operations in the previous part of this article series. In this section, we will do the next operation in which we can check out the details of the data stored in the database and do some further operations with the existing data.
Let's begin with the following procedure.
Step 1
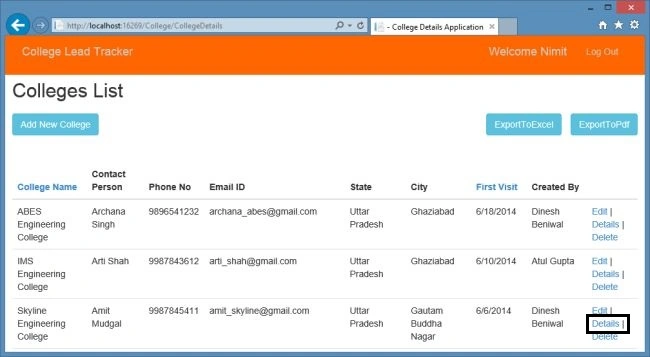
As you can see in the following screenshot, we have the ListView of the existing data. Now, for checking the details we can click on the Details link.
Step 2
Now add a new web form with the master page named ManageCollegeDetails in the College folder.

Step 3
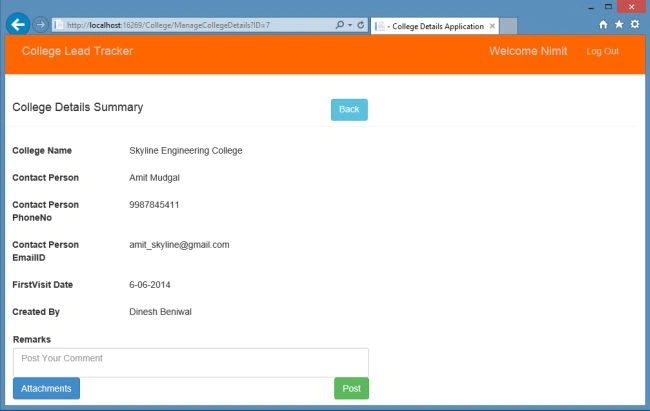
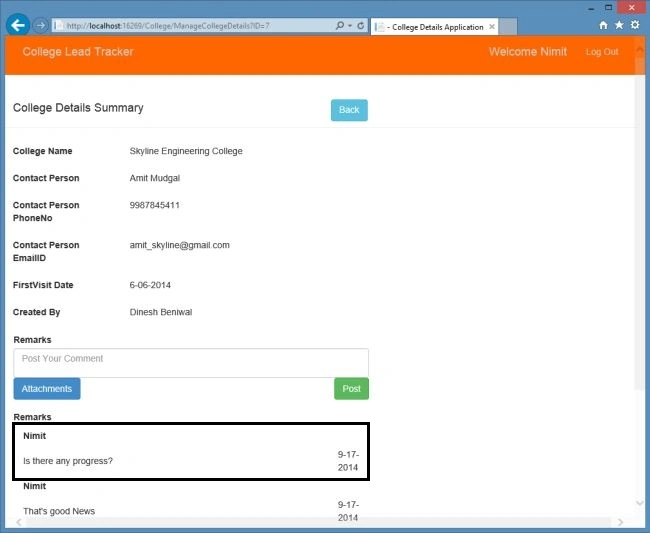
Design the web form with the following code:

Gowtham RajamanickamPosted May 28, 2015, 10:44 AM
this is great..