

Introduction to CKEditor-Part 2
Before reading this post, please read CKEditor-introduction.
Here, we will learn how to add a CSS style sheets, JavaScript, and plugin to CKEditor. CKEditor runs inside Iframe. Thus, the site (parent page) styles don’t work inside CKEditor.
Insert CSS
The CSS files to be used need to apply a style to editor content. It should reflect CSS used in the target pages, where the content is to be displayed.
For single CSS file
- <textarea name="myckeditor "></textarea>
- <script type="text/javascript">
- CKEDITOR.replace('myckeditor');
- CKEDITOR.config.contentsCss = '/Content/bootstrap-3.3.7-dist/css/bootstrap-theme.css';
- </script>
For multi CSS file
The contentsCss accepts a string or an array of strings. Thus, we can add more than 1 CSS files.
CKEDITOR.config.contentsCss = ['/Content/bootstrap-3.3.7-dist/css/bootstrap-theme.css', '/Content/app.css'];
How to do it?
After adding Bootstrap, we are able to get all CSS styles of Bootstrap.
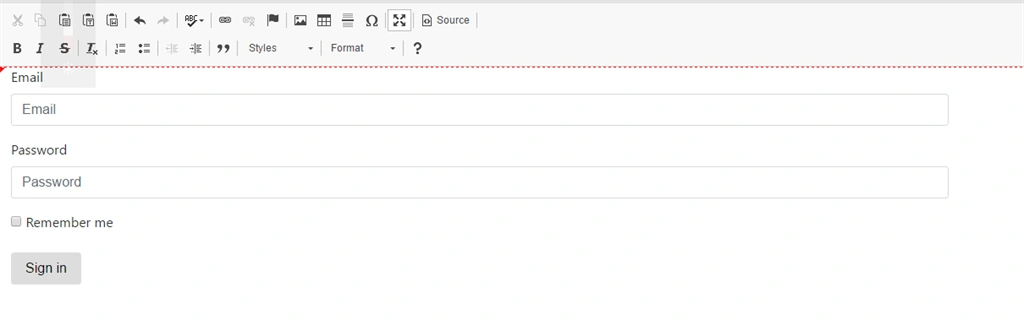
Here, a simple login form is required with Bootstrap classes. Click Source button in CKEditor toolbar. Paste this code and change the source mode to normal. We can see the full login form with Bootstrap style.
- <form class="form-horizontal">
- <div class="form-group"> <label for="email" class="col-sm-2 control-label">Email</label>
- <div class="col-sm-10"> <input type="email" class="form-control" id="email" placeholder="Email"> </div>
- </div>
- <div class="form-group"> <label for="password" class="col-sm-2 control-label">Password</label>
- <div class="col-sm-10"> <input type="password" class="form-control" id="password" placeholder="Password"> </div>
- </div>
- <div class="form-group">
- <div class="col-sm-offset-2 col-sm-10">
- <div class="checkbox"> <label><input type="checkbox"> Remember me</label> </div>
- </div>
- </div>
- <div class="form-group">
- <div class="col-sm-offset-2 col-sm-10"> <button type="submit" class="btn btn-default">Sign in</button> </div>
- </div>
- </form>

Join the conversation! Your thoughts help the community grow.