

Introduction
Live Unit testing is one new feature added in Visual Studio 2017, where the unit test happens automatically in background, once your code gets edited.
Live Unit testing is one new feature added in Visual Studio 2017, where the unit test happens automatically in background, once your code gets edited.
Creating a console Application
Open Visual Studio 2017 -> New-> Project -> Installed templates-> Visual C#-> Windows Classic Desktop-> Console App, I named the project as SampleProject.
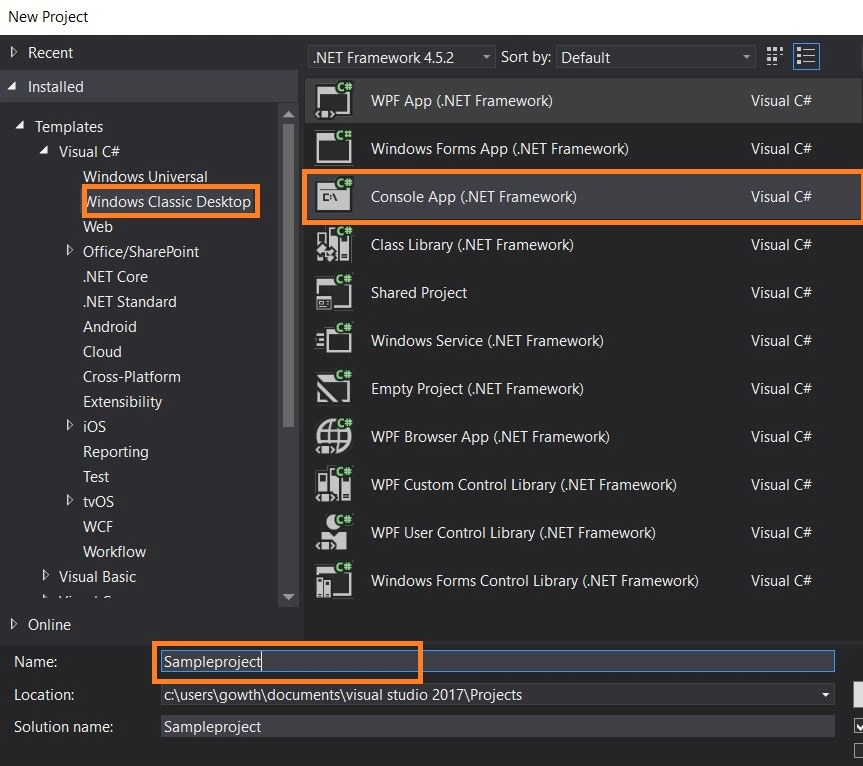
Write the code given below in Program.cs.
- class Program
- {
- static void Main(string[] args)
- {
- Program p = new Program();
- int result = p.AddTest(10, 20);
- WriteLine(result);
- ReadLine();
- }
- public int AddTest(int x, int y)
- {
- int result = x + y;
- return result;
- }
- }
Create a new test project
Right click on Solution->Add new project-> choose Test from templates -> Unit Test Project, I named it as AddUnitTestProject.
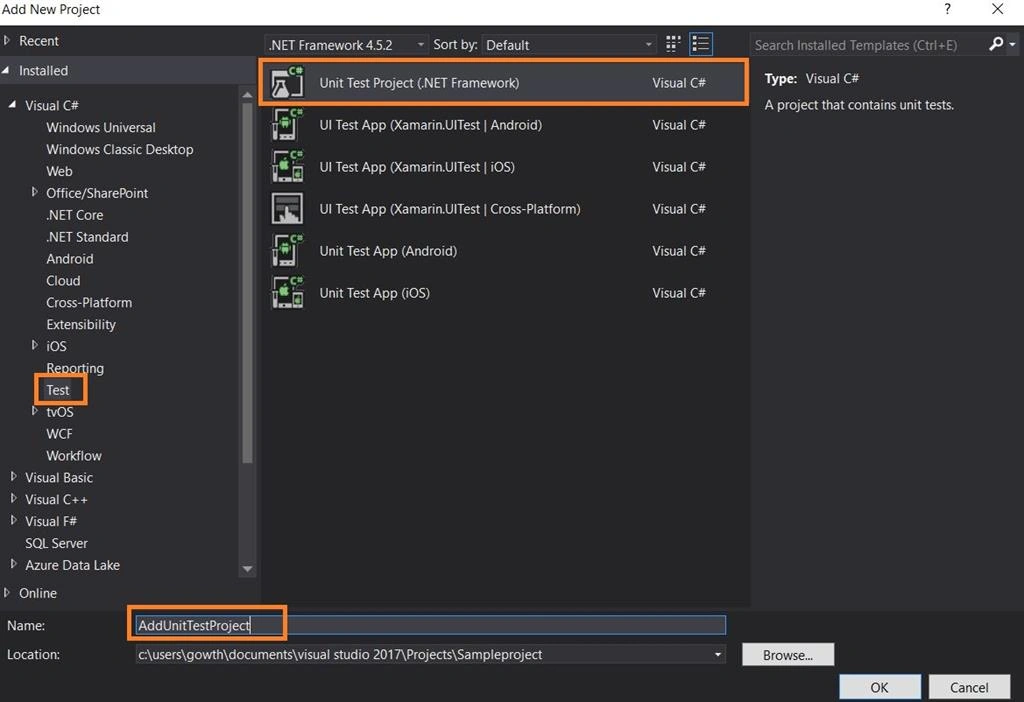
Rename the default cs file. I named it as UnitTestAdd.cs.
Write the code given below in UnitTestAdd.cs.
- [TestClass]
- public class UnitTestAdd
- {
- [TestMethod]
- public void TestMethod1()
- {
- Program _AddTest = new Program();
- var result = _AddTest.AddTest(10, 20);
- Assert.IsTrue(result == 30);
- }
- }
Run Live Unit test
To start Live Unit testing, go to Test-> Live Unit Testing ->Start as shown below.
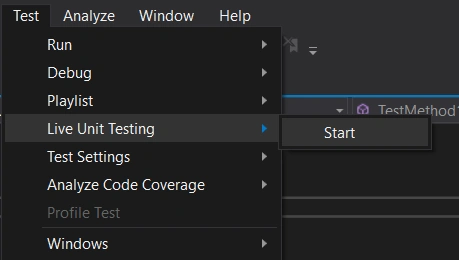
Click Start to run the Unit test.
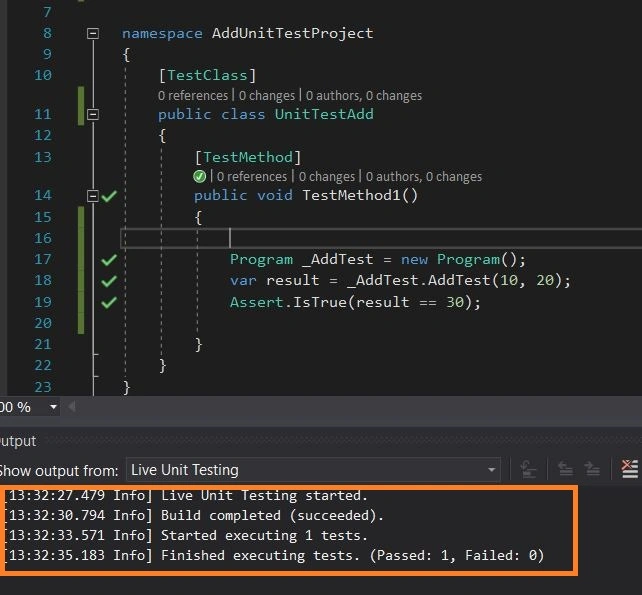
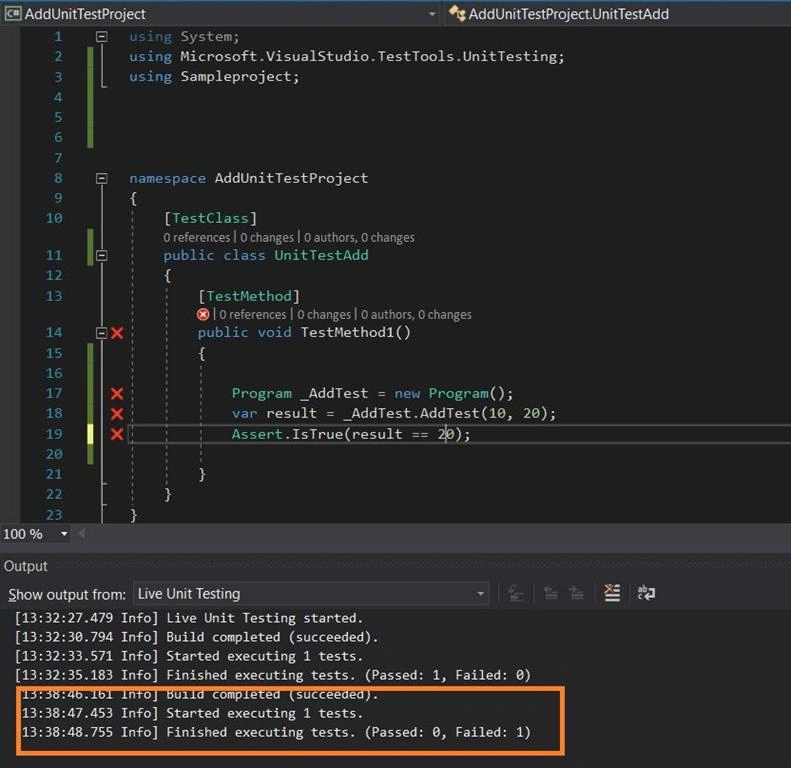
Now, I have edited the code.
UnitTestAdd.cs
- [TestMethod]
- public void TestMethod1()
- {
- Program _AddTest = new Program();
- var result = _AddTest.AddTest(10, 20);
- Assert.IsTrue(result == 20);
- }
Once you edit the code, Unit test will start automatically and run in the background, as shown below.
I hope, you have enjoyed this blog. Your valuable feedback, questions and comments about this blog are always welcome.
Vignesh ManiPosted Mar 29, 2017, 8:32 AM
Nice article. Thanks for sharing