For doing this project we need a Microsoft Ajax Script Manager and Update Panel.
AJAX development is done using JavaScript. With increased use of JavaScript comes the need for better ways to manage, reference, localize (that is, provide different script versions for specific language and culture combinations) and transmit script code to the client browser.
The ASP.NET ScriptManager is at the center of ASP.NET AJAX functionality. The ScriptManager is the key component that coordinates the use of JavaScript for the Microsoft AJAX Library.
The Update Panel is the coding block where we must place our server side control. For that when we click any control there will be no postback done for that control.
Now I am going to tell you the process of binding the process. First we will create a XML file where the DropDownList will be banded.
Step 1:
Create a new Web project on your Visual Studio.
Step 2:
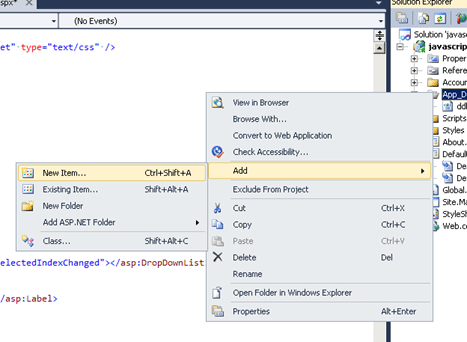
Now we have to create the XML file. So right-click the "App_Data" folder. Click Add->NewItem.
Step 3:
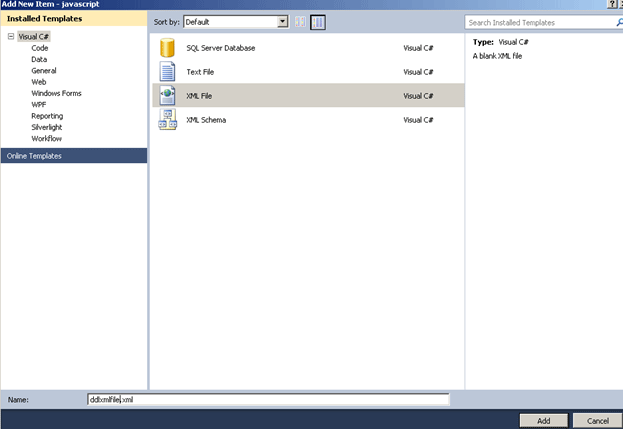
Now click on the XML file and give the file the name "ddlxmlfile.xml". After that click the "Add" button.
Step 4:
Now in the XML file paste the following code:
<ListItems>
<ListItem text="--SELECT--" value="0"></ListItem>
<ListItem text="Pen" value="1"></ListItem>
<ListItem text="Watch" value="2"></ListItem>
<ListItem text="Rice" value="3"></ListItem>
<ListItem text="Powder" value="4"></ListItem>
<ListItem text="DeoDrant" value="5"></ListItem>
</ListItems>
See here I have written all my items under my root "<ListItems>".
Step 5:
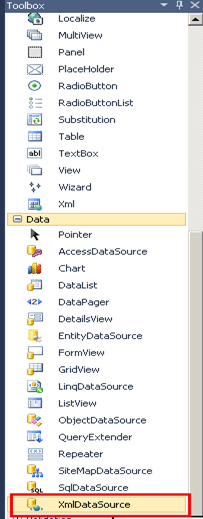
Now go to the "Default.aspx" file.
After that you have to attach the "xmldatasource" from the tool box.
Step 6:
Now we have to add some properties into the "xmldatasouce" for binding the XML file.
<asp:XmlDataSource ID="XmlDataSource1" runat="server"
DataFile="~/App_Data/ddlxmlFile.xml"
XPath="ListItems/ListItem">
</asp:XmlDataSource>

See here the "Datafile" properties specifies the XML file name.
And the "xpath" property specifies the root node and the child node for binding the XML file.
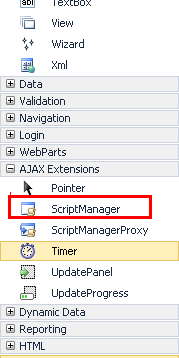
Step 7:
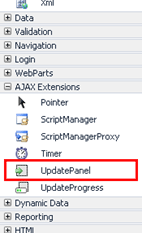
Now first place the "scriptamanager" into the "default.aspx" page from the tool box.
It will look like:

Step 8:
Now place the UpdatePAnel from the toolbox.
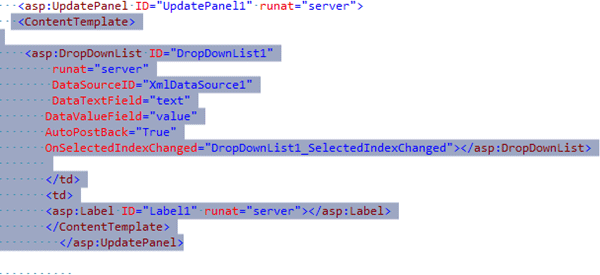
Now write the "<ContentTemplate>" under the Update Panel block. It will be like:
<asp:UpdatePanel ID="UpdatePanel1" runat="server">
<ContentTemplate>
</ContentTemplate>
</asp:UpdatePanel>
Step 9:
Now to attach the DropDownList under the "ContentTemplate" of the UpdatePanel and to bind it to the XML data source.
So the code will be:
<asp:UpdatePanel ID="UpdatePanel1" runat="server">
<ContentTemplate>
<asp:DropDownList ID="DropDownList1"
runat="server"
DataSourceID="XmlDataSource1"
DataTextField="text"
DataValueField="value"
AutoPostBack="True"
OnSelectedIndexChanged="DropDownList1_SelectedIndexChanged"></asp:DropDownList>
</td>
<td>
<asp:Label ID="Label1" runat="server"></asp:Label>
</ContentTemplate>
</asp:UpdatePanel>
Fig:
Step 10:
See I have added a label in the aspx file. So when you click on the DropDownList it will display the selected DropDownList item.
<asp:Label ID="Label1" runat="server"></asp:Label>
Step 11:
Now it's time to drag the list box into the aspx page with update panel.
<td><asp:ListBox ID="ListBox1" runat="server" ForeColor="#FF3399"
SelectionMode="Multiple" Width="96px">
</asp:ListBox>
</ContentTemplate>
</asp:UpdatePanel>
</td>
<td>
<asp:UpdatePanel ID="UpdatePanel2" runat="server">
<ContentTemplate>
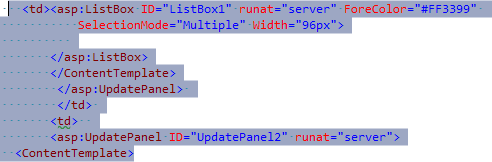
See here I given selectionmode=Multiple. That means we can select multiple items in the ListBox.
Step 12:
Now I am going to add 2 buttons.
One is to remove a particular item in the DropDownList and another is to remove all items in the list box.
<ContentTemplate>
<asp:Button ID="Button1" runat="server" Text="Remove Itms"
onclick="Button1_Click1" />
</ContentTemplate>
</asp:UpdatePanel>
</td>
<td>
<asp:UpdatePanel ID="UpdatePanel3" runat="server">
<ContentTemplate>
<asp:Button ID="Button2" runat="server" Text="RemoveAll"
onclick="Button2_Click" />
</ContentTemplate>
</asp:UpdatePanel>
See here each button I have placed under the UpdatePanel.
Step 13:
So the entire code for the aspx file is:
<%@ Page Title="Home Page" Language="C#" MasterPageFile="~/Site.master" AutoEventWireup="true"
CodeBehind="Default.aspx.cs" Inherits="javascript._Default" %>
<asp:Content ID="HeaderContent" runat="server" ContentPlaceHolderID="HeadContent">
</asp:Content>
<asp:Content ID="BodyContent" runat="server" ContentPlaceHolderID="MainContent">
<h2>
Welcome To the Ajax World..
</h2>
<link href="StyleSheet1.css" rel="stylesheet" type="text/css" />
<script type="text/javascript">
</script>
<asp:ScriptManager ID="ScriptManager1" runat="server">
</asp:ScriptManager>
<table >
<tr>
<td>
<asp:UpdatePanel ID="UpdatePanel1" runat="server">
<ContentTemplate>
<asp:DropDownList ID="DropDownList1"
runat="server"
DataSourceID="XmlDataSource1"
DataTextField="text"
DataValueField="value"
AutoPostBack="True"
OnSelectedIndexChanged="DropDownList1_SelectedIndexChanged"></asp:DropDownList>
</td>
<td>
<asp:Label ID="Label1" runat="server"></asp:Label>
</td>
</tr>
<tr>
<td><asp:ListBox ID="ListBox1" runat="server" ForeColor="#FF3399"
SelectionMode="Multiple" Width="96px">
</asp:ListBox>
</ContentTemplate>
</asp:UpdatePanel>
</td>
<td>
<asp:UpdatePanel ID="UpdatePanel2" runat="server">
<ContentTemplate>
<asp:Button ID="Button1" runat="server" Text="Remove Itms"
onclick="Button1_Click1" />
</ContentTemplate>
</asp:UpdatePanel>
</td>
<td>
<asp:UpdatePanel ID="UpdatePanel3" runat="server">
<ContentTemplate>
<asp:Button ID="Button2" runat="server" Text="RemoveAll"
onclick="Button2_Click" />
</ContentTemplate>
</asp:UpdatePanel>
</td>
</tr>
</table>
<asp:XmlDataSource ID="XmlDataSource1" runat="server"
DataFile="~/App_Data/ddlxmlFile.xml"
XPath="ListItems/ListItem">
</asp:XmlDataSource>
</asp:Content>
Step 14:
Now we have to write the code in the default.aspx.cs file.
First we will write the code for selecting a particular item in the DropDownList; it will put into the list box.
protected void DropDownList1_SelectedIndexChanged(object sender, EventArgs e)
{
Label1.Text = "Selected Item text = <b>" + DropDownList1.SelectedItem.Text + "</b><br />";
ListBox1.Items.Add(new ListItem(DropDownList1.SelectedItem.Text, DropDownList1.SelectedItem.Text));
}
Step 15:
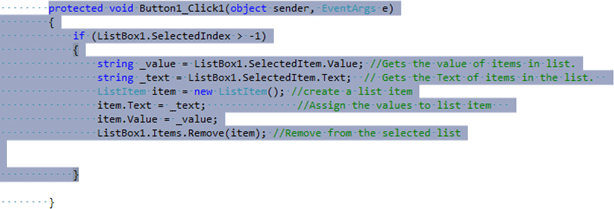
Now we have to delete the particular selected item by clicking the "remove" button.
protected void Button1_Click1(object sender, EventArgs e)
{
if (ListBox1.SelectedIndex > -1)
{
string _value = ListBox1.SelectedItem.Value; //Gets the value of items in list.
string _text = ListBox1.SelectedItem.Text; // Gets the Text of items in the list.
ListItem item = new ListItem(); //create a list item
item.Text = _text; //Assign the values to list item
item.Value = _value;
ListBox1.Items.Remove(item); //Remove from the selected list
}
}
Step 16:
Now the code is for deleting all the items from the list box is:
protected void Button2_Click(object sender, EventArgs e)
{
ListBox1.Items.Clear();
}
Step 17:
Now run the code. It will look like:
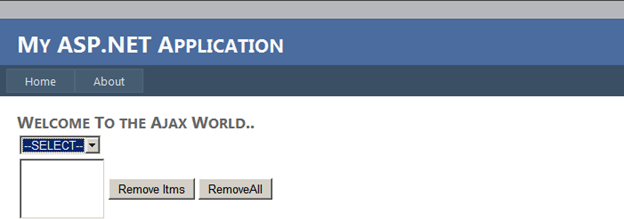
Step 18:
Now select any item from the DropDownList and it will add it to the list box.
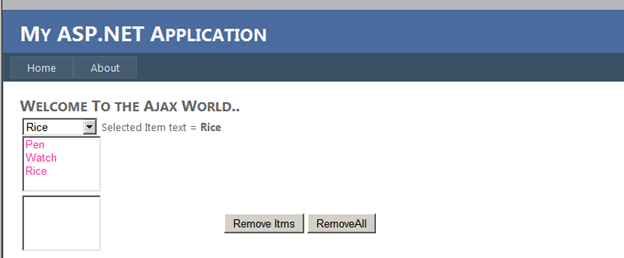
Step 19:
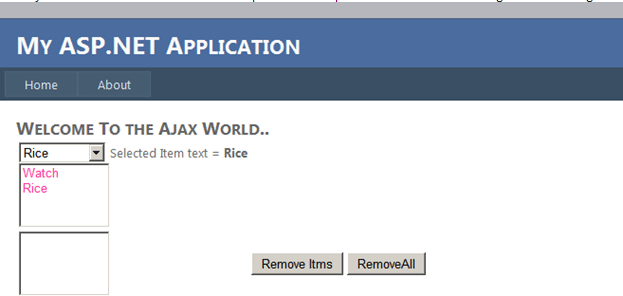
Now select a particular item from the Listbox for e.g. : Pen and after that click the "RemoveItems" button. It will look and remove the "pen" items from the ListBox. Notice that in all those operations no post back event handling is done.
Step 20:
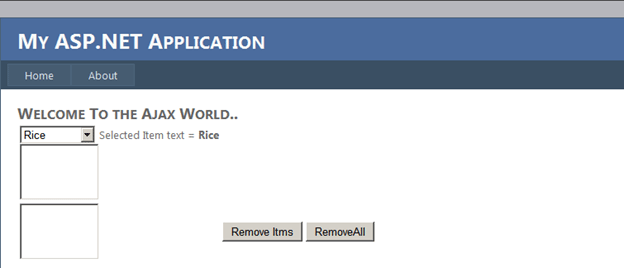
Now when you click the "remove all" buttons it will clear all the items from the list box.
Conclusion:
So in this article we have seen how to add the data by clicking from the DropDownList and also remove the particular items with asynchronous ajax functionality.