

Prologue:
In this article we shall discuss about how to create shell extension for LightSwitch 2011. In my previous article we discussed about the way to setup the atmosphere for creating extensions for LightSwitch 2011.
What is LightSwitch shell?
The shell for a Visual Studio LightSwitch 2011 application enables users to interact with the application. It manifests the navigable items, running screens, associated commands, current user information, and other useful information that are part of the shell's domain.
While LightSwitch provides a straightforward and powerful shell, you can create your own shell that provides your own creative means for interacting with the various parts of the LightSwitch application.
Main three parts of LightSwitch shell
There are three main parts in LightSwitch shell,
- The Managed Extensibility Framework (MEF), which is responsible for shell contract.
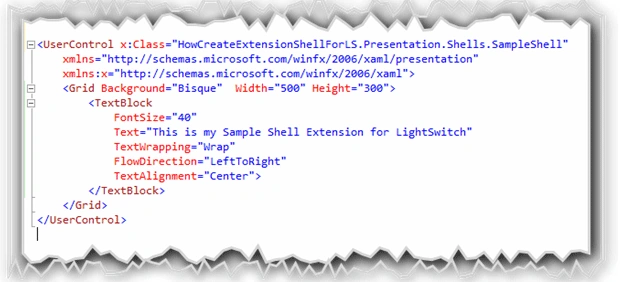
- The Extensible Application Markup Language (XAML), which describes the controls that are used for the shell UI.
- The Code behind of the XAML, which implements the behavior of the controls and interacts with the LightSwitch run time.
So let create a demo LightSwitch shell which simply displays a message in a screen.
Preparing the solution
Before getting started, we need to verify that whether we are having all the prerequisites installed. Please read my previous article. Please follow the installation instructions for installing extensibility tool kit.
Startup the visual studio LightSwitch 2011; create an extension project called "HowToCreateExtensionForLS" as shown in the below figure.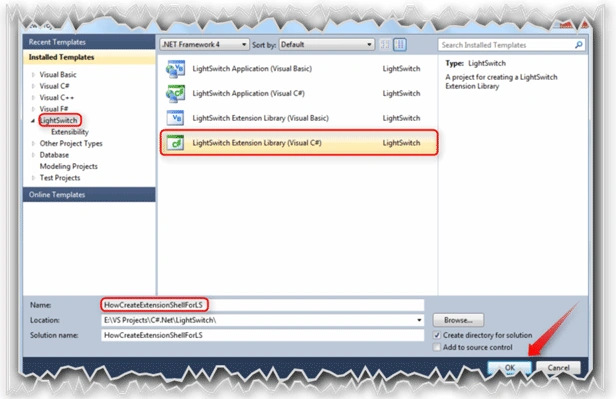
Once we have installed all prerequisites, then we will get the Extension library project type and follow the figure.
The project which we created just now will have some project templates as shown in the figure.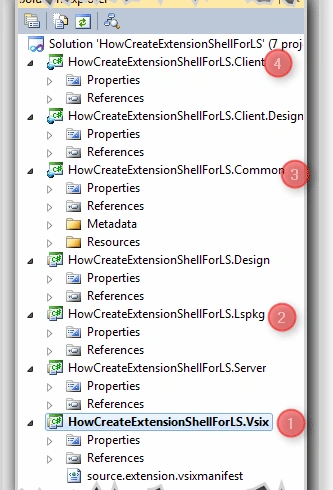
Here,
- The .Vsix project packages the generated .Lspkg file into a .Vsix package so that it can be added to LightSwitch through the Extension Manager.
- The .Lspkg project packages the previous five projects so that LightSwitch can unpack and reference them when the package is installed.
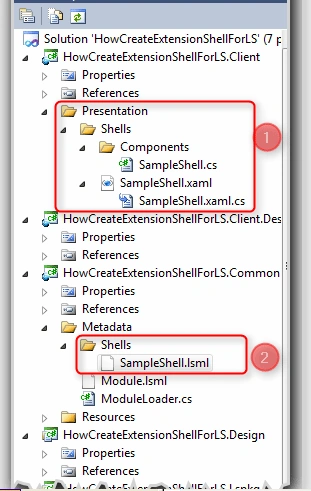
- The .Common project will have Meta data about shell which we are going to create.
- The .Client project will have the Xaml files for the shell.
Creating shell file
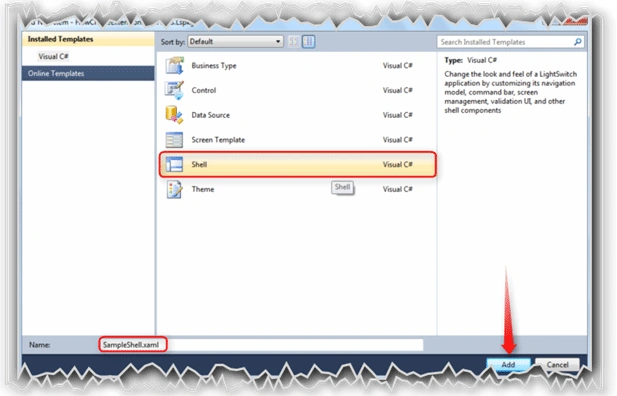
To create a shell file, follow steps shown in the figure below.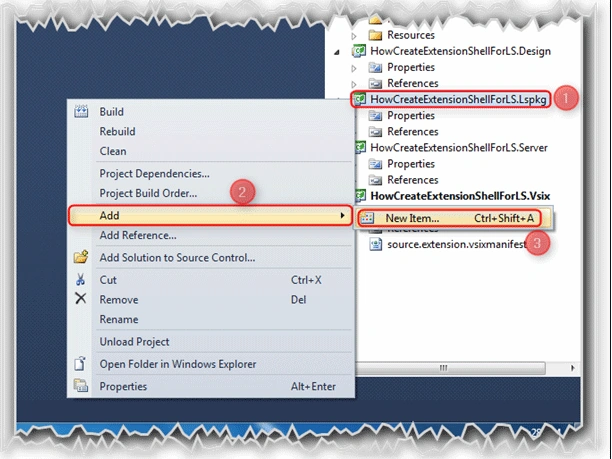
Here,
- Select the .Lspkg project.
- Click on add option in the popup menu.
- Select New Item option.
ilyin valPosted Apr 6, 2012, 9:42 AM
THANKS JAGANATHAN! ITS I HAD SEEK!
Mohan RathourPosted Oct 22, 2011, 2:54 PM
Nice article Jaganathan
Mohan RathourPosted Oct 22, 2011, 2:54 PM
Nice article Jaganathan