

Note: This article was published on 12/08/2024.
This series of articles will discuss the major feafures for Angular. The way to discuss could be AI in concept + Code Demo in StackBlitz | Instant Dev
- Angular Features (0) --- What is Angular
- Angular Features (1) --- Data Binding: Data Transfer inside Component
- Angular Features (2) --- Component Interaction
Advanced:
Note:
Since the concept of component interaction here is with similar or same mechanizm or funcationality as view variable transfer data between MVC controllers, saytherefore, I put the other article series of View Variables in ASP.NET MVC here as references:
- Razor Engine in MVC
- View Variables in ASP.NET MVC
- View Variables in ASP.NET Core MVC
- Pass Data Across Views In .NET MVC
- Partial, RenderParial, Action, RenderAction
A - Introduction
Angular is a component based platform and all components make up the application. The major mechanizim for Angular is the data trasferting, either within a component or between (among) components. This article will discuss the data transfer between different Angular components.
The content of this article:
- A - Introduction
- B - Send Data from Parent Component to Child Component
- C - Sending Data from Child Component to Parent Component
B - Send Data from Parent Component to Child Component
The @Input() decorator in a child component or directive signifies that the property can receive its value from its parent component.
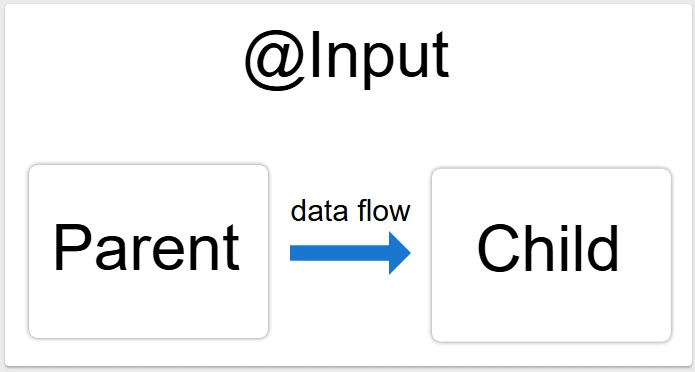
To use @Input(), you must configure the parent and child.
B - 1 - Configuring Child Component
To use the @Input() decorator in a child component class, first import Input and then decorate the property with @Input(), as in the following example.
import { Component, Input } from '@angular/core'; // First, import Input
export class ChildComponent {
  @Input() item = ''; // decorate the property with @Input()
}
In this case, @Input() decorates the property item, which has a type of string, however, @Input() properties can have any type, such as number, string, boolean, or object. The value for item comes from the parent component.
Next, in the child component template, add the following:
<p>
  Today's item: {{item}}
</p>
B -2 - Configuring Parent Component
The next step is to bind the property in the parent component's template. In this example, the parent component template is parent.component.html.
-
Use the child's selector, here
<app-child>, as a directive within the parent component template. -
Use property binding to bind the
itemproperty in the child to thecurrentItemproperty of the parent.
<app-child [item]="currentItem"></app-child>
- In the parent component class, designate a value for
currentItem:
export class ParentComponent {
  currentItem = 'Television';
}
With @Input(), Angular passes the value for currentItem to the child so that item renders as Television.
The following diagram shows this structure:
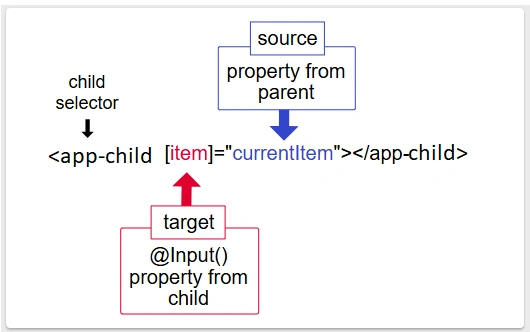
The target in the square brackets, [], is the property you decorate with @Input() in the child component. The binding source, the part to the right of the equal sign, is the data that the parent component passes to the nested component.
B - 3 - Code Demo in Stackblitz:
C - Sending Data from Child Component to Parent Component
The @Output() decorator in a child component or directive lets data flow from the child to the parent.
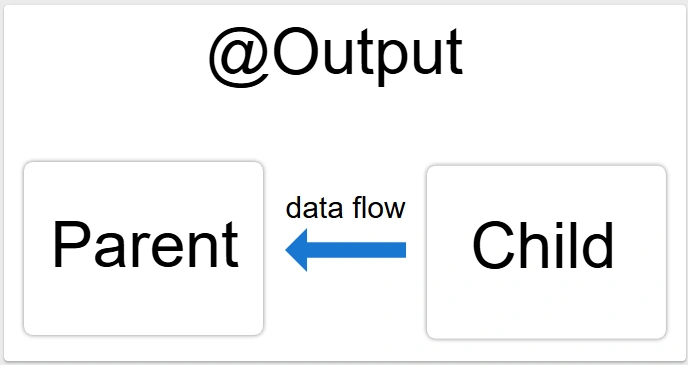
@Output() marks a property in a child component as a doorway through which data can travel from the child to the parent.
The child component uses the @Output() property to raise an event to notify the parent of the change. To raise an event, an @Output() must have the type of EventEmitter, which is a class in @angular/core that you use to emit custom events.
To use @Output(), you must configure the parent and child.
C - 1 - Configuring the child component
The following example features an <input> where a user can enter a value and click a <button> that raises an event. The EventEmitter then relays the data to the parent component.
- Import
OutputandEventEmitterin the child component class:
import { Output, EventEmitter } from '@angular/core';
-
In the component class, decorate a property with
@Output(). The following examplenewItemEvent@Output()has a type ofEventEmitter, which means it's an event.
@Output() newItemEvent = new EventEmitter<string>();
The different parts of the preceding declaration are as follows:
Join the conversation! Your thoughts help the community grow.