

Introduction
For now, we will try some basic input and output (I/O) operations as shown in the following code.
- void setup()
- {
- // Baud Rate
- Serial.begin(9600);
- Serial.println("Hello Arduino");
- Serial.println("Hey, C# Corner");
- }
- void loop()
- {}
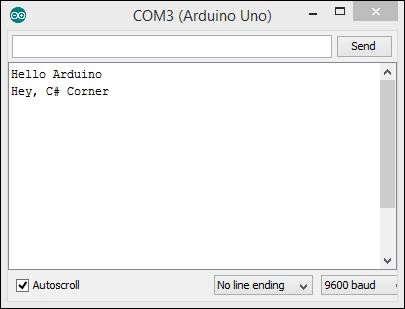
Next, we have a println() function that prints the string in the Serial Monitor. And, on every execution, it shifts to a new line (in other words every statement is appended with \n).
There is also a function called print(), but it differs with println(). The basic difference is that it doesn't switch to the next line after every execution. Whereas, println() does after every execution. That's what an extra ln (in other words line) can do. So, the sketch would be like.
- byte user_input;
- void setup() {
- // Baud Rate
- Serial.begin(9600);
- Serial.println("Hello Arduino");
- Serial.println("Hey, C# Corner");
- }
- void loop() {
- if (Serial.available()) {
- user_input = Serial.read();
- Serial.println(user_input);
- }
- }
And the output would be like this:
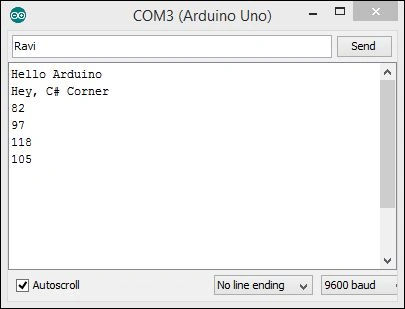 Here, we need the input as “Ravi” and the Serial Monitor accepts my string and parses (converts) it into a byte data type since we have declared user_input as a byte type. And, it converts "R", "a", "v", "i" to the respective ASCII values since the byte data type stores only ASCII values.
Note: "R" is equivalent to 82, "a" equivalent to 97, "v" equivalent to 118 and "i" equivalent to 105.
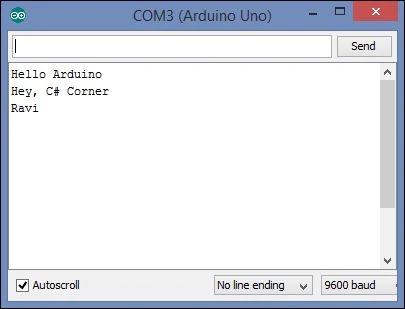
What if I want to print in character mode instead of ASCII codes? So, for this, we have a function called write(), that accepts byte values and returns characters.
Here, we need the input as “Ravi” and the Serial Monitor accepts my string and parses (converts) it into a byte data type since we have declared user_input as a byte type. And, it converts "R", "a", "v", "i" to the respective ASCII values since the byte data type stores only ASCII values.
Note: "R" is equivalent to 82, "a" equivalent to 97, "v" equivalent to 118 and "i" equivalent to 105.
What if I want to print in character mode instead of ASCII codes? So, for this, we have a function called write(), that accepts byte values and returns characters.
- byte user_input;
- void setup() {
- // Baud Rate
- Serial.begin(9600);
- Serial.println("Hello Arduino");
- Serial.println("Hey, C# Corner");
- }
- void loop() {
- if (Serial.available()) {
- user_input = Serial.read();
- Serial.write(user_input);
- }
- }
The rest of the code will the remain same except the Serial.write(user_input) function. Now, it will show it differently as in the following:
 Note: In the preceding code, we have used available() to check whether the Serial Port is ready or not for accepting user input.
So, next, we will try to parse Serial.read() to char type data.
The Sketch would be like:
Note: In the preceding code, we have used available() to check whether the Serial Port is ready or not for accepting user input.
So, next, we will try to parse Serial.read() to char type data.
The Sketch would be like:
- void setup() {
- // Baud Rate
- Serial.begin(9600);
- Serial.println("Hello Arduino");
- Serial.println("Hey, C# Corner");
- }
- void loop() {
- if (Serial.available()) {
- char input = Serial.read();
- Serial.println(input);
- }
- }
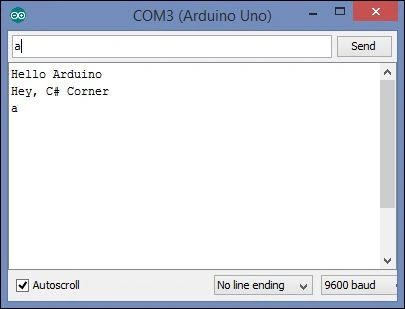
And, the output is as expected.
 In spite of char, you can use int to get an integral value.
It's one of the most-used features of Arduino coding. And, we will use this often in our future articles. Next, we will try the Temperature Module and display it in Serial Monitor.
In spite of char, you can use int to get an integral value.
It's one of the most-used features of Arduino coding. And, we will use this often in our future articles. Next, we will try the Temperature Module and display it in Serial Monitor.
Santhakumar MunuswamyPosted May 13, 2015, 4:17 PM
Thanks for nice article
NitinPosted May 13, 2015, 12:09 PM
good one
Sibeesh VenuPosted May 13, 2015, 8:22 AM
Good one
Gowtham RajamanickamPosted May 13, 2015, 8:15 AM
informative