

Introduction
This article is intended to consolidate the principles of messaging in Biztalk Server 2006. Now we're going to analyze the business scenario where you are integrating data from a variety of sources, and some of these sources are legacy applications that may not have XML as the communication data format. One common format we deal with is the flat file.
A flat file is an ASCII text file consisting of records of single type and there is no structure information about the relationships among the records, unlike XML which has a well defined structure. It consists of one or more records and each record contains one or more fields. Each field may contain a value or it is omitted. The width of the fields may be fixed or variable. In a fixed width file there is neither field delimiter and nor record delimiter. Empty spaces are filled with pad characters. In a variable width file there is a special character as delimiters (fields or records) such as tab character, the comma or the pipe character. The most common example is the CSV file.
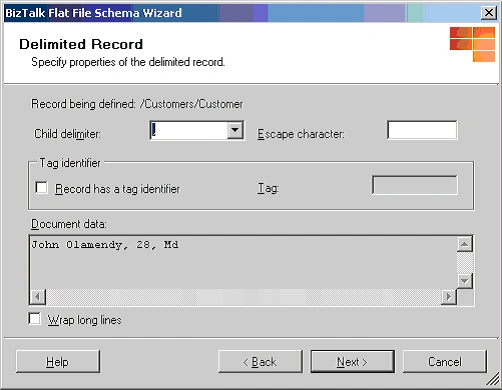
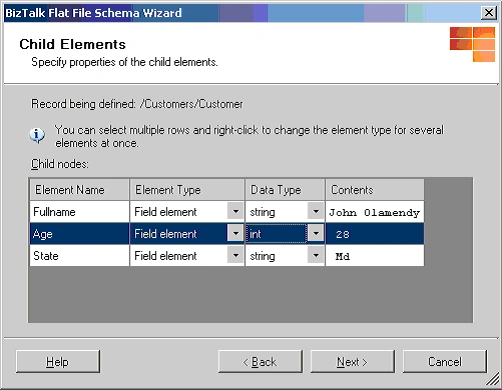
Let's create a sample flat file that is comma-separated for storing information about customers as shown in Listing 1. You can see that we have four records with three fields specifying Full name, Age and State of each customer.
| Full name | Age | State |
| John Olamendy | 28 | Md |
| Peter Patterson | 30 | Ca |
| Peter Jones | 38 | Ca |
| John Smith | 34 | Ca |
Listing 1
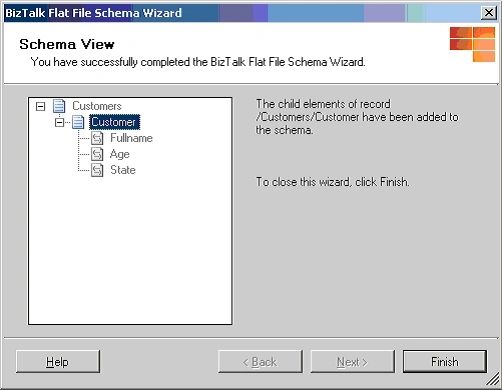
Now we're going to create a flat file schema through the Flat File Schema Wizard.
- Start Visual Studio 2005.
- Create a Biztalk Project and enter the name Flat_File_Schemas.
- In order to create the schema, click on the Project | Add New Item menu and select Schemas Files in the left panel and Flat File Schema Wizard in the right panel. Name the file CustomerFlatFile as shown in Figure 1.
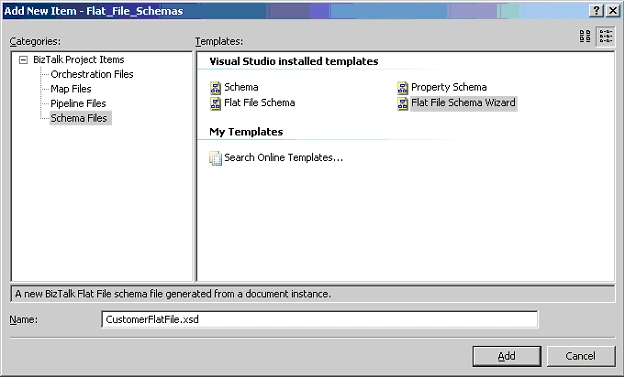
Figure 1
- The Welcome page appears. Click Next to continue.
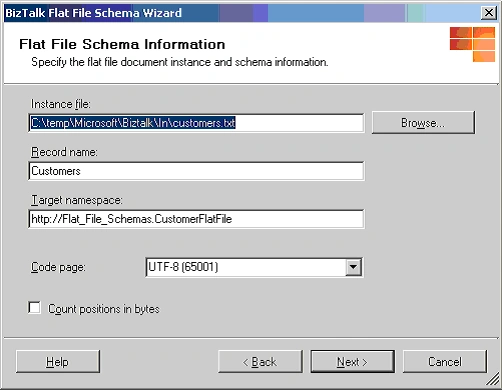
- In the Flat File Schema Information page, click on the Browse button to locate the sample file created before. Set the Record Name to Customers. Accept the default settings for Target Namespace and Code Page options as shown in Figure 2. Click Next to continue.
Join the conversation! Your thoughts help the community grow.