

Introduction
In a real-world web application scenario, generally, we follow architecture where we have:
- Frontend
- Backend
Backend consists of API + Database, API can be in Node.js, ASP.NET Core, etc., and database can be in SQL Server, Raven DB, NoSQL, etc.
Generally, backend development is a time-consuming process which takes too much time to develop when a developer needs to build an API that is connected to a database. In a database, we also need to create database objects like table, stored procedure to perform INSERT, UPDATE, DELETE operations and more; and we also write code in the API which accesses these stored procedures that help to communicate with the database.
Firebase helps us to make the development faster, so we can skip the development part where we build APIs and database objects like stored procedure.
What is Firebase?
Firebase is a platform that is provided by Google to build a backend for web and mobile applications.
Firebase can work with multiple platforms like iOS, Android, Java, Angular, Javascript, C++ etc.
What does Firebase offer to us?
- Fast and real-time database
- Authentication
- Analytics
- Storage
In this article, our focus is on usinga Ffirebase database to achieve the following in real time:
- Create object
- Read object
- Update object
- Delete object
Create Firebase Project
First, open the https://firebase.google.com/ and sign up if you don’t have a Google account, otherwise go to the sign in.
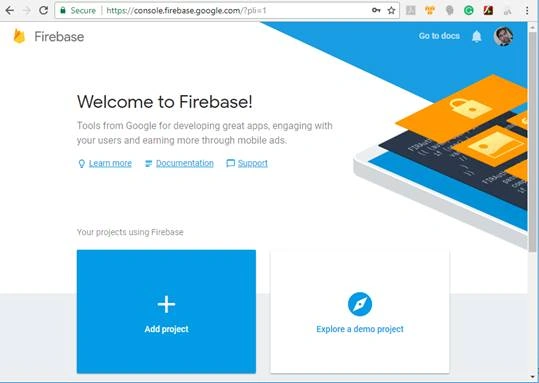
Then, click Add project as shown in Figure 1.
Now, add the project name, “FirebaseDemo,” and select the country/region where you want to setup your database. I am going to use the default “United States” and click “Create Project.”
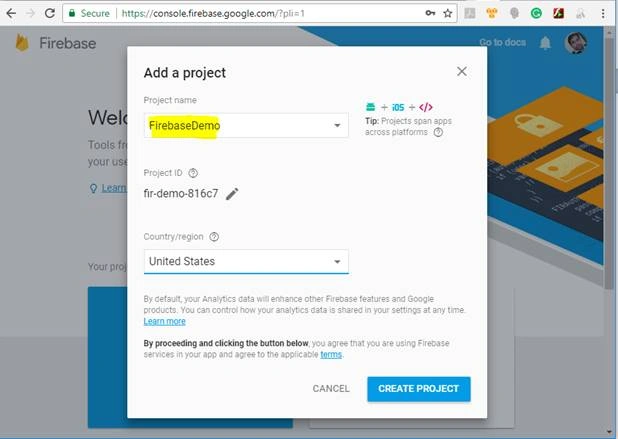
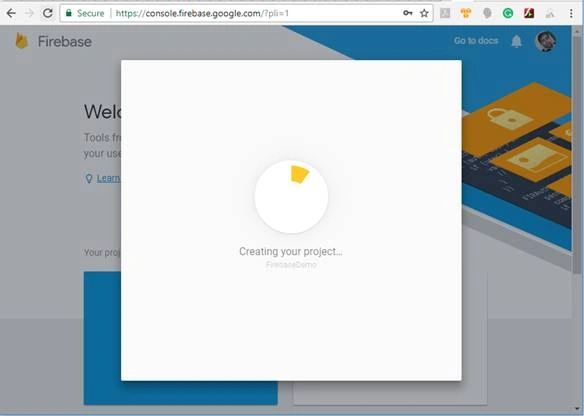
Figure 3 shows the creation of your project.
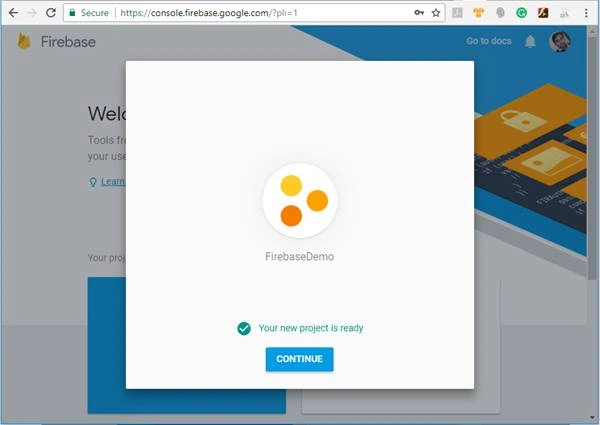
Once the Firebase project gets created you will see the below screen with the message “Your new project is ready.”
To set up the database click the navigation button as shown in Figure 5.
Create Firebase Database
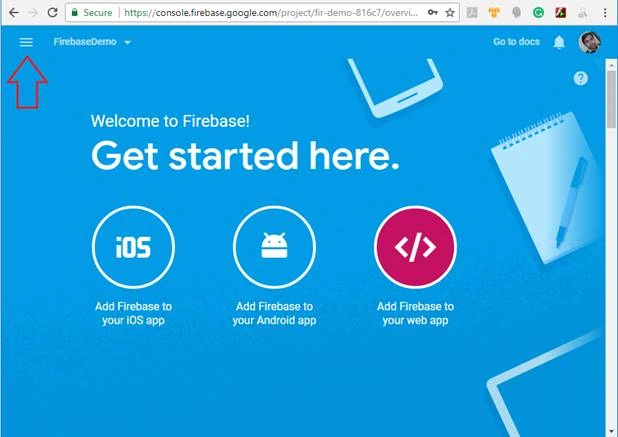
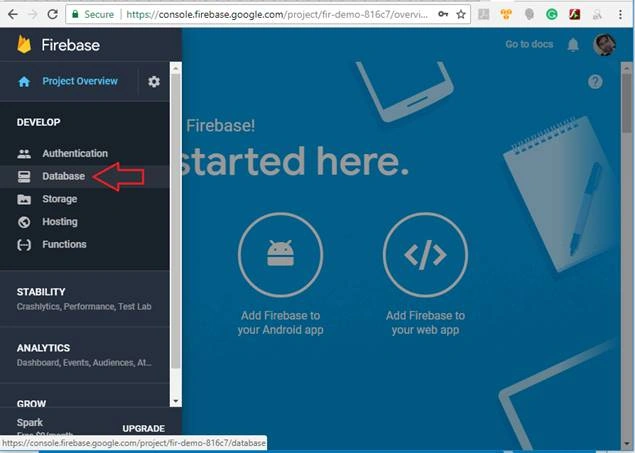
Under the “DEVELOP” tab click the database section to setup the database. See Figure 6.
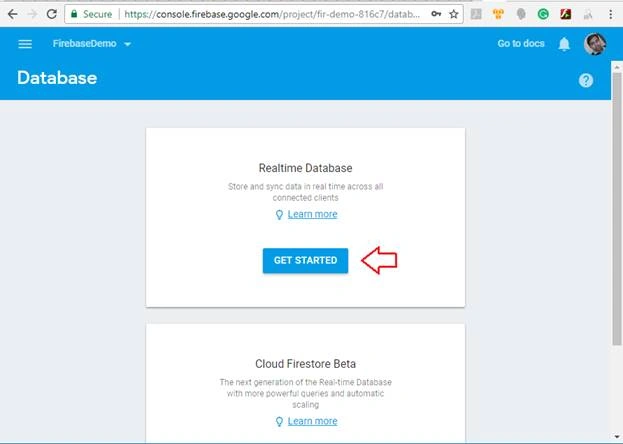
Now, click the “Get Started” button to create a new database in Firebase as shown in Figure 7.
In Figure 8, you can see a root node with ‘+’ sign, this ‘+’ sign will allow you to create the first object under the root node. Let’s click on the ‘+’
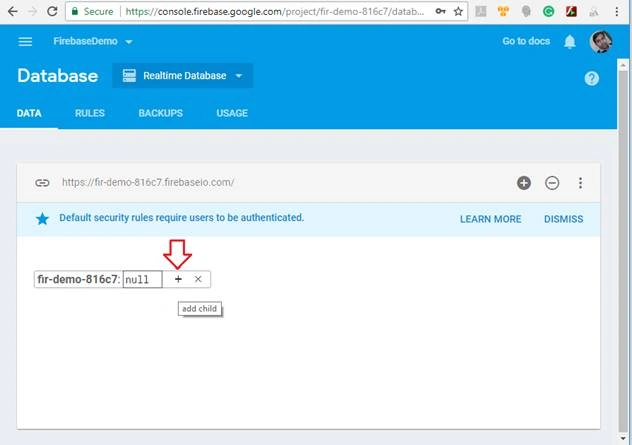
You can create the database object in a key-value pair format, I am going to set the only key for my first database object; i.e. “Countries”, which I will use like a table as shown in Figure 9.
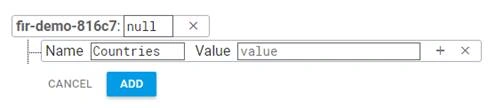
Let’s add the first node under the Countries node using the ‘+’ sign as shown in Figure 10.
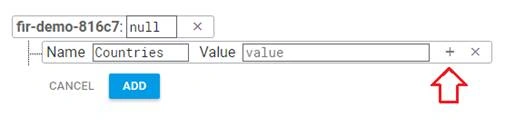
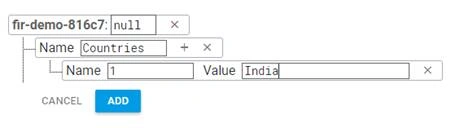
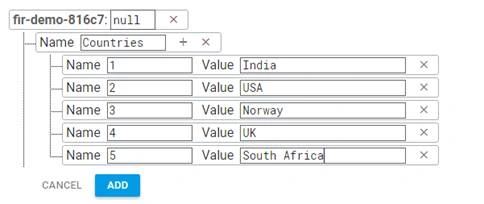
You can add multiple nodes under the “Countries” node using ‘+’ sign as shown in Figure 12.
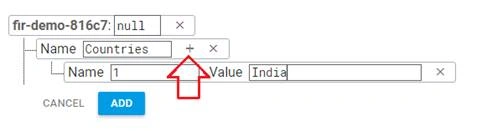
Once you have added your node just click the “ADD” button to persist our nodes.
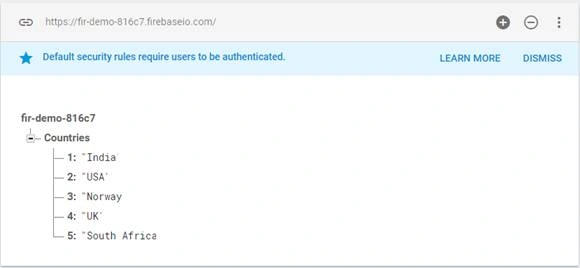
After saving the nodes you will see the data in a tree structure.
Create Angular Project
To create an Angular application and consume the Firebase database inside the application follow Figure 15

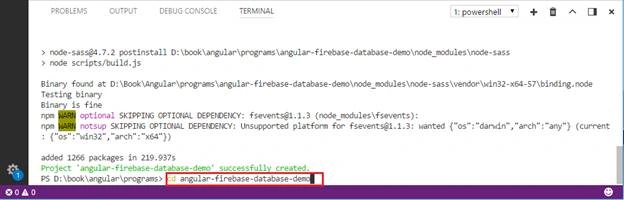
Now, go inside the application directory using the cd command.
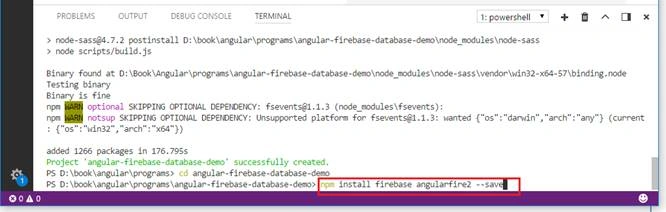
To install standard Firebase library and angularfire2 library which allows Firebase to work with an Angular2 app; see Figure 17 and run the following commands.
npm install firebase angularfire2 --save:
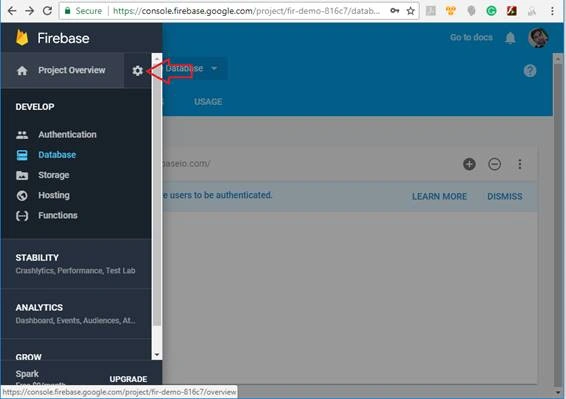
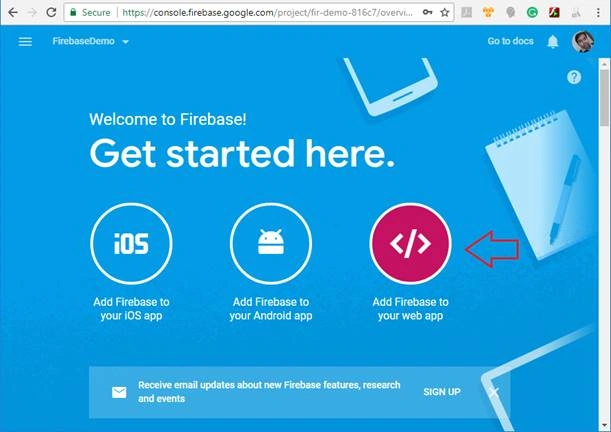
When we've set up the Firebase project some configuration setting gets created. To see these settings go to the >> Project overview >> Add Firebase to your web app. Follow figures 18 and 19.
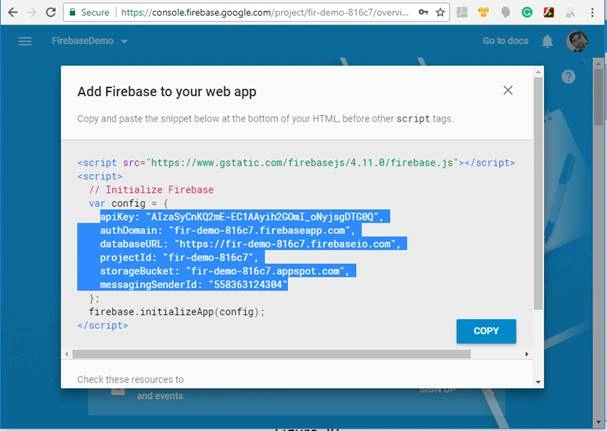
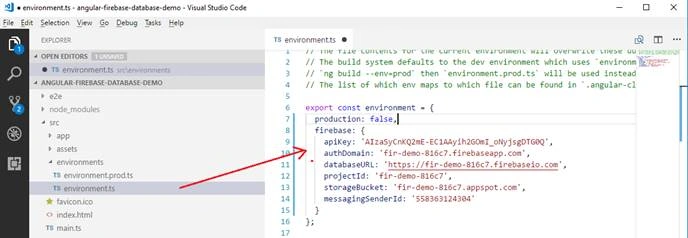
Now, copy the config settings which are shown in Figure 20. Paste them in the environment.ts file.
To open the environment.ts file got to the src > app > environments > environment.ts as shown in Figure 21.
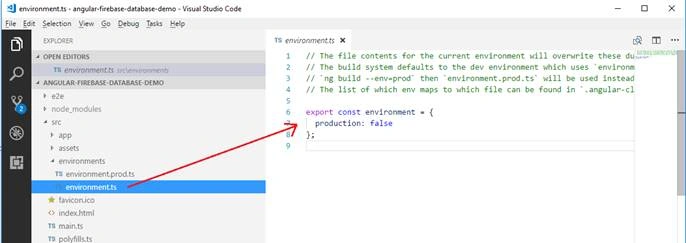
Copy and paste the below code snippet inside the “environment” class as shown in Figure 22.
- firebase: {
- apiKey: 'AIzaSyCnKQ2mE-EC1AAyih2GOmI_oNyjsgDTG0Q',
- authDomain: 'fir-demo-816c7.firebaseapp.com',
- databaseURL: 'https://fir-demo-816c7.firebaseio.com',
- projectId: 'fir-demo-816c7',
- storageBucket: 'fir-demo-816c7.appspot.com',
- messagingSenderId: '558363124304'
Listing 1.
- export const environment = {
- production: false,
- firebase: {
- apiKey: 'AIzaSyCnKQ2mE-EC1AAyih2GOmI_oNyjsgDTG0Q',
- authDomain: 'fir-demo-816c7.firebaseapp.com',
- databaseURL: 'https://fir-demo-816c7.firebaseio.com',
- projectId: 'fir-demo-816c7',
- storageBucket: 'fir-demo-816c7.appspot.com',
- messagingSenderId: '558363124304'
- }
- };
Listing 2.
Now, we need to import “AngularFireModule” and “AngularFireDatabaseModule” in the app.module.ts file.
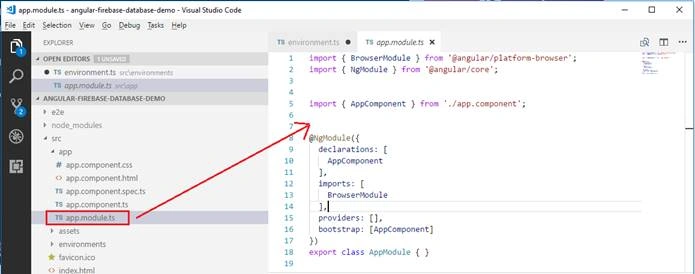
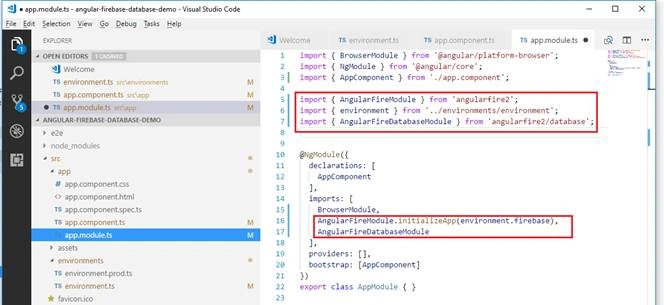
Add the below line in the import section at the top.
- import {
- AngularFireModule
- } from 'angularfire2';
- import {
- environment
- } from '../environments/environment';
- import {
- AngularFireDatabaseModule
- } from 'angularfire2/database';
Also add the “AngularFireModule” and “AngularFireDatabaseModule” inside the ngModule under import section as shown in Figure 24.
Now, it is time to get data from Firebase and display it on view. We are going to use app component for this.
Open the app.component.ts go to the src > app > app.component.ts.
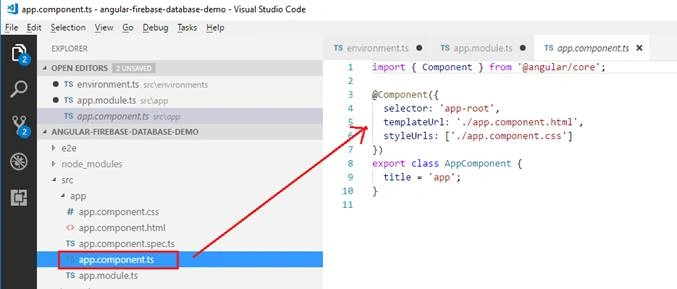
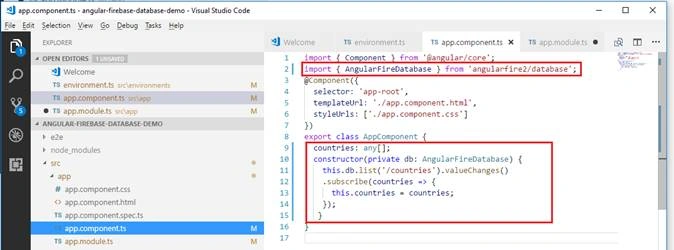
Import the “AngularFireDatabase” in top of the file.
- import { AngularFireDatabase } from 'angularfire2/database';
Add the constructor inside the AppComponent class and inject the AngularFireDatabase to access the list of countries.
- export class AppComponent {
- countries: any[];
- constructor(private db: AngularFireDatabase) {
- this.db.list('/countries').valueChanges().subscribe(countries => {
- this.countries = countries;
- console.log(this.countries);
- });
- }
- }
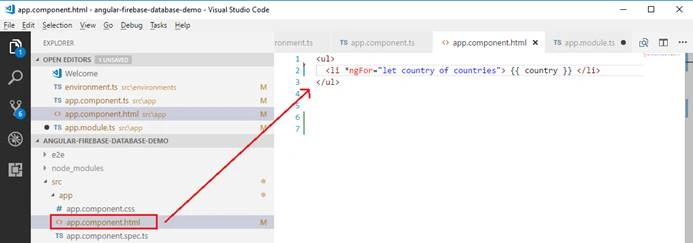
Add the following HTML inside the “app.component.html” page to view the list of countries. We are getting countries as a list, so we need to iterate this list through for each loop as shown in Figure 27.
- <ul>
- <li *ngFor="let country of countries"> {{ country }} </li>
- </ul>
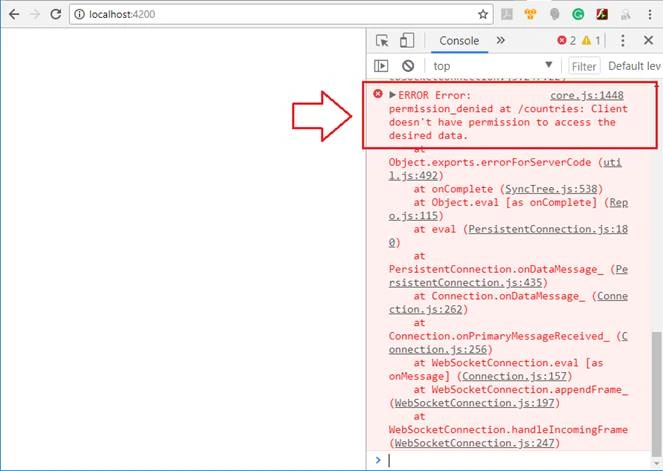
Now, run the Angular app using “ng serve” and open it in a web browser using http://localhost:4200
Unfortunately, it will show nothing and inside the console, it will show an error for permission which is shown in Figure 28.
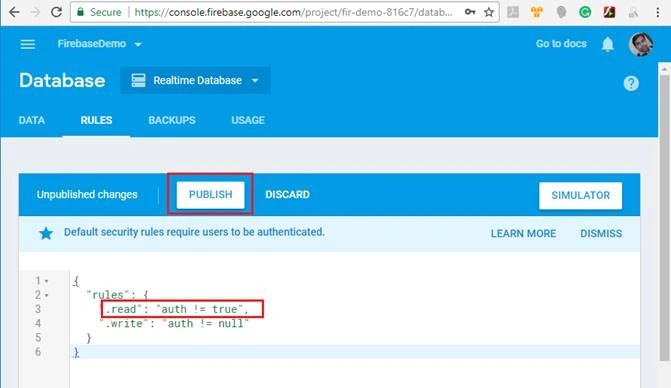
To fix this error we need to set the rule for reading and publishing it as shown in Figure 29
.read: auth != true
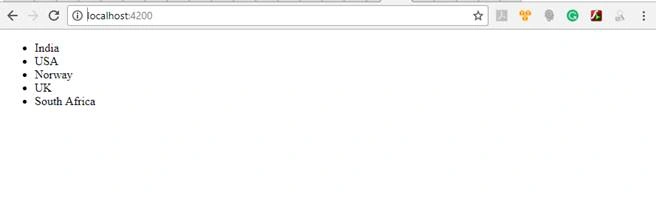
As you publish the rules for database and go to the browser you will see the list of the countries on the webpage displayed and one more thing you will notice is that you do not need to refresh the web page or restart the application again. This is the beauty of Firebase, and it is called real-time update.
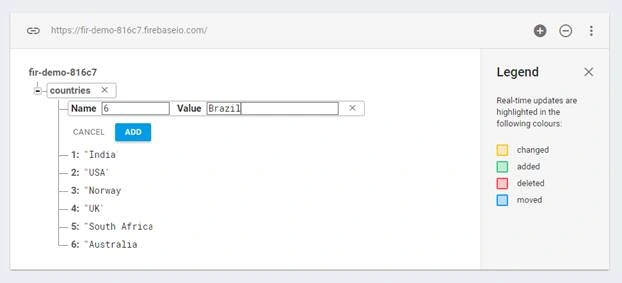
To view the real-time update of fFrebase and Angular, open the firebase database and add a few more countries like this:
Open the web page in the browser and you will notice the countries list updates itself due to real-time capabilities on the fFrebase.
Now, the question is how are real time upgrades reflected in Angular applications, and the answer is by the “subscribe” method.
- this.db.list('/countries').valueChanges().subscribe(countries => {
- this.countries = countries;
- console.log(this.countries);
- });
It subscribes to the list of the pages from the database and this subscription will always be in the memory to reflect the changes.
Sathishkumar DPosted May 31, 2018, 8:41 AM
Thank you.. Helpful
Aruljothy SundaramoorthyPosted Mar 18, 2018, 2:12 PM
Awesome work....! Keep doing :)