

Introduction
This article explains how to open the gallery in your phone and display the selected images, capture a photo from the camera and save it to the gallery of your Android phone.
First, the user will need to choose if he/she wants to select an image from the gallery or wants to capture an image from the camera. Then depending on the option chosen by the user, we will either open the gallery or capture an image.
Step 1
Open "AndroidManifest" and add the following code to it:
- <manifest xmlns:android="http://schemas.android.com/apk/res/android"
- package="com.chhavi.uploadingandviewimage"
- android:versionCode="1"
- android:versionName="1.0" >
- <uses-permission android:name="android.permission.CAMERA" />
- <uses-feature android:name="android.hardware.camera" />
- <uses-feature android:name="android.hardware.camera.autofocus" />
- <uses-permission android:name="android.permission.WRITE_EXTERNAL_STORAGE" />
- <uses-sdk
- android:minSdkVersion="7"
- android:targetSdkVersion="16" />
- <application
- android:allowBackup="true"
- android:icon="@drawable/ic_launcher"
- android:label="@string/app_name"
- android:theme="@style/AppTheme" >
- <activity
- android:name="com.chhavi.uploadingandviewimage.MainActivity"
- android:label="@string/app_name" >
- <intent-filter>
- <action android:name="android.intent.action.MAIN" />
- <category android:name="android.intent.category.LAUNCHER" />
- </intent-filter>
- </activity>
- </application>
- </manifest>
Step 2
Open "activity_main" and add the following code to it:
- <LinearLayout xmlns:android="http://schemas.android.com/apk/res/android"
- xmlns:tools="http://schemas.android.com/tools"
- android:id="@+id/LinearLayout1"
- android:layout_width="match_parent"
- android:layout_height="match_parent"
- android:orientation="vertical"
- android:padding="10dp" >
- <LinearLayout
- android:layout_width="match_parent"
- android:layout_height="wrap_content"
- android:gravity="center"
- android:padding="5dp" >
- <Button
- android:id="@+id/btnSelectPhoto"
- android:layout_width="match_parent"
- android:layout_height="wrap_content"
- android:text="Select Photo" />
- </LinearLayout>
- <LinearLayout
- android:layout_width="match_parent"
- android:layout_height="match_parent"
- android:orientation="vertical"
- android:padding="10dp" >
- <ImageView
- android:id="@+id/viewImage"
- android:layout_width="match_parent"
- android:layout_height="wrap_content"
- android:src="@drawable/camera" />
- </LinearLayout>
- </LinearLayout>

Later the selected image will be displayed in the ImageView.
Step 3
Open "MainActivity" and add the following code to it:
- package com.chhavi.uploadingandviewimage;
- import android.app.AlertDialog;
- import android.content.DialogInterface;
- import android.content.Intent;
- import android.database.Cursor;
- import android.graphics.Bitmap;
- import android.graphics.BitmapFactory;
- import android.net.Uri;
- import android.os.Bundle;
- import android.app.Activity;
- import android.os.Environment;
- import android.provider.MediaStore;
- import android.util.Log;
- import android.view.Menu;
- import android.view.View;
- import android.widget.Button;
- import android.widget.ImageView;
- import java.io.File;
- import java.io.FileNotFoundException;
- import java.io.FileOutputStream;
- import java.io.IOException;
- import java.io.OutputStream;
- public class MainActivity extends Activity {
- ImageView viewImage;
- Button b;
- @Override
- protected void onCreate(Bundle savedInstanceState) {
- super.onCreate(savedInstanceState);
- setContentView(R.layout.activity_main);
- b=(Button)findViewById(R.id.btnSelectPhoto);
- viewImage=(ImageView)findViewById(R.id.viewImage);
- b.setOnClickListener(new View.OnClickListener() {
- @Override
- public void onClick(View v) {
- selectImage();
- }
- });
- }
- @Override
- public boolean onCreateOptionsMenu(Menu menu) {
- // Inflate the menu; this adds options to the action bar if it is present.
- getMenuInflater().inflate(R.menu.main, menu);
- return true;
- }
- private void selectImage() {
- final CharSequence[] options = { "Take Photo", "Choose from Gallery","Cancel" };
- AlertDialog.Builder builder = new AlertDialog.Builder(MainActivity.this);
- builder.setTitle("Add Photo!");
- builder.setItems(options, new DialogInterface.OnClickListener() {
- @Override
- public void onClick(DialogInterface dialog, int item) {
- if (options[item].equals("Take Photo"))
- {
- Intent intent = new Intent(MediaStore.ACTION_IMAGE_CAPTURE);
- File f = new File(android.os.Environment.getExternalStorageDirectory(), "temp.jpg");
- intent.putExtra(MediaStore.EXTRA_OUTPUT, Uri.fromFile(f));
- startActivityForResult(intent, 1);
- }
- else if (options[item].equals("Choose from Gallery"))
- {
- Intent intent = new Intent(Intent.ACTION_PICK,android.provider.MediaStore.Images.Media.EXTERNAL_CONTENT_URI);
- startActivityForResult(intent, 2);
- }
- else if (options[item].equals("Cancel")) {
- dialog.dismiss();
- }
- }
- });
- builder.show();
- }
- @Override
- protected void onActivityResult(int requestCode, int resultCode, Intent data) {
- super.onActivityResult(requestCode, resultCode, data);
- if (resultCode == RESULT_OK) {
- if (requestCode == 1) {
- File f = new File(Environment.getExternalStorageDirectory().toString());
- for (File temp : f.listFiles()) {
- if (temp.getName().equals("temp.jpg")) {
- f = temp;
- break;
- }
- }
- try {
- Bitmap bitmap;
- BitmapFactory.Options bitmapOptions = new BitmapFactory.Options();
- bitmap = BitmapFactory.decodeFile(f.getAbsolutePath(),
- bitmapOptions);
- viewImage.setImageBitmap(bitmap);
- String path = android.os.Environment
- .getExternalStorageDirectory()
- + File.separator
- + "Phoenix" + File.separator + "default";
- f.delete();
- OutputStream outFile = null;
- File file = new File(path, String.valueOf(System.currentTimeMillis()) + ".jpg");
- try {
- outFile = new FileOutputStream(file);
- bitmap.compress(Bitmap.CompressFormat.JPEG, 85, outFile);
- outFile.flush();
- outFile.close();
- } catch (FileNotFoundException e) {
- e.printStackTrace();
- } catch (IOException e) {
- e.printStackTrace();
- } catch (Exception e) {
- e.printStackTrace();
- }
- } catch (Exception e) {
- e.printStackTrace();
- }
- } else if (requestCode == 2) {
- Uri selectedImage = data.getData();
- String[] filePath = { MediaStore.Images.Media.DATA };
- Cursor c = getContentResolver().query(selectedImage,filePath, null, null, null);
- c.moveToFirst();
- int columnIndex = c.getColumnIndex(filePath[0]);
- String picturePath = c.getString(columnIndex);
- c.close();
- Bitmap thumbnail = (BitmapFactory.decodeFile(picturePath));
- Log.w("path of image from gallery......******************.........", picturePath+"");
- viewImage.setImageBitmap(thumbnail);
- }
- }
- }
- }
In the code above, "AlertDialog" will create a pop-up dialog box that will ask the user to choose "Take Photo", in other words capture an image from the camera or "Choose from Gallery" or "Cancel". Note that in both "Choose from Gallery" and "Take Photo", you can add any code in "startActivityForResult".
Output snapshots
Run the application on an Android phone.
The first screen looks like,
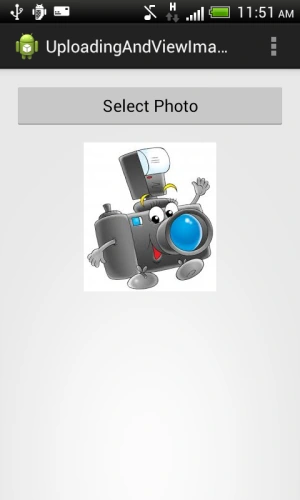
Clicking on the button "Select Photo" you will get the alert dialog box-like,
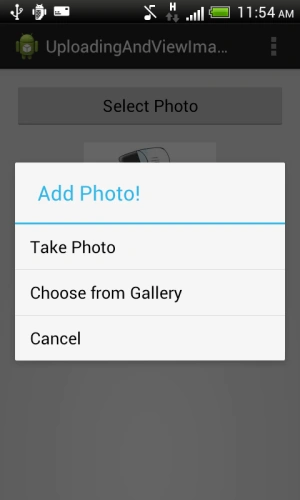
Selecting "Take photo" will open your camera.
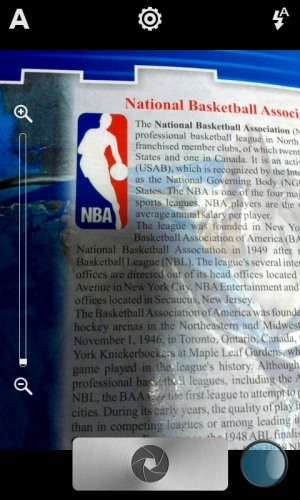
After clicking the photo, you can discard it or save it by selecting the tick mark:

Finally, the image clicked will be displayed in the ImageView.
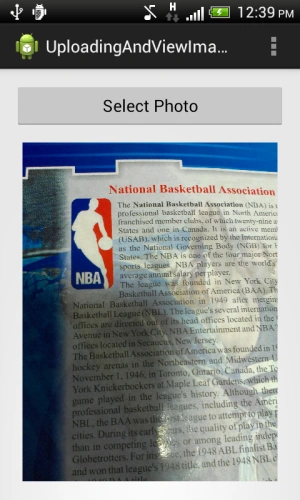
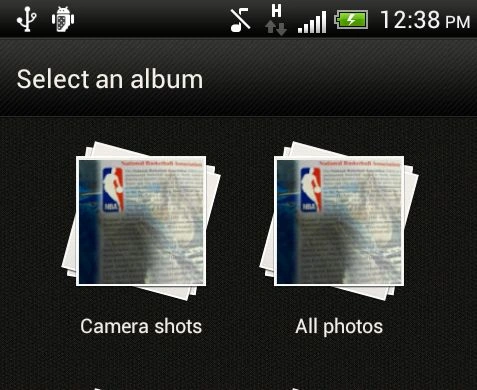
Selecting "Choose from Gallery" will open your gallery (note that the image captured earlier has been added to the phone gallery).
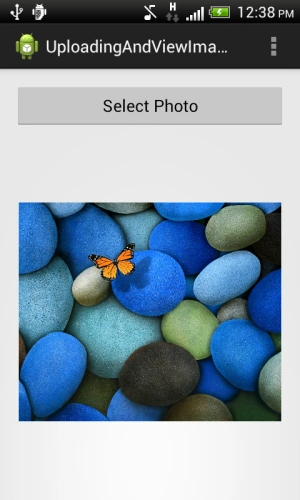
Selecting an image from these albums will be displayed in the ImageView like:
Summary
In this article, we learned about Capture Image From Camera and Select Image From Gallery of Android Phone Using Android Studio.
Thank you... Enjoy coding :)
涛 马Posted Sep 4, 2020, 2:56 PM
Hello, i cannot use camera when I select "take a photo" . I add permission on file. But when I click, the error: android.os.FileUriExposedException: file:///storage/emulated/0/temp.jpg exposed beyond app through ClipData.Item.getUri(). Actually I didn't know what's mean "temp.jpg" in project? Could you explain this?
Asad ChoudharyPosted Apr 27, 2020, 5:39 PM
Nice article, but it's a bit lengthy, Here i have found a very simple article to capture picture with camera in Kotlin Android. https://handyopinion.com/capture-photo-with-camera-in-kotlin-android/
Vikram NegiPosted Aug 3, 2018, 1:39 AM
Thanks a lot
Hassan HasanPosted Mar 17, 2018, 2:36 PM
How i upload a image after selecting image
Sagar PatilPosted Mar 16, 2018, 7:04 AM
Nice article...I need to capture image after 5 seconds of opening camera without user interaction. How can i integrate?
AHMED SUHAILPosted Jan 22, 2018, 3:59 AM
Log.w("path of image from gallery......******************.........", picturePath+""); Here What should I do? Please let me know, because i cannot save images
Kishwer NaheedPosted May 27, 2017, 3:51 AM
Thanks ...It's help me a lot.
Apurba DuttaPosted Apr 21, 2017, 1:24 AM
Private static final int STORAGE_PERMISSION_CODE = 123;
Apurba DuttaPosted Apr 21, 2017, 1:24 AM
//This method will be called when the user will tap on allow or deny @Override public void onRequestPermissionsResult(int requestCode, @NonNull String[] permissions, @NonNull int[] grantResults) { //Checking the request code of our request if ((requestCode == STORAGE_PERMISSION_CODE)||((requestCode == MY_PERMISSIONS_REQUEST_LOCATION))) { //If permission is granted if (grantResults.length > 0 && grantResults[0] == PackageManager.PERMISSION_GRANTED) { //Displaying a toast Toast.makeText(this, "Permission Granted ", Toast.LENGTH_LONG).show(); } else { //Displaying another toast if permission is not granted Toast.makeText(this, "Oops you just denied the permission", Toast.LENGTH_LONG).show(); } } }
Apurba DuttaPosted Apr 21, 2017, 1:24 AM
Private void requestStoragePermission() { if (ContextCompat.checkSelfPermission(this, android.Manifest.permission.CAMERA) == PackageManager.PERMISSION_GRANTED) return; if (ActivityCompat.shouldShowRequestPermissionRationale(this, android.Manifest.permission.CAMERA)) { //If the user has denied the permission previously your code will come to this block //Here you can explain why you need this permission //Explain here why you need this permission } //And finally ask for the permission ActivityCompat.requestPermissions(this, new String[]{ android.Manifest.permission.CAMERA}, STORAGE_PERMISSION_CODE); }
Apurba DuttaPosted Apr 21, 2017, 1:23 AM
@Ankit Srivastava, if you using sdk>=23 then you must provide permission for this activity, it is the permission use, please use
Ankit SrivastavaPosted Mar 25, 2017, 8:36 AM
These codes are not working for me..:( no error but nothing is happening after clicking on image button. Please help
Abdullah khattakPosted Dec 22, 2016, 11:47 AM
It's really helpful thanks..!
kalu singh raoPosted Jul 12, 2016, 6:24 AM
Nice...
Hyfy InnovationsPosted Jun 2, 2016, 4:34 AM
Hi I'm applying this code in Fragment class but it doesn't support Activity Result..!
Rohit GuptaPosted Mar 5, 2016, 10:53 AM
hii... at the time of running, app is unfortunatelly stopped is show immulator
Jerex GarciaPosted Sep 8, 2015, 12:37 PM
Hi. I follow this tutorial and it works fine. But when i use take photo using camera, then I take picture using portrait, the output shows the picture in landscape form. How to make it portrait?
G GopiPosted Aug 13, 2015, 12:36 AM
By using your code my can't saved particular path in my camera give me the solution
G GopiPosted Aug 13, 2015, 12:33 AM
I want to know where should be captured image can be saved
Chaya bhagyaPosted Jul 27, 2015, 4:56 AM
Thnks for the code,bt i wanted to knw where the capturedimage from camera and selecting image from gallery be stored??
ejaz ulhaqPosted Jul 13, 2015, 3:26 AM
how to make stamps (seal) in android studio
Jatin ValiaPosted Jun 26, 2015, 1:45 PM
and i am able to get the preview from choose a gallery option but i am not getting the take photo results
Jatin ValiaPosted Jun 26, 2015, 1:43 PM
i am getting an error at android:src="@drawable/camera"in layout
Shalin BhavsarPosted Jun 3, 2015, 3:17 AM
Hi...When i want to clicked image in Gallery folder,not available inside...may i know that is that any prob.. my SdkVersion is 8 to 22
Shalin BhavsarPosted Jun 2, 2015, 9:12 AM
Hi ..I will set up the code and testing it..any thing happen then ll let u,...thanks
Pahaa El-hussinyPosted May 3, 2015, 4:30 PM
thank you you made my day.. keep it up (Y)
Sanjay NarisePosted Apr 14, 2015, 2:00 AM
thank you
Bikesh TriconPosted Apr 6, 2015, 9:47 AM
Thanks Chhavi ... code is very useful.
Vikas GoyalPosted Jan 31, 2015, 2:12 AM
not working
Ag.Pro. DevPosted Dec 28, 2014, 10:05 AM
you made my day successful
Gattamaneni VenkatanarasimhamPosted Dec 26, 2014, 5:29 AM
i have problem at (R.menu.main,menu) how to solve
Zuhry ZuhryPosted Dec 12, 2014, 2:13 AM
how to implement this code with android fragment??
ammy sandhuPosted Dec 9, 2014, 12:01 PM
this code is not working properly !!
Happy TimePosted Aug 19, 2014, 12:54 AM
Thank a lot.
mikael ezzatiPosted Jul 14, 2014, 1:29 AM
Thanks Chhavi Goel , how can cache last image in image view? so when user close program and come back again not need to set or take image again?
Yashdeep RamawatPosted Feb 12, 2014, 9:31 AM
Thanks Chhavi ... code is very useful... keep it up !!
mehdi SunasaraPosted Jan 25, 2014, 3:14 AM
Can you please explain the program using comments.....
wallace harrisPosted Jan 13, 2014, 5:29 AM
images are not getting saved
Akira RayjinPosted Aug 12, 2013, 1:32 AM
selecting from gallery 3-4 times make application out of memory.. in Bitmap thumbnail = (BitmapFactory.decodeFile(picturePath)); is there any solution for this?