

Introduction
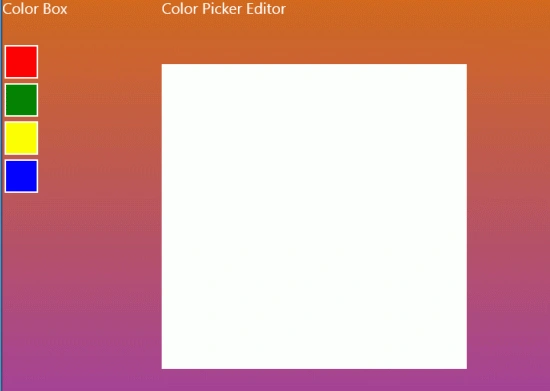
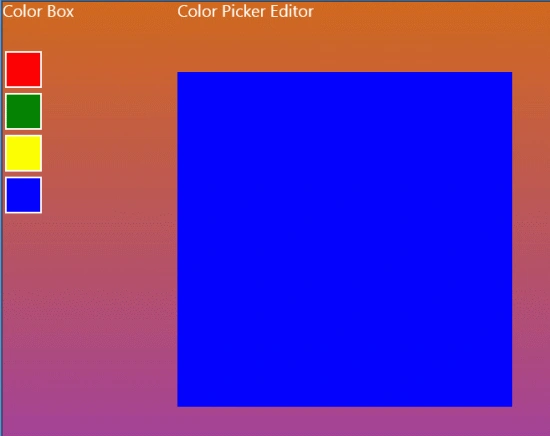
In this article we will make an application for a Color picker editor. It is like a sub-set of a paints application. In a color picker application, we can get the color according to our choice. This application contains a color box, where a set of colors is available for picking the color and the second part is the editor.
Here we will take a frame as an object for using the color picker application. From the color box we can pick the color; just click on the color as our choice.
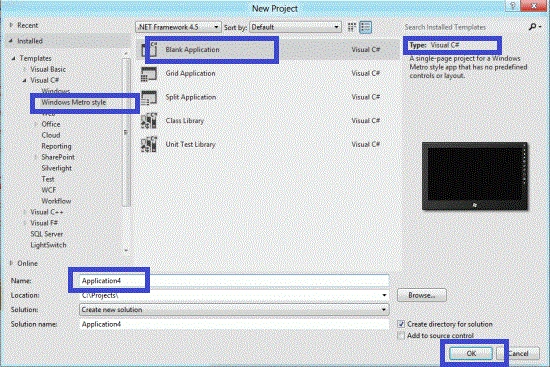
Step 1 : First, you will create a new Metro Style Application. Let us see the description with images of how you will create it.
- Open Visual Studio 2011
- File -> New -> Project
- Choose Template -> Visual C# ->Metro Style Application
- Rename the application
Step 2 : In the Solution Explorer there are two files that we will primarily work with; the BlankPage.xaml and BlankPage.xaml.cs files.
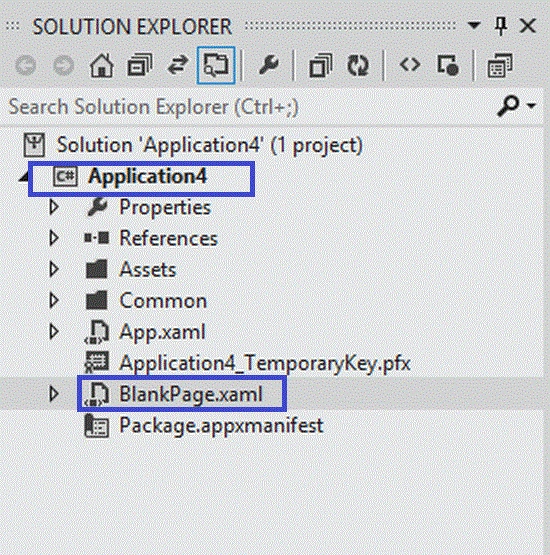
Step 3 : The BlankPage.xaml file is as in the following code:
Code :
<Page
x:Class="Application4.BlankPage"
xmlns="http://schemas.microsoft.com/winfx/2006/xaml/presentation"
xmlns:x="http://schemas.microsoft.com/winfx/2006/xaml"
xmlns:local="using:Application4"
xmlns:d="http://schemas.microsoft.com/expression/blend/2008"
xmlns:mc="http://schemas.openxmlformats.org/markup-compatibility/2006"
mc:Ignorable="d">
<Grid x:Name="LayoutRoot">
<Grid.RowDefinitions>
<RowDefinition Height="0.010*"/>
<RowDefinition Height="0.081*"/>
<RowDefinition Height="0.058*"/>
</Grid.RowDefinitions>
<Grid.ColumnDefinitions>
<ColumnDefinition Width="0.050*"/>
<ColumnDefinition Width="0.333*"/>
</Grid.ColumnDefinitions>
<Grid.Background>
<LinearGradientBrush EndPoint="0.5,1" StartPoint="0.5,0">
<GradientStop Color="BlueViolet" Offset="1"/>
<GradientStop Color="Chocolate"/>
</LinearGradientBrush>
</Grid.Background>
<StackPanel Grid.Row="1" Grid.Column="0">
<Button x:Name="RedB" Background="Red" Height="50" Width="50" Click="RedB_Click_1">
</Button>
<Button x:Name="GreenB" Background="Green" Height="50" Width="50" Click="GreenB_Click_1">
</Button>
<Button x:Name="YelloB" Background="Yellow" Height="50" Width="50" Click="YelloB_Click_1">
</Button>
<Button x:Name="BlueB" Background="Blue" Height="50" Width="50" Click="BlueB_Click_1">
</Button>
</StackPanel>
<Grid Grid.Column="1" Grid.Row="1" HorizontalAlignment="Left">
<Frame x:Name="Frame1" Height="400" Width="400" Background="White"></Frame>
</Grid>
<TextBlock Grid.Row="0" Grid.Column="0" Text="Color Box" FontSize="20" Foreground="White">
</TextBlock>
<TextBlock Grid.Row="0" Grid.Column="1" Text="Color Picker Editor" FontSize="20" Foreground="White">
</TextBlock>
</Grid>
</Page>
Step 4 : The BlankPage.xaml.cs file is as in the following code:
Code :
using System;
using System.Collections.Generic;
using System.IO;
using System.Linq;
using Windows.Foundation;
using Windows.Foundation.Collections;
using Windows.UI.Xaml;
using Windows.UI.Xaml.Controls;
using Windows.UI.Xaml.Controls.Primitives;
using Windows.UI.Xaml.Data;
using Windows.UI.Xaml.Input;
using Windows.UI.Xaml.Media;
using Windows.UI.Xaml.Navigation;
namespace Application4
{
public sealed partial class BlankPage : Page
{
public BlankPage()
{
this.InitializeComponent();
}
protected override void OnNavigatedTo(NavigationEventArgs e)
{
}
private void RedB_Click_1(object sender, RoutedEventArgs e)
{
Frame1.Background = new SolidColorBrush(Windows.UI.Colors.Red);
}
private void GreenB_Click_1(object sender, RoutedEventArgs e)
{
Frame1.Background = new SolidColorBrush(Windows.UI.Colors.Green);
}
private void YelloB_Click_1(object sender, RoutedEventArgs e)
{
Frame1.Background = new SolidColorBrush(Windows.UI.Colors.Yellow);
}
private void BlueB_Click_1(object sender, RoutedEventArgs e)
{
Frame1.Background = new SolidColorBrush(Windows.UI.Colors.Blue);
}
}
}
Code 5 : After running this code the output looks like this:
Click the Red color in the Color Box.
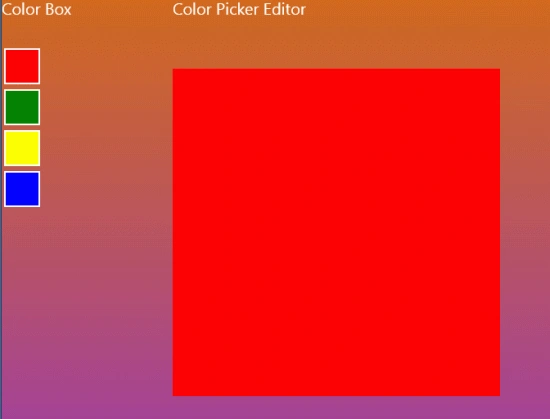
Click the Blue color in the Color Box.
Jean PaulPosted May 28, 2012, 8:55 PM
Cool! That was a colorful application