

This configuration will help the users to configure the policy that you want to bind on Central Administration with your choice.
How to configure it?
Let’s open Central Admin of SharePoint on your machine. On your Windows desktop screen, click Start >> Administrative Tools >> SharePoint 2013 Central Administration.
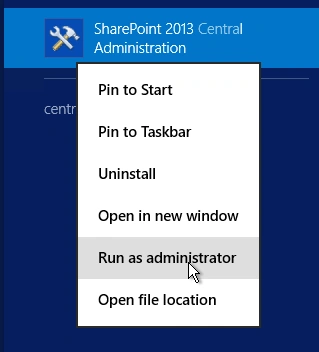
- Run it as an administrator to have the elevated privileges.
- You will see the screenshot given below.
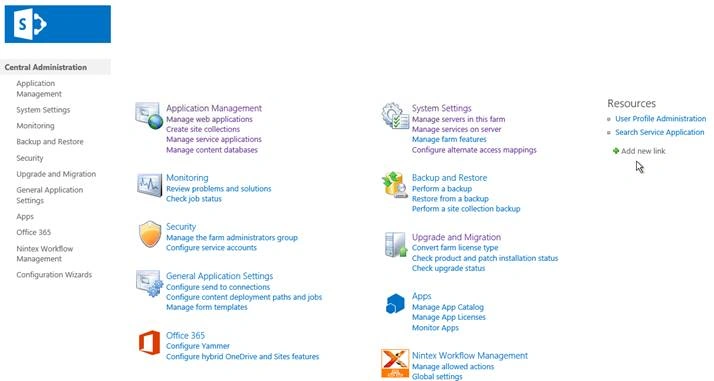
- Central Admin is configured under the categories given above.
- Click Security.
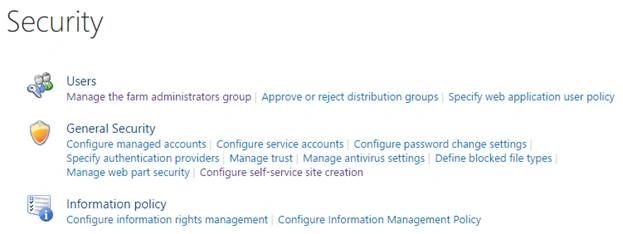
- Go to Information Policy.

- Click Configure information management policy.
- You will see the screen given below.
Configure

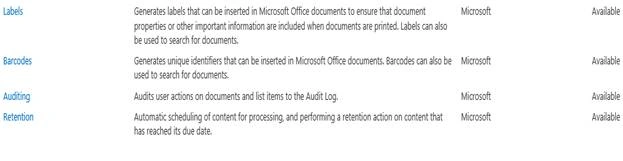
- Information Management Policy Configuration
Here, you choose among the default SharePoint policy, which you want to use on the Central Admin Server.
As per the screen above, we have 4 default policies.
- Labels
It generates the labels, which can be inserted in Microsoft Office documents to ensure that the document properties or other important information are included when the documents are printed. Labels can also be used to search for the documents. - Barcodes
It generates unique identifiers, which can be inserted in Microsoft Office documents. Barcodes can also be used to search for the documents. - Auditing
This audits the user actions on the documents and the list items to the Audit Log. - Retention
This involves automatic scheduling of the content for processing and performing a retention action on the content, which has reached its due date.
When you click on the policy, you can choose, if you want this policy needs to be avalilable for the use in new site and list policies or not.
Once you click OK, the configuration selected by you will be added by default in all the sites within the web and the policy will be able to abide by the sites.
In this article, we saw how to configure information management policy in SharePoint 2013 Central Administration. There are more articles to come on Central Administration. Until then, keep reading and keep learning.
Humayun Kabir MamunPosted Mar 20, 2017, 3:15 AM
Thanks Manpreet for this nice article...