

Introduction
List of Parts
- Arduino Uno
- Potentiometer
- Bread Board
- Resistor
- BlueTooth (HC05).
- Mobile Phone
- Hook up wires
Software Required
- Arduino IDE
- Android App.
Parts Explanation
- The BlueTooth HC05 is used to communicate the message from Arduino to the mobile phone.
- It is a wireless device to send the message clearly.
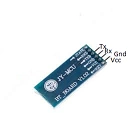 Figure1 - HC05
Connection
- In the Bluetooth, the Vcc should be connected to the 5v supply of the Arduino board.
- In the Bluetooth, the Gnd should be connected to the Gnd supply of the Arduino board.
- In the Bluetooth, the Tx should be connected to the Rx of the Arduino board.
- In the Bluetooth, the Rx should be connected to the Tx of the Arduino board.
LCD Display To Arduino Uno
- Fix the LCD in 16 to 2 of the bread board.
- The 16 pin to the Gnd.
- The 15 pin to the Vcc.
- The 14 pin to the Digital pin 12.
- The 13 pin to the Digital pin 11.
- The 12 pin to the Digital pin 05.
- The 11 pin to the Digital pin 04.
- The 01 pin to the Gnd.
- The 02 pin to the Vcc.
- The 03 pin to the potentiometer.
- The 04 pin to the Digital pin 03.
- The 05 pin to the Gnd.
- The 06 pin to the Digital pin 02.
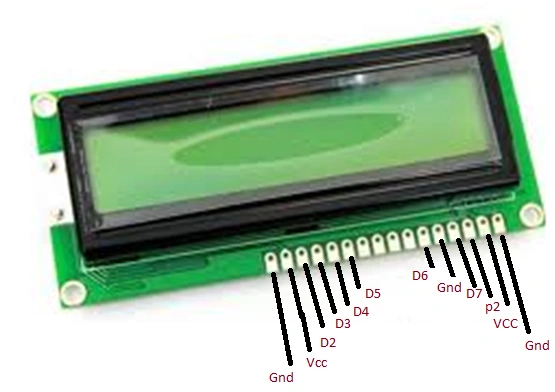 Figure 2 - LCD Display
Potentiometer To LCD Display
- Connect the Arduino board to the LCD display as per the preceding figure.
- The Vin should be connected to the LCD display in 03.
Programming For LCD Coding
- #include <LiquidCrystal.h>
- LiquidCrystal lcd(12, 11, 5, 4, 3, 2);
- String readString;
- void setup() {
- Serial.begin(9600);
- lcd.begin(16, 2);
- }
- void loop() {
- while(Serial.available()){
- delay(50);
- char c=Serial.read();
- readString+=c;
- }
- if(readString.length()>0){
- Serial.println(readString);
- if (readString =="button_1"){
- lcd.clear();
- lcd.print("Mert Arduino");
- }
- if (readString =="button_2"){
- lcd.clear();
- lcd.print("Hello World");
- }
- if (readString =="button_3"){
- lcd.clear();
- lcd.print("Please Subscribe");
- }
- if (readString =="button_4"){
- lcd.clear();
- lcd.print("Youtube Channel");
- }
- readString="";
- }
- }
- It will be used to display the LCD connection by the above code that is uploaded to the Arduino Board.
- It will simply connect and switch ON the LCD display.
- The potentiometer is used to display and adjust.
- Then we can upload the Bluetooth coding what we have done in the MIT App Inverter.
- In the MIT App Inverter we can set the 4 buttons and Save the program.
OUTPUT
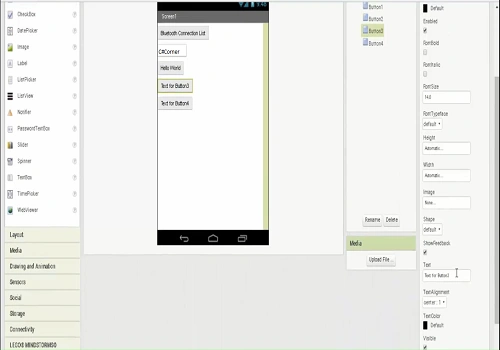
Figure 4 - Output1
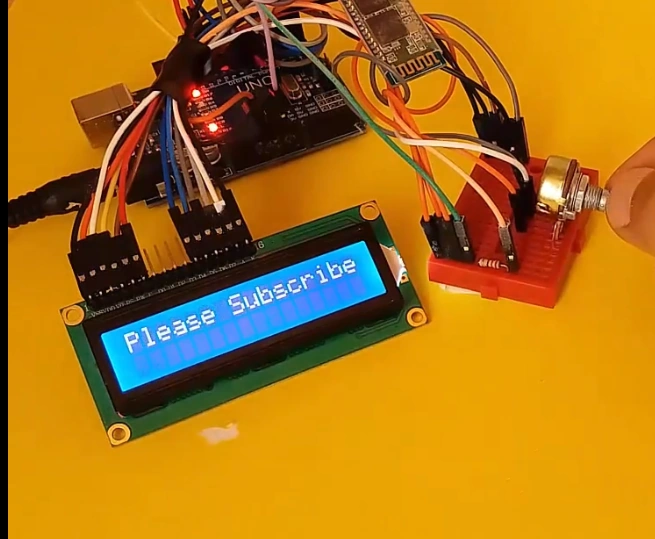
Figure 5 - Output 2
Bright MawungwaPosted Nov 12, 2018, 2:37 PM
My lcd is displaying wierd characters ,can you help
Hadshana KamalanathanPosted Jul 21, 2018, 7:17 PM
Nice one...
Munish APosted Oct 17, 2017, 1:52 PM
Nice Article sister, ineed some suuggestion to build a bigger product using IoT Can you spread some light....
RakeshPosted Feb 27, 2017, 1:45 PM
Good article share
Bryian TanPosted Feb 27, 2017, 8:21 AM
Thanks for sharing ... ??
Vishal PrajapatiPosted Feb 27, 2017, 7:36 AM
Worth reading.....
Anu VPosted Feb 26, 2017, 5:58 AM
Thanks for sharing..nice..........
Vignesh ManiPosted Feb 24, 2017, 5:27 PM
Good article Karthiga.