

This article explains how to create a Farm solution using Visual Studio 2013.
Step 1
Open Visual Studio 2013 with Run as administrator.
Start Visual Studio 2013.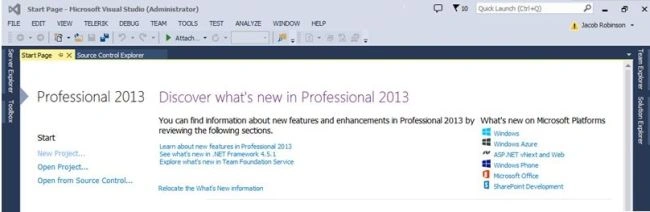
Step 2
Click "File" -> "New" -> "Project...".
The New Project window will appear. Now click the Office/SharePoint templates and then select SharePoint 2013 - Empty Project.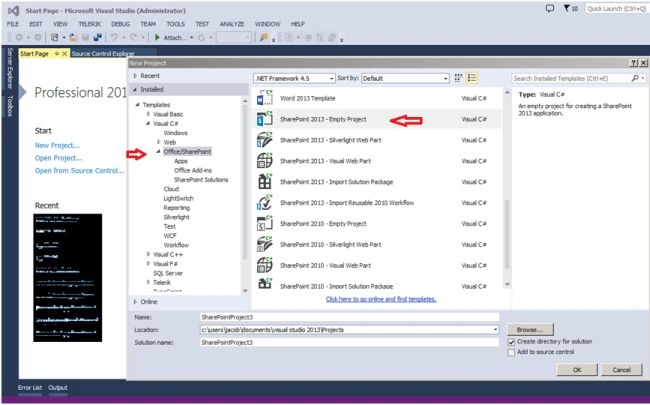
Step 3
Enter the name of the solution and click the Ok button.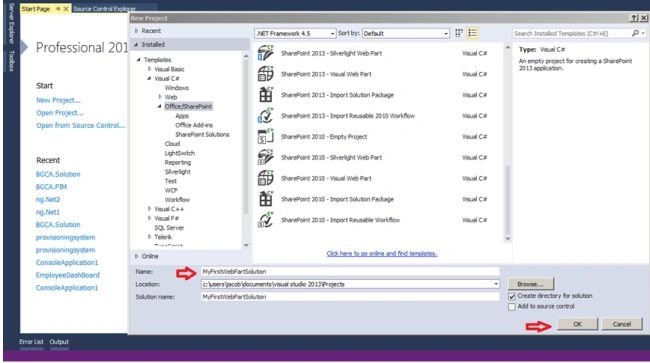
Step 4
Once clicking the Ok button, the following popup will appear. Enter your SharePoint site URL and click the Validate button. Once Validate, check the Deploy as a Farm solution checkbox.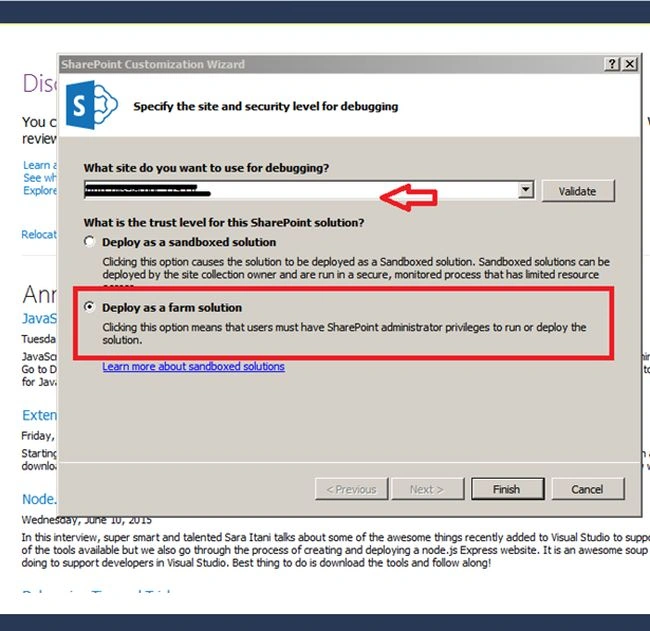
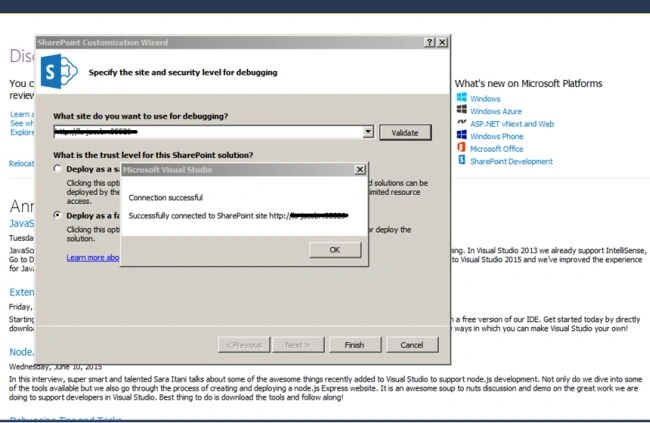
Step 5
Click OK and click the Finish button.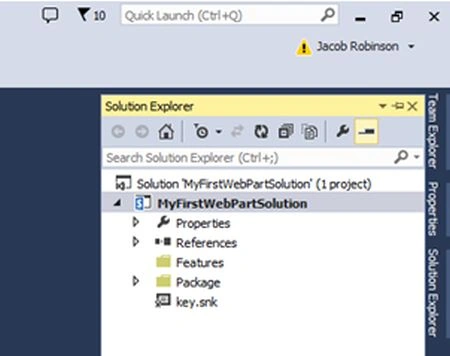
Step 6
Right-click the project in the solution then click Add and click on New Item.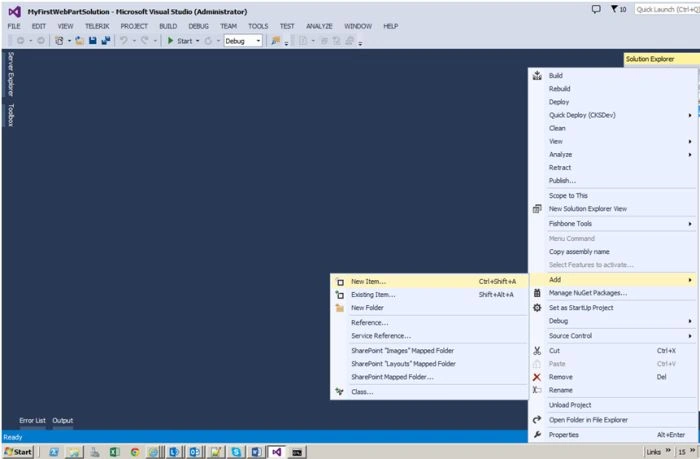
Step 7
The following screen will appear.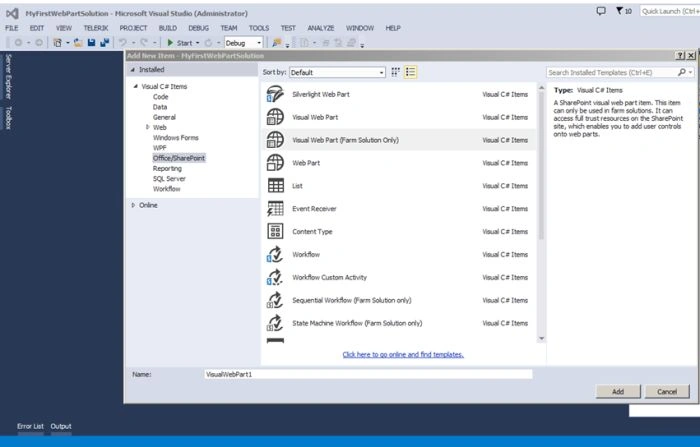
Step 8
Select Visual Web Part (Farm Solution only) and enter the name of the Web Part and then click the Add button.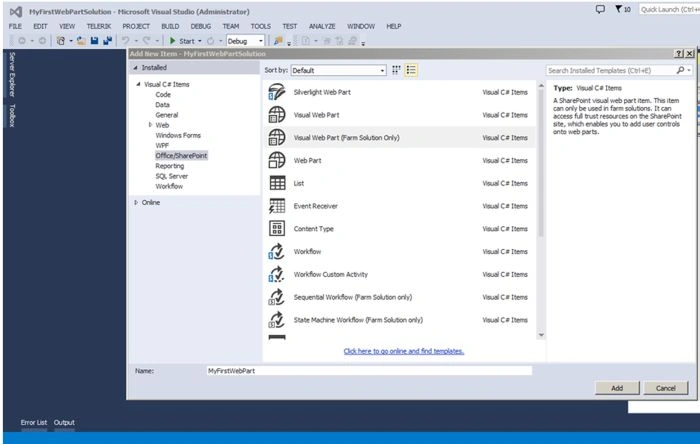
Step 9
Your new web part has been added to the solution as can be seen in the Solution Explorer.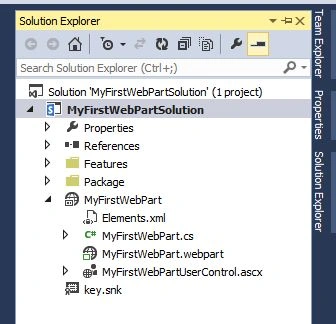
Step 10
Open your .ascx page (MyFirstWebPartUserControl.ascx) and create your design. Here I have added a label.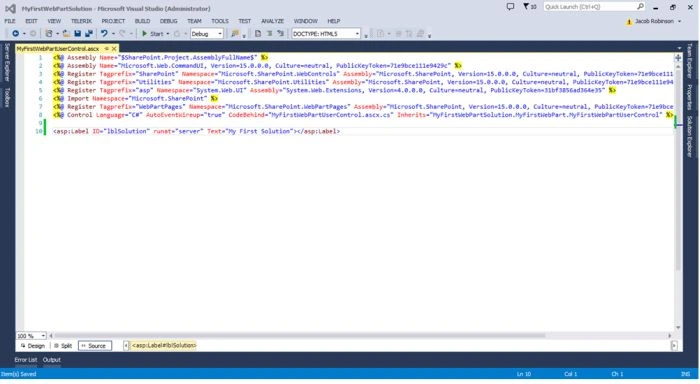
Step 11
Build your solution.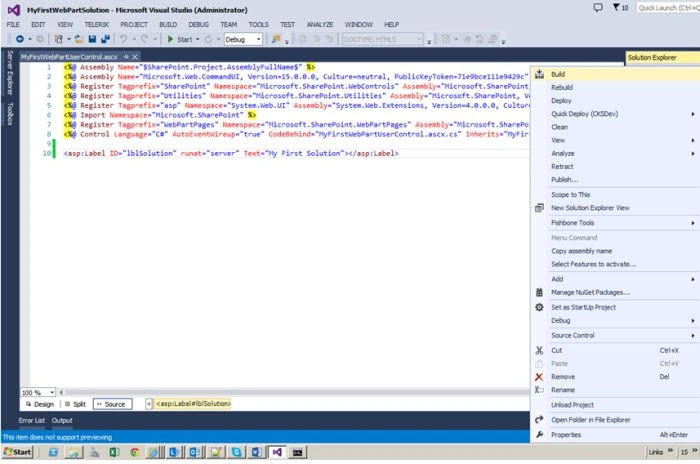
Step 12
Deploy your solution.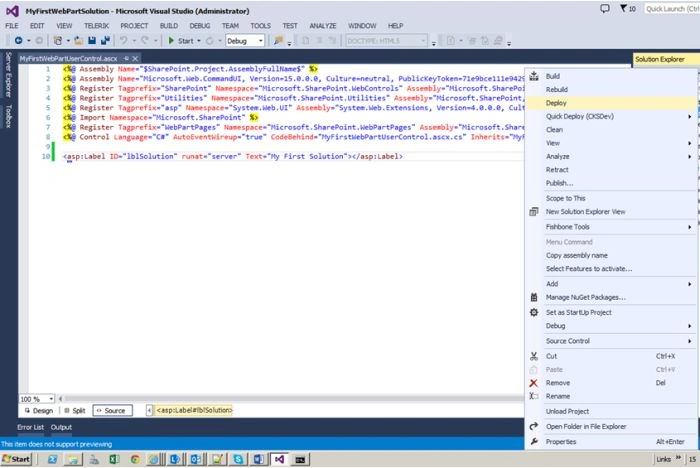
Finally the Farm solution is created and deployed to the SharePoint site.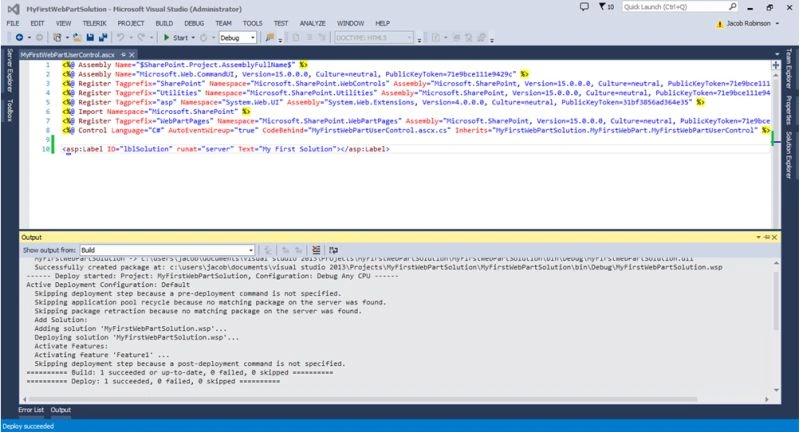
Summary
In this article we explored how to create a Farm solution using Visual Studio 2013.
SriramPosted Jul 6, 2015, 3:23 AM
Good job...........
Santhakumar MunuswamyPosted Jul 3, 2015, 2:41 PM
Thanks for nice article.:)
Sibeesh VenuPosted Jul 3, 2015, 1:35 AM
Good one.