

This article will help you to create your first website on Microsoft Azure. Microsoft Azure provides you one of the easiest ways to create your website within minutes and get it hosted instantly.
One of the most important things to create a website on Azure is to have an Azure account. Microsoft provides a free trial account for one month to explore the features of Azure. Use the following procedure to create your first website.
1. First create your account on Microsoft Azure. After you create your account, go to "manage.windowsazure.com" and login into your account. After you login successfully, you will see the home screen that has many options in it.
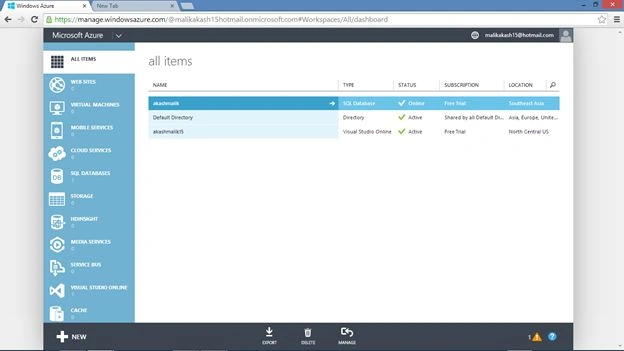
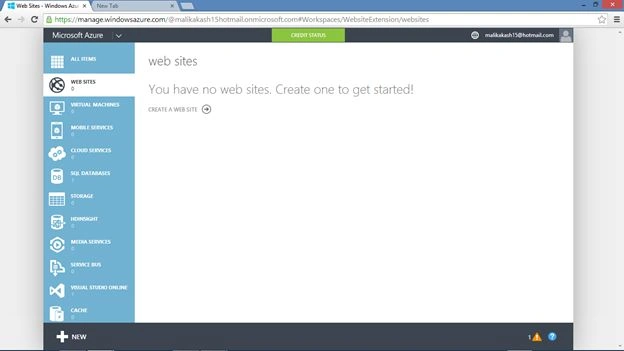
2. Click on "Website" and you will see there are no websites created. So let's create a website. Click on "Create a Web Site".
3. After you click on "Create a Website", you will get a menu where you will have three choices to create your website . These are :
- Quick Create: It allows you to just specify a URL for your website and tasks like deployment are done later.
- Custom Create: It allows you to create your website with options like creating a new database or deploying from source controls
- From Gallery: It allows you to create a website using existing templates from other sites.
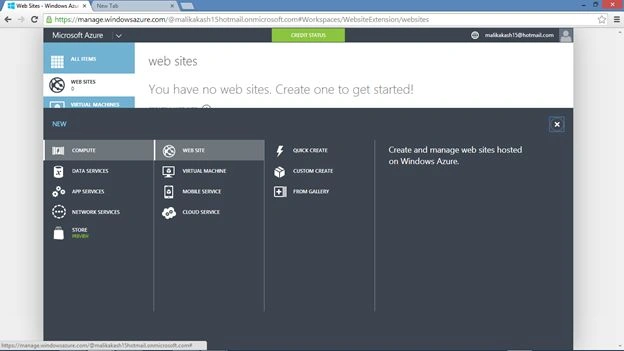
4. We will choose the third option to create our website. We will use an existing template and use it in our website. When you click on "From Gallery", you will get a list of options from where you can choose a site depending on the type of site you are creating like a blog site or e commerce site.
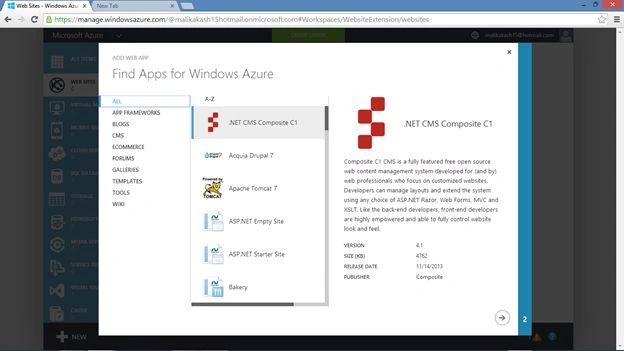
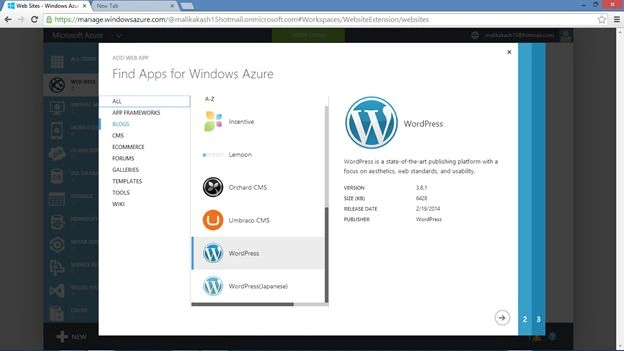
5. From the given list you can choose the options that suits your website theme. I chose Blogs and selected Word Press as my template. Click on next (the arrow at the bottom-right corner).
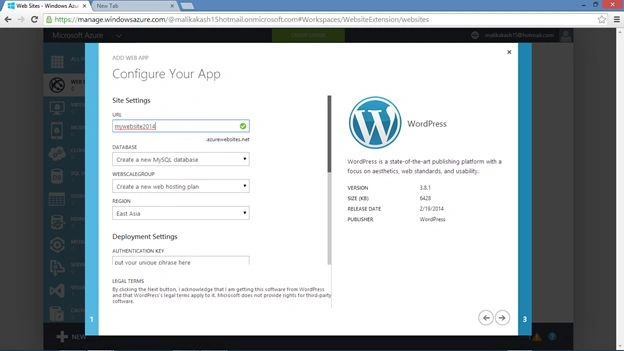
6. Specify the URL of your website. I gave it the mywebsite2014. You can also select the region where you want to host the website depending on the maximum user count that your website will get from that region. Click on the arrow for next.
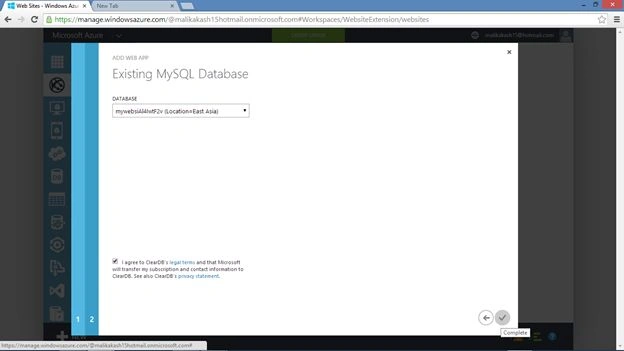
7. This screen will provide you the information regarding the name of the database created and the region where the site will be hosted. Click on the Terms and Conditions check box and click on complete (the right tick mark at the bottom-right corner).
8. You will see a screen that will provide you information that your site is being created.
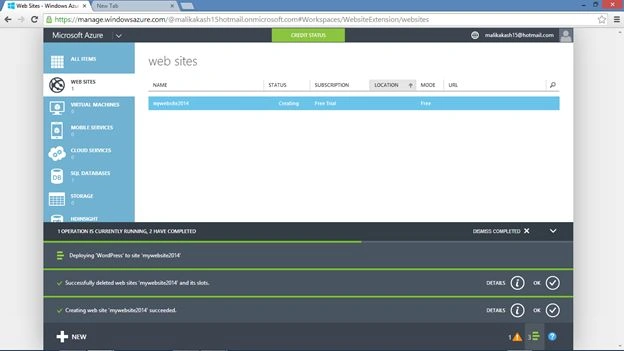
9. After some time, the site will be deployed and the status will change to running.
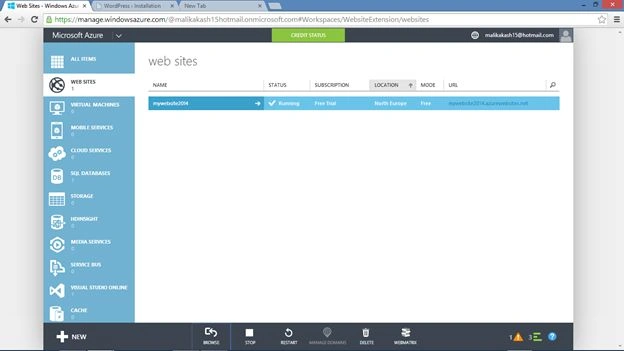
10. Click on the browse button that you see in the bottom and it will take you to your newly created website. Since I chose Word Press, it asks me for some information regarding the web site.
5. From the given list you can choose the options that suits your website theme. I chose Blogs and selected Word Press as my template. Click on next (the arrow at the bottom-right corner).
6. Specify the URL of your website. I gave it the mywebsite2014. You can also select the region where you want to host the website depending on the maximum user count that your website will get from that region. Click on the arrow for next.
7. This screen will provide you the information regarding the name of the database created and the region where the site will be hosted. Click on the Terms and Conditions check box and click on complete (the right tick mark at the bottom-right corner).
8. You will see a screen that will provide you information that your site is being created.
9. After some time, the site will be deployed and the status will change to running.
10. Click on the browse button that you see in the bottom and it will take you to your newly created website. Since I chose Word Press, it asks me for some information regarding the web site.
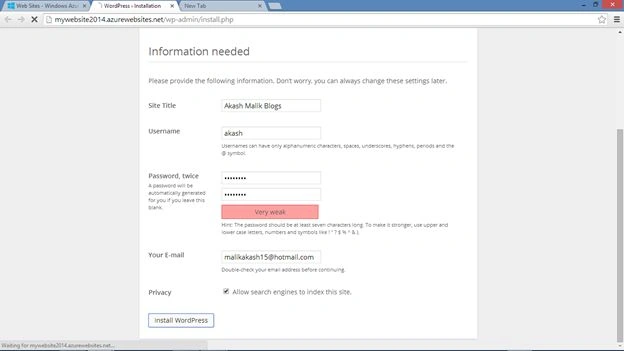
11. After you fill in the information and click on "install Word Press" a login screen will be shown and you need to enter the login details that you have provided above.
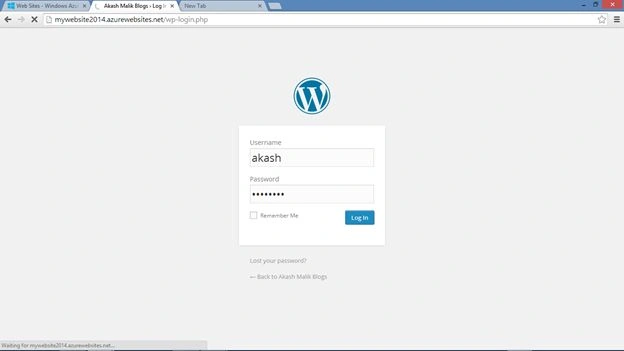
12. After you Login, you will see the Home screen of your web site. Congratulations! You have successfully created your first website using Azure.

If you have any query then please feel free to contact me. I hope this article was useful to you.
K P Singh ChundawatPosted May 9, 2015, 9:10 AM
Greate ....its very Helpful for me thanks for sharing Akash Malik..
Anupam SinghPosted Jul 21, 2014, 3:43 AM
very helpful..
Akash MalikPosted Apr 14, 2014, 12:40 PM
Hey Sam Currently Microsoft allow only 10 Websites for a free account with a total storage amount of 1 gb.
Sam HobbsPosted Apr 14, 2014, 12:15 PM
I think this article will help many people. I have already created a web site in Azure. I am not sure, but I think it is possible to create web sites that will remain free but the amount of storage for a free web site is small and Microsoft does not provide support for free web sites.