

Introduction
In today's blog, we are going to explore how we can collect data from Microsoft Forms and create in SharePoint List using Power Automate flow.
- Microsoft Forms: is an easy-to-use tool for making quizzes, polls, and surveys. But we need those data to better summarize and store them in the proper format for analysis, and we use SharePoint list.
- Microsoft SharePoint Lists: is a way for businesses to work together that is built on the web. It lets users make, share, and handle custom lists in a safe way. These lists offer a flexible way to organize data like contacts, projects, or workflows. They also make it easier for teams to work together and for organizations to make decisions based on data.
- Microsoft Power Automate: is a cloud-based service that allows users to create and automate workflows and tasks across multiple applications and services without needing developer assistance.
We will use all these tools to create a row in the SharePoint List.
So first, we need to create a Microsoft form in Microsoft 365. I created a form that looks like this image.
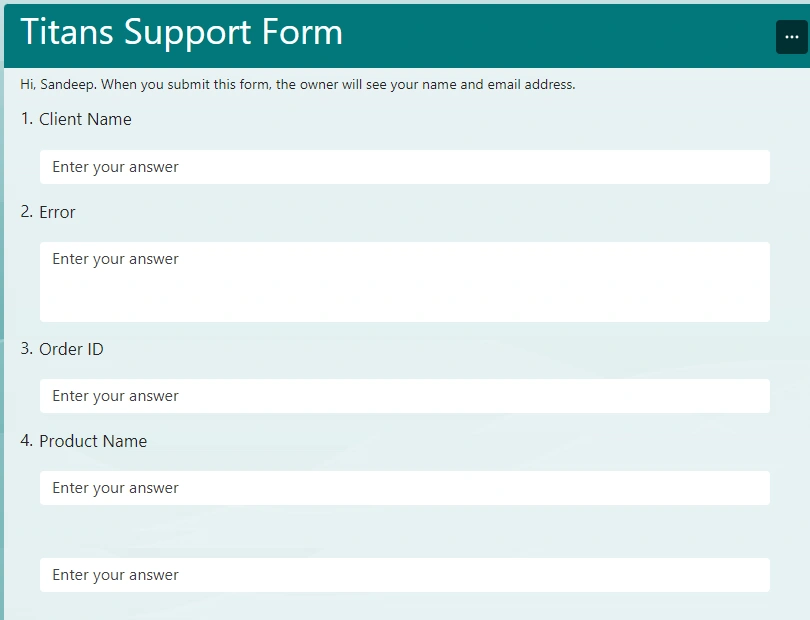
Where we have fields like – 1. Client Name, 2. Error, 3. Order ID, Product Name.
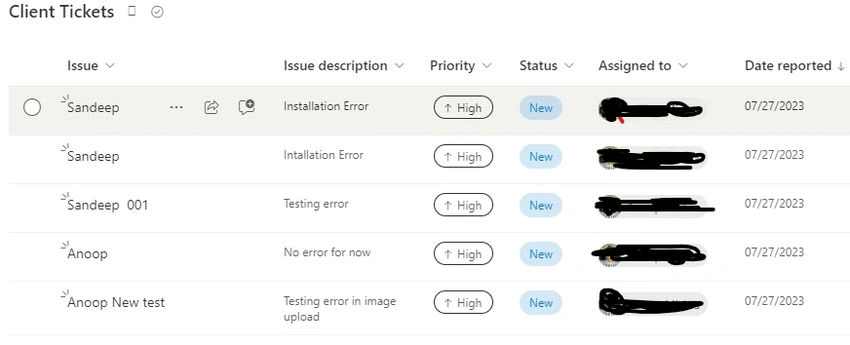
I also created a SharePoint Listing using an issue tracker template' which I named "Client Tickets".
So the next step is to create an automated flow using Power Automate, which we can access using Microsoft 365 app launcher. In Power Automate, use these steps.
Create a new flow
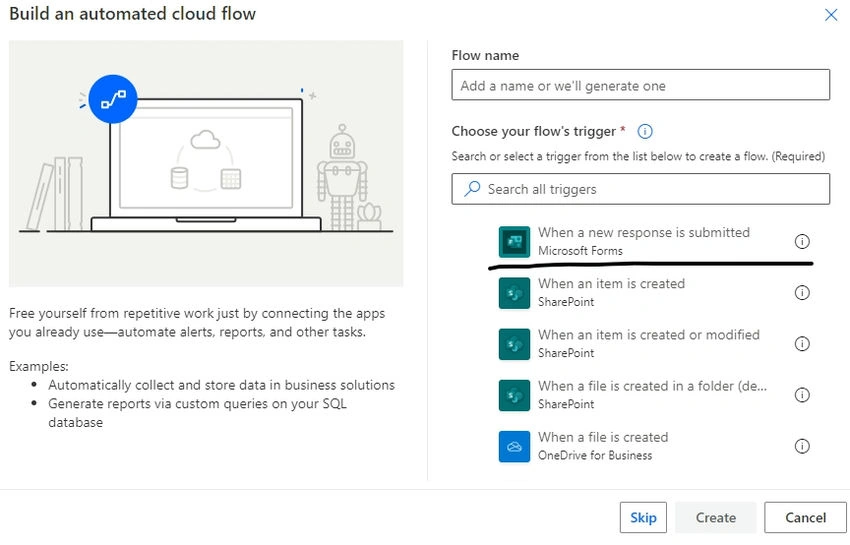
Click "Create" on the left side of the screen and choose "Automated cloud flow."
Select a Trigger
Select a trigger from the flow 'When a new response is submitted'.
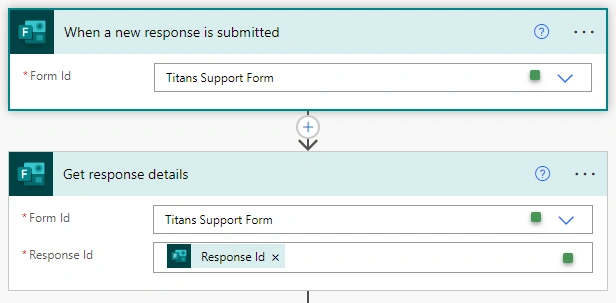
Select form id in steps like this.

After setting the trigger, click on "New step" and then "Add an action." This will add a new action.
'Get Response from from' to collect the response add form id, and then response id.
Choose SharePoint
Create item action. Type "SharePoint" into the search bar, click on it, and then select "Create item." And map fields from dynamics content using popups.
Set the action up
You'll need to give the Site Address and List Name. These should match the site and List in SharePoint where you want to add the row.
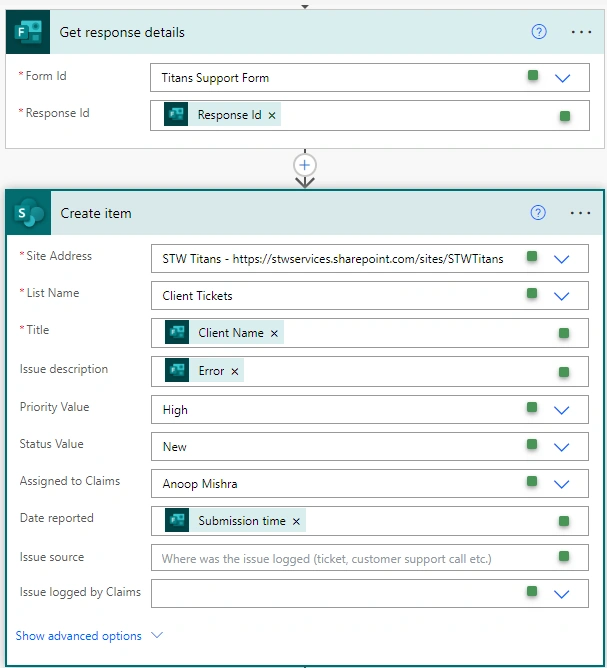
Add info to List
Next, fill in the fields that match the columns of your SharePoint group. You can enter static values or content that change based on your flow's trigger or events that have come before.
Save your flow and try it out
In the top right corner of the screen, click "Save." Now you can check your flow by clicking "Test" and following the on-screen instructions.
This is how you will get submitted form data in the SharePoint list.
Conclusion
In today's topic, we discussed how we can create an automated flow to grab data from Microsoft form and insert it in SharePoint List using Microsoft Low code and No code way.
Join the conversation! Your thoughts help the community grow.