

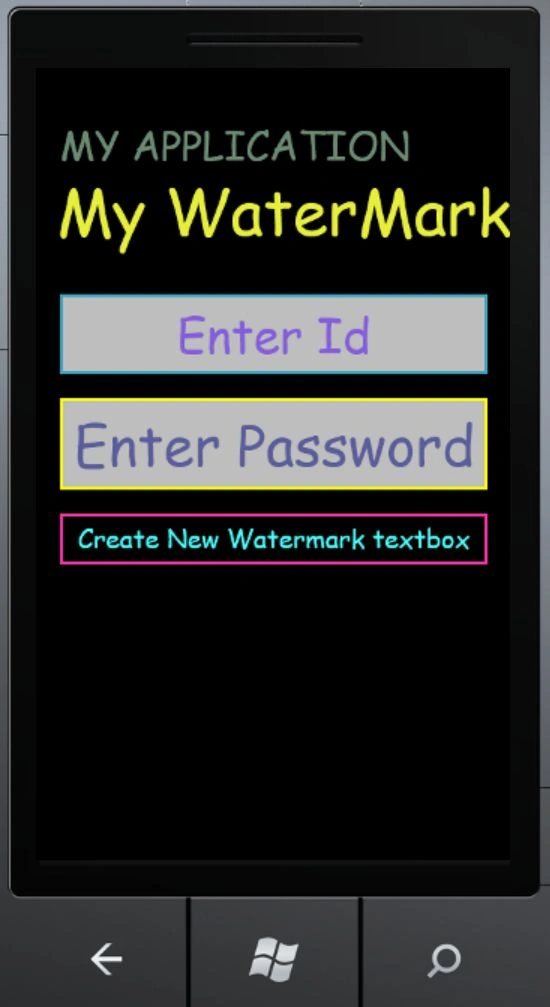
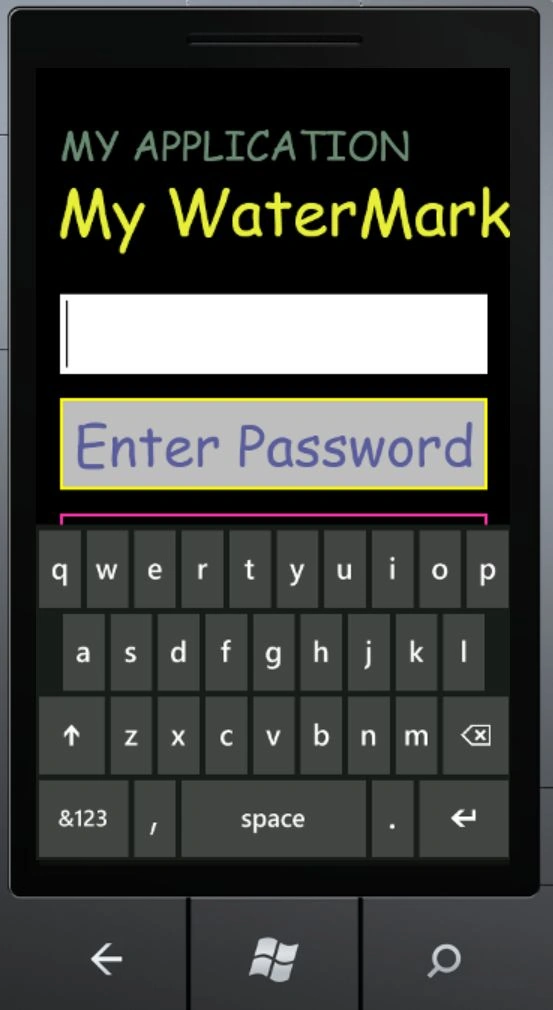
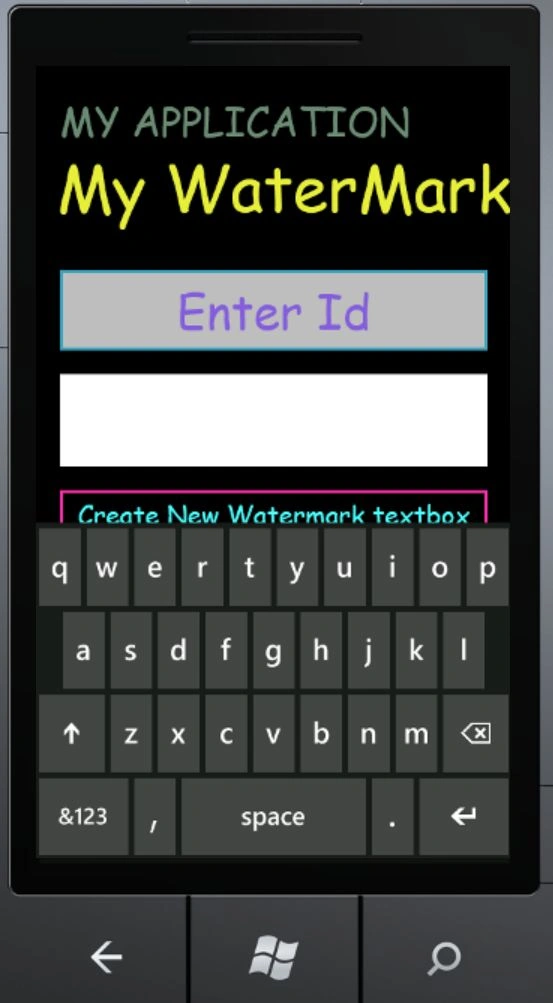
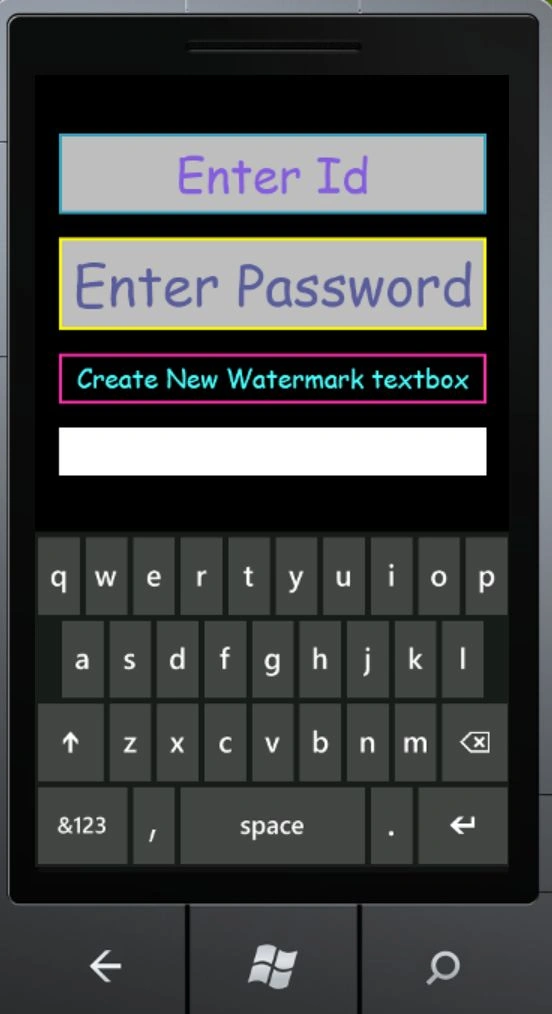
Now it's time to create some special effects in Windows Phone 7. In this article we are going to create a watermark effect on the TextBox control from Windows Phone 7. Further as you know about the watermark effect which means that whenever we will click on the TextBox control and it will be hidden so that we can write the text inside the TextBox control. If we don't write inside the TextBox control then it again shows the watermark effect as well. So the information to use a watermark effect is that it tells you for which thing the TextBox control is used and what you have to do to write inside the TextBox. So this is the useful effect for building any page and if we have many entries through TextBox then to identify that which TextBox is used for what thing then we can identify it easily so let's we have to see the steps which is given below to implement such type of functionality.
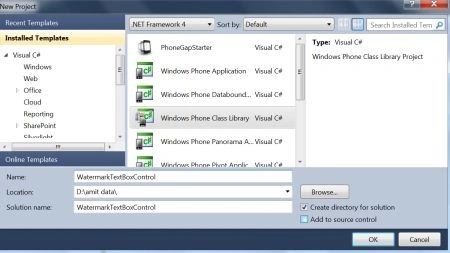
Step 1: In this step we have to take the Windows Phone class library.
- First open the Visual Studio 2010
- Go to File->New->Project
- Select the template Silverlight for Windows Phone->Windows Phone Class library
- Give it a name as you choose
- Click OK.
Step 2: In this step we have to write the code for the WatermarkTextBox.cs file which will be the name of the class library.
Code:
using System;
using System.Net;
using System.Windows;
using System.Windows.Controls;
using System.Windows.Documents;
using System.Windows.Ink;
using System.Windows.Input;
using System.Windows.Media;
using System.Windows.Media.Animation;
using System.Windows.Shapes;
namespace WatermarkedTextBoxControl
{
public class WatermarkedTextBox : TextBox
{
ContentControl WatermarkContent;
public static readonly DependencyProperty WatermarkProperty =
DependencyProperty.Register("Watermark", typeof(object), typeof(WatermarkedTextBox), new PropertyMetadata(OnWatermarkPropertyChanged));
public static readonly DependencyProperty WatermarkStyleProperty =
DependencyProperty.Register("WatermarkStyle", typeof(Style), typeof(WatermarkedTextBox), null);
public Style WatermarkStyle
{
get { return base.GetValue(WatermarkStyleProperty) as Style; }
set { base.SetValue(WatermarkStyleProperty, value); }
}
public object Watermark
{
get { return base.GetValue(WatermarkProperty) as object; }
set { base.SetValue(WatermarkProperty, value); }
}
public WatermarkedTextBox()
{
DefaultStyleKey = typeof(WatermarkedTextBox);
}
public override void OnApplyTemplate()
{
base.OnApplyTemplate();
this.WatermarkContent = this.GetTemplateChild("watermarkContent") as ContentControl;
if(WatermarkContent != null)
{
DetermineWatermarkContentVisibility();
}
}
protected override void OnGotFocus(RoutedEventArgs e)
{
if (WatermarkContent != null && string.IsNullOrEmpty(this.Text))
{
this.WatermarkContent.Visibility = Visibility.Collapsed;
}
base.OnGotFocus(e);
}
protected override void OnLostFocus(RoutedEventArgs e)
{
if (WatermarkContent != null && string.IsNullOrEmpty(this.Text))
{
this.WatermarkContent.Visibility = Visibility.Visible;
}
base.OnLostFocus(e);
}
private static void OnWatermarkPropertyChanged(DependencyObject sender, DependencyPropertyChangedEventArgs args)
{
WatermarkedTextBox watermarkTextBox = sender as WatermarkedTextBox;
if(watermarkTextBox != null && watermarkTextBox.WatermarkContent !=null)
{
watermarkTextBox.DetermineWatermarkContentVisibility();
}
}
private void DetermineWatermarkContentVisibility()
{
if (string.IsNullOrEmpty(this.Text))
{
this.WatermarkContent.Visibility = Visibility.Visible;
}
else
{
this.WatermarkContent.Visibility = Visibility.Collapsed;
}
}
}
}
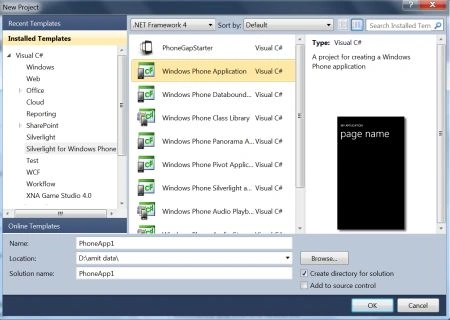
Step 3 : In this step you have to take a Windows Phone application to use the watermark TextBox control; see the figure given below.
- Start the Visual Studio 2010
- Take a Windows Phone application
- Give it a name
- Click OK.
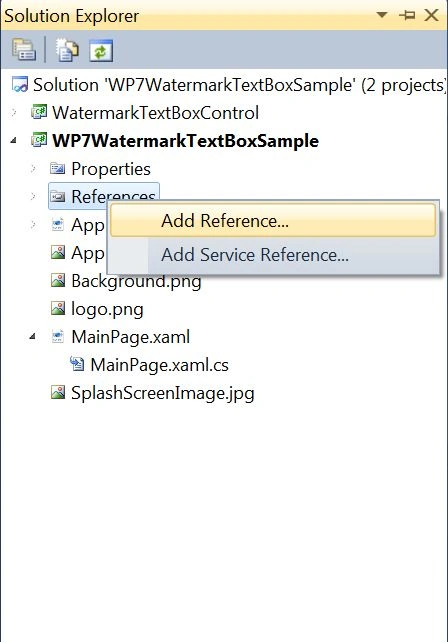
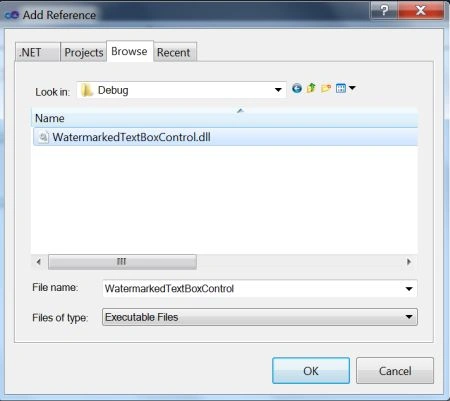
Step 4: After taking the new project let you have to add the reference of the dll file which was created during build of the Windows Phone library; let us see from where you have to add that library reference and also add the project; see the figure given below.
Step 5: In this step you have to add the whole library to the Windows Phone application; for adding the project you have to see the images given below.
- Go to solution explorer
- Select add new project
- Select the name of the library project you made
- Click OK.
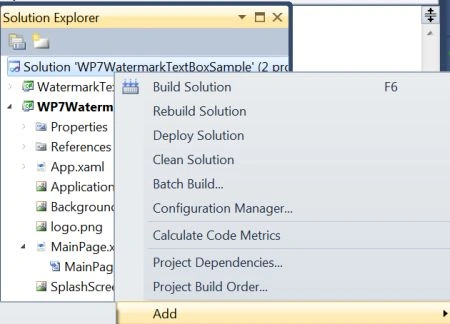
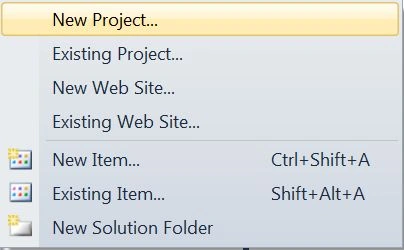
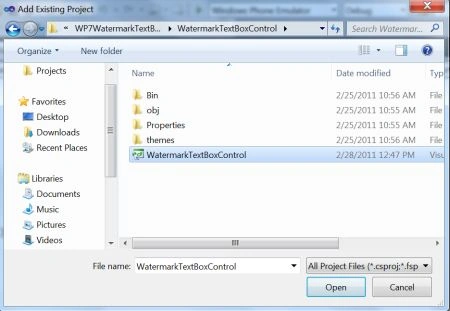
Step 6: In this step we will see how the project will be added whenever we add the existing project; see the figure given below.
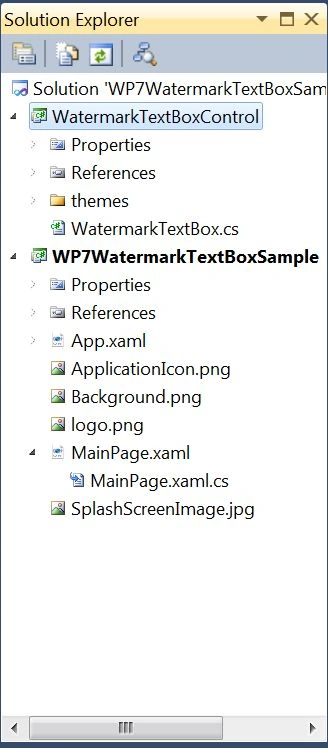
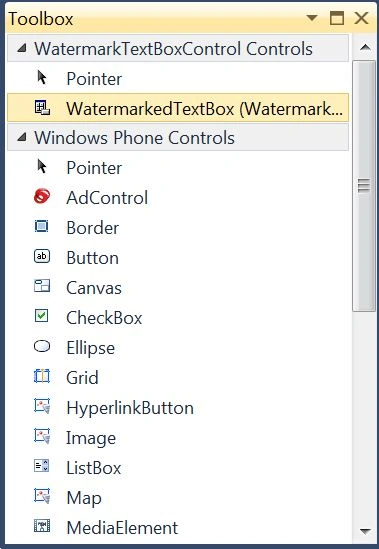
Step 7: In this step you will see how it will appear inside your toolbox item; see the figure given below:
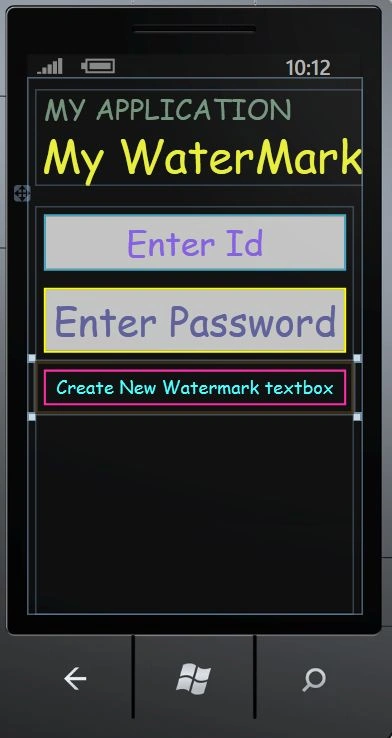
Step 8: In this step you will see that if we want to create the watermark TextBox using the button click then you can easily do that; have a look at the code given below:
Code: MainPage.xaml.cs
using System;
using System.Collections.Generic;
using System.Linq;
using System.Net;
using System.Windows;
using System.Windows.Controls;
using System.Windows.Documents;
using System.Windows.Input;
using System.Windows.Media;
using System.Windows.Media.Animation;
using System.Windows.Shapes;
using Microsoft.Phone.Controls;
using WatermarkedTextBoxControl;
namespace WP7WatermarkTextBoxSample
{
public partial class MainPage : PhoneApplicationPage
{
// Constructor
public MainPage()
{
}
private void Button_Click(object sender, RoutedEventArgs e)
{
WatermarkedTextBox textBox = new WatermarkedTextBox();
textBox.Watermark = "Test Watermark";
this.ContentPanel.Children.Add(textBox);
}
}
}
Umesh RathodPosted Jun 15, 2015, 5:33 AM
how to make watermark at left.
janakPosted Sep 11, 2012, 9:52 AM
Excellent work.