

In this article, I am going to describe, how to create a SQL Server Agent job step, which executes SQL scripts in SQL Server 2012, using SQL Server Management Studio. I am giving you a example to take backup (.BAK) file of SQL Server database on a daily basis at some specific time, which is given in the job scheduler.
SQL Server Management Studio can be used to create a database backup job to take backup of a user database. Just follow some steps and UI work processes to create a simple backup job, run the job and you can see the results on the screen.
Step 1- SQL Server Management Studio and login with your credentials.
Step 2- After connecting to SQL Server, Expand Object Explorer=>SQL Server agent=>Expand Job=>Right click=>select in menu "New job". See the image, given below-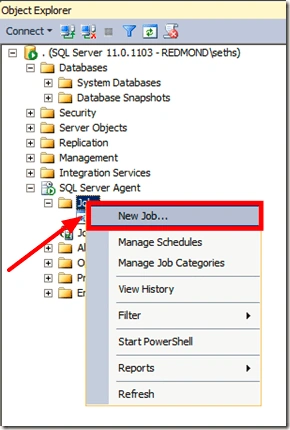
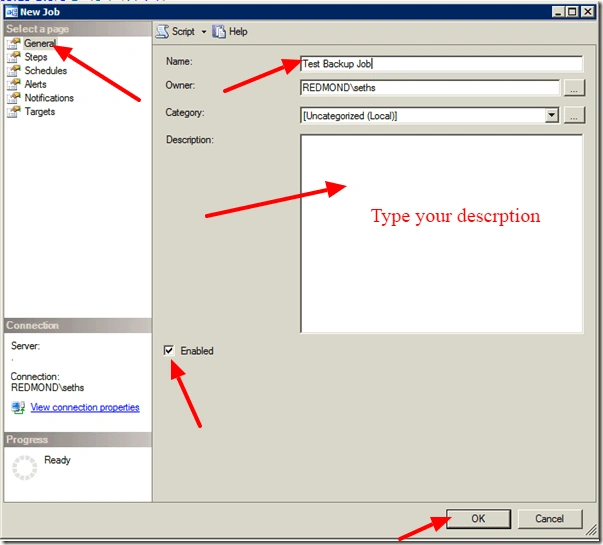
Step 3- Select General=>type name of SQL agent job. You can write the description also. See the image, given below-
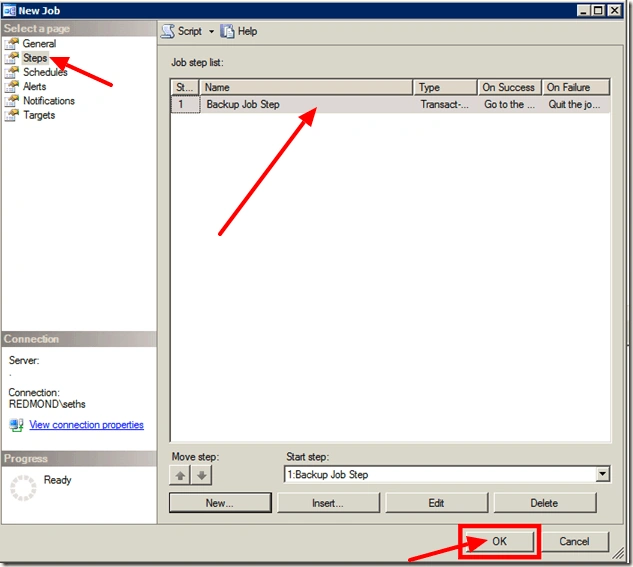
Step 4- Select Steps=>Click "New"=>"OK" on bottom of the screen. See the image, given below-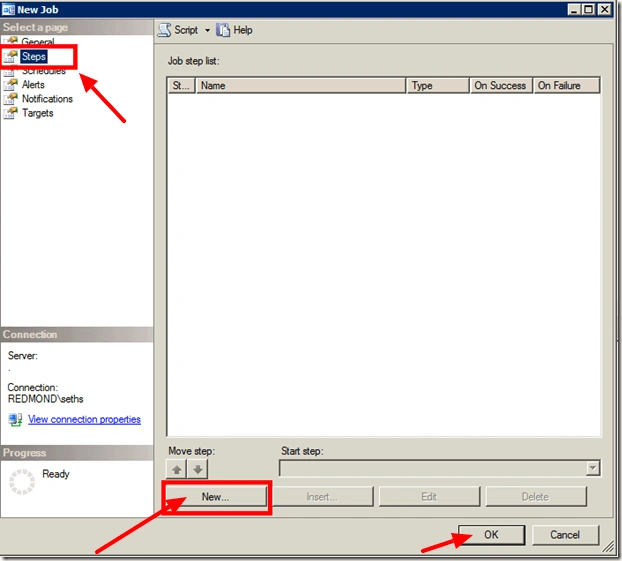
After clicking new, open new tab and see in next screen.
Step 5- Select General=>type Step name=>Command. In command panel, you can use SQL query. See the image, given below-
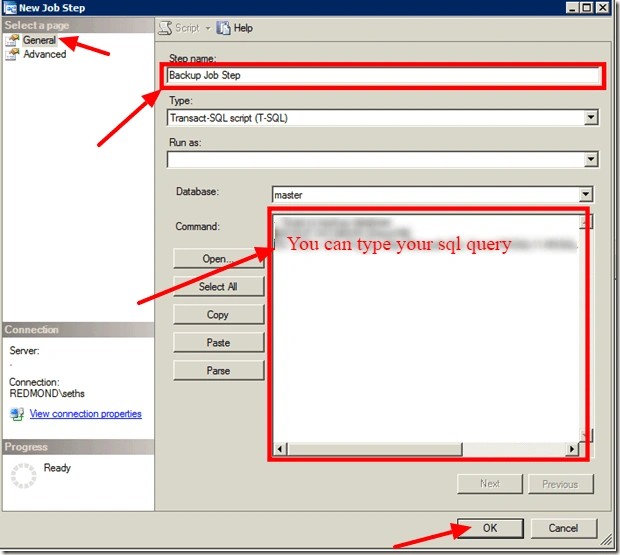
Here, my query is used to take backup of SQL database. I have created a cursor to take backup files of the database.
- Copy-paste code here to remove the line numbers.1. DECLARE @name VARCHAR(50) -- database name
- DECLARE @path VARCHAR(256) -- path for backup files
- DECLARE @fileName VARCHAR(256) -- filename for backup
- DECLARE @fileDate VARCHAR(20) -- used for file name
- -- specify database backup directory
- SET @path = 'C:\Backup\'
- -- specify filename format
- SELECT @fileDate = CONVERT(VARCHAR(20),GETDATE(),112)
- DECLARE db_cursor CURSOR FOR
- SELECT name
- FROM master.dbo.sysdatabases
- WHERE name IN ('TestDB')
- OPEN db_cursor
- FETCH NEXT FROM db_cursor INTO @name
- WHILE @@FETCH_STATUS = 0
- BEGIN
- SET @fileName = @path + @name + '_' + @fileDate + '.BAK'
- BACKUP DATABASE @name TO DISK = @fileName
- FETCH NEXT FROM db_cursor INTO @name
- END
- CLOSE db_cursor
- DEALLOCATE db_cursor
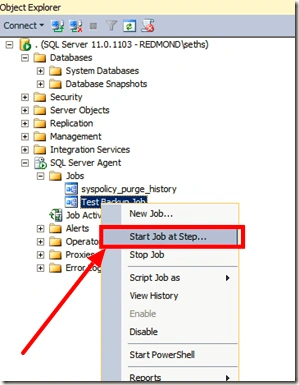
Step 7- Now, you can see in jobs menu, your job has been created and is ready to start. Afterwards, you can start your job. See the image, given below-
Step 8- After clicking "Start job at step", your job is running and performing, according to your query. See the image, given below-
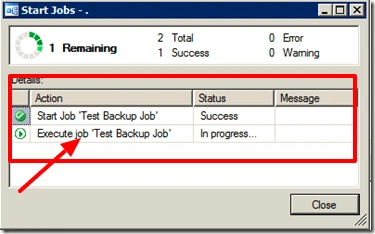
Also, you can check the status of the job in this panel.
Step 9- After job completion, you can see the "success" status for this job. See the image, given below-
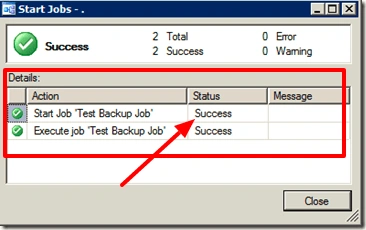
Afterwards, you can check your back file (.BAK) file, which has been created on the specified path.
Step 10- After job completion, you can see the history of the job. See the image, given below-
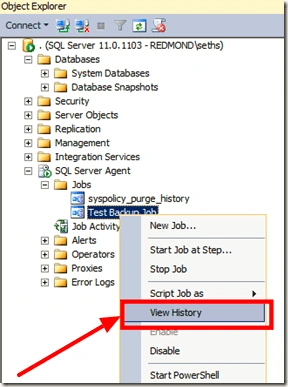
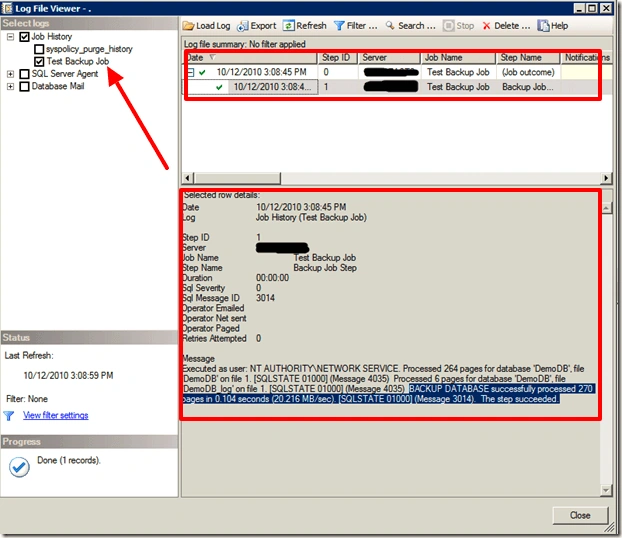
Afterwards, you can see whole information and history of your job. See the image, given below-
Manav PandyaPosted Sep 15, 2016, 10:19 AM
Great approach for beginner ...
SubashPosted Sep 14, 2016, 12:24 AM
Nice one sir
Bikesh SrivastavaPosted Sep 6, 2016, 12:35 PM
Thanks
Midhun TpPosted Sep 6, 2016, 11:55 AM
Good one
Prasanna MuraliPosted Sep 6, 2016, 11:39 AM
Nice post....