

Introduction
This article shows how to create a Checkbox List. In this application we create a dropdown list of checkboxes in which we can select one or more records.
Now let's see the application
Step 1
Use the following procedure to create the sample application using the Web API:
- Start Visual Studio 2013.
- From the Start Window select "New Project".
- Select "Installed" -> "Templates" -> "Visual C#" -> "Web" -> "Visual Studio 2012" and select "ASP.NET MVC4 Web Application".
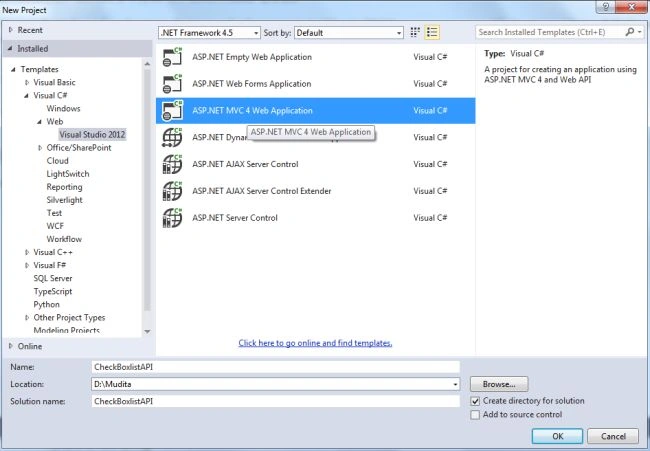
- Click on the "OK" button.
- From the MVC4 project window select "Web API".
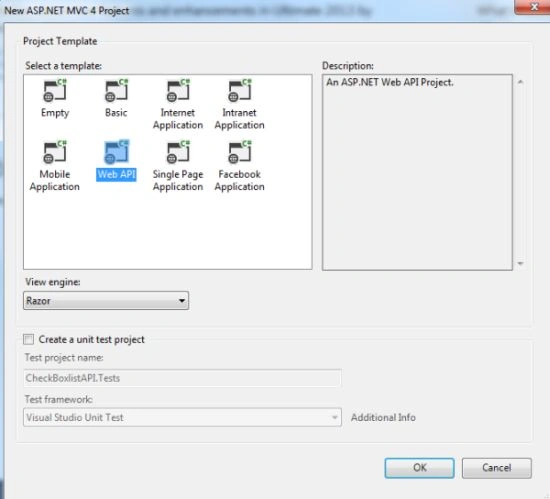
- Click on the "OK" button.
Step 2
Use the following procedure to create a Model class:
- In the "Solution Explorer".
- Right-click on the Model Folder.
- Select "Add" -> "Class".
- Select "Installed" -> "Visual C#" and select "Class".
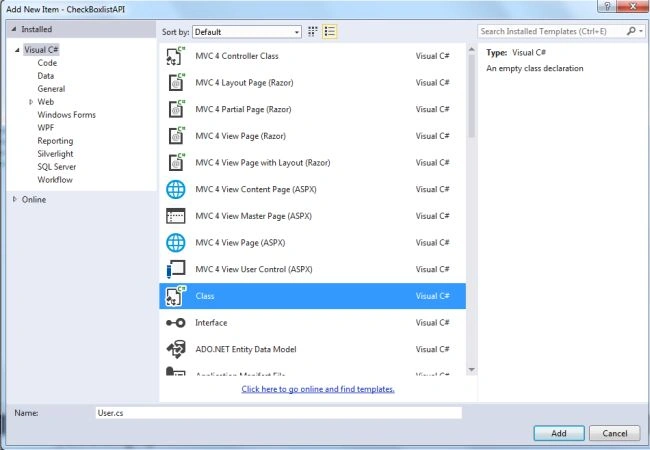
- Click on the "OK" button.
Add the following Code:
- using System;
- using System.Collections.Generic;
- using System.Linq;
- using System.Web;
- using System.Web.Mvc;
- namespace CheckBoxlistAPI.Models
- {
- public class User
- {
- public IList<SelectListItem> User_Name { get; set; }
- }
- }
Step 3
Use the following procedure to create a Controller:
- In the "Solution Explorer".
- Right-click on the "Controller Folder".
- Select "Add" -> "Controller".
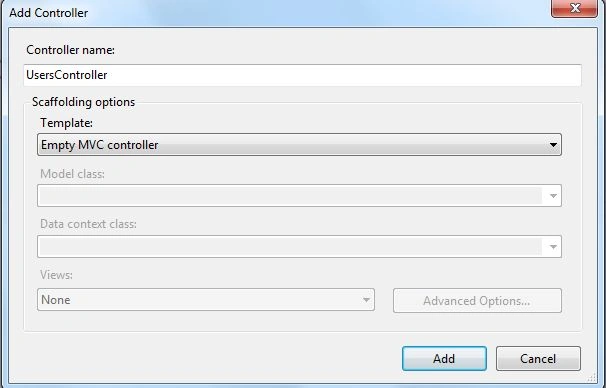
- Select "MVC Controller" from the template.
- Click on the "Add" button.
Add the following Code:
- using System;
- using System.Collections.Generic;
- using System.Linq;
- using System.Web;
- using System.Web.Mvc;
- using CheckBoxlistAPI.Models;
- namespace CheckBoxlistAPI.Controllers
- {
- public class UsersController : Controller
- {
- //
- // GET: /Users/
- public ActionResult Index()
- {
- return View();
- }
- public ActionResult UserView()
- {
- User obj = new User();
- List<SelectListItem> Username = new List<SelectListItem>();
- Username.Add(new SelectListItem{Text = "User1", Value="1"});
- Username.Add(new SelectListItem{Text ="User2",Value="2"});
- Username.Add(new SelectListItem { Text = "User3", Value = "3" });
- Username.Add(new SelectListItem { Text = "User4", Value = "4" });
- obj.User_Name = Username;
- return View(obj);
- }
- }
- }
Step 4
Add a new View:
- In the UsersController.
- Right-click on the "UserView" ActionResult.

- Select "Add View".
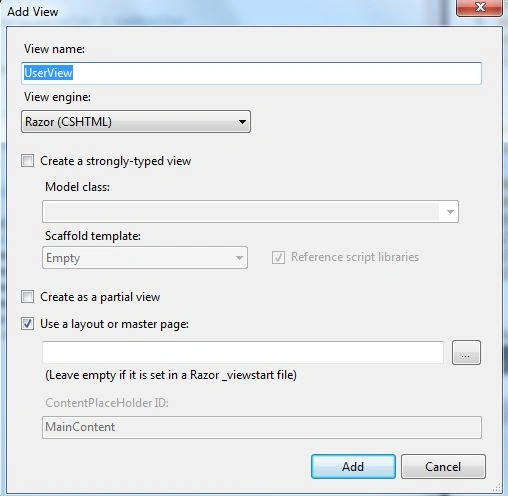
- Click on the "Add" button.
Add the following code:
- @model CheckBoxlistAPI.Models.User
- @{
- ViewBag.Title = "UserView";
- }
- <h2>UserView</h2>
- <script src="~/Scripts/jquery-1.8.2.min.js"></script>
- <script>
- $(document).ready(function () {
- $('.chklst').click(function () {
- var getcid = $(this).attr('id');
- var ischk = $('#' + getcid).is(':checked');
- if ($('#' + getcid).is(':checked') == true) {
- $('#td' + $(this).val()).css("color", "Green");
- $('#td' + $(this).val()).css("background-color", "Pink");
- }
- else {
- $('#td' + $(this).val()).css("color", "Black");
- $('#td' + $(this).val()).css("background-color", "white");
- }
- });
- });
- </script>
- <div id=" userlist" class="elem" style="height:100px; overflow:auto;border:solid;width:150px">
- @foreach (var Username in @Model.User_Name)
- {
- var ChkID = "chk" + Username.Value;
- var tdID = "td" + Username.Value;
- <table width="100%">
- <tr>
- <td width="20px">
- <input type="checkbox" id="@ChkID"class="chklst" value="@Username.Value"/>
- </td>
- <td id="@tdID" width="100px">
- @Username.Text
- </td>
- </tr>
- </table>
- }
- </div>
Step 5
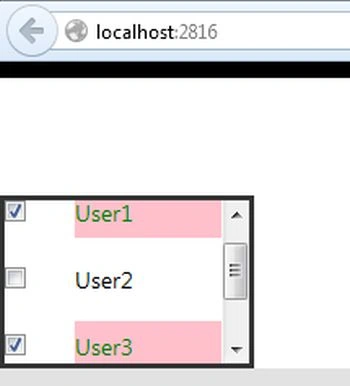
Execute the application:
Comments
Join the conversation! Your thoughts help the community grow.