

Introduction
Android is one of the most popular operating systems for mobile. In this article, I will show you how to create a Native Calculator Android application using Android Studio.
Requirements
- Android Studio version 2.3.3
- Little bit XML and JAVA knowledge.
- Android Emulator (or) Android mobile
- Download link (Android Studio)
Steps to be followed
The following steps are required to create a native Calculator Android application using Android Studio and I have included the source code below.
Step 1
Open Android Studio and start a new Android Studio Project.
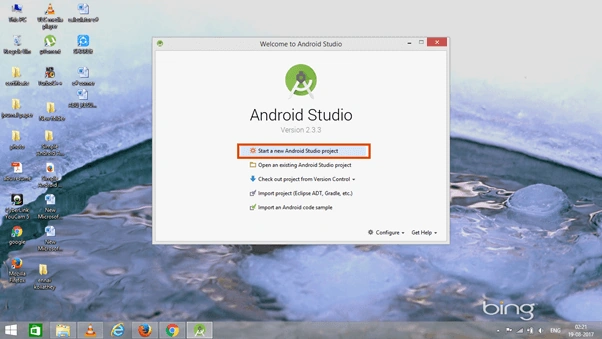 Step 2
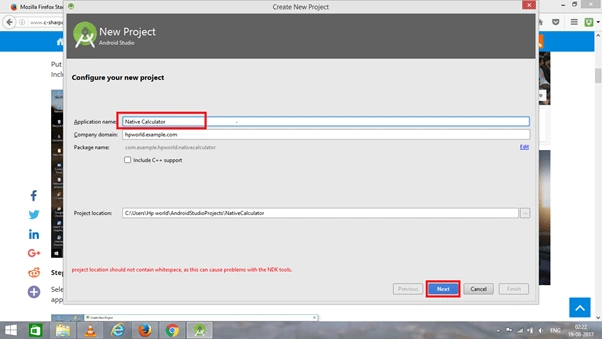
You can choose your application name and choose where your project is stored on the location. If you wish to use C++ for coding the project, mark the "Include C++ support", and click the "Next" button.
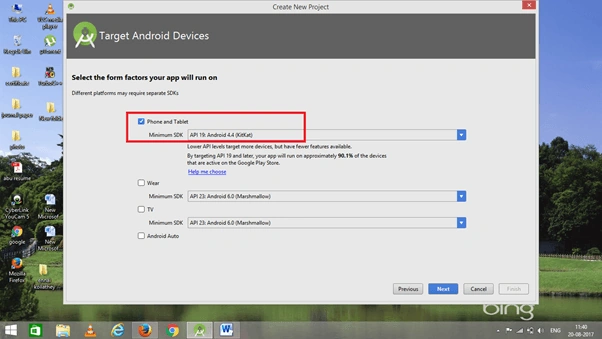
 Now, select the version of Android and select the target Android devices.
Step 3
Now, add the activity and click the "Next" button.
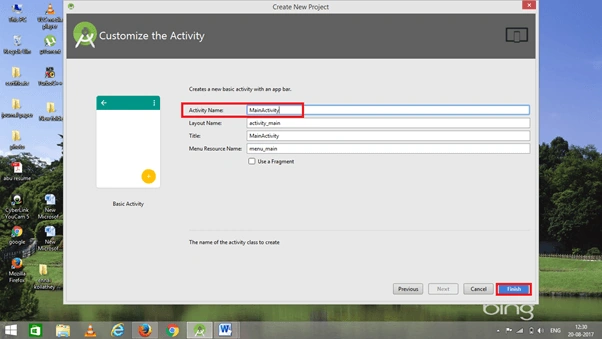
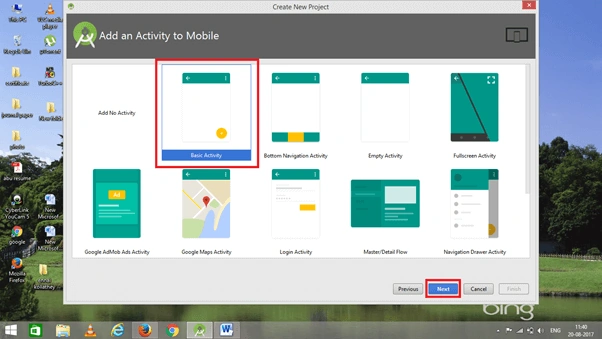 Add Activity name and click the "Finish" button.
Step 4
Go to activity_main.xml, This XML file contains the designing code for an Android app in the activity_main.xml.
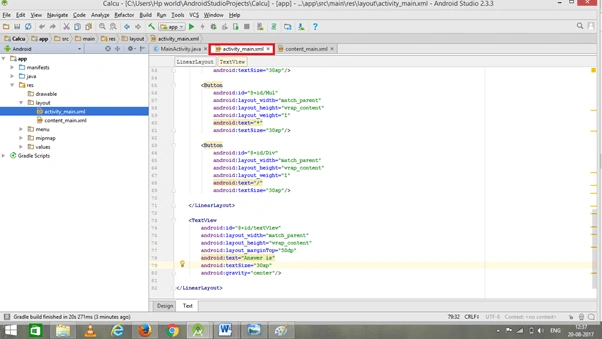 The XML code is given below.
- <LinearLayout
- xmlns:android="http://schemas.android.com/apk/res/android"
- android:orientation="vertical"
- android:layout_width="match_parent"
- android:layout_height="match_parent"
- android:layout_margin="20dp">
- <LinearLayout
- android:id="@+id/linearLayout1"
- android:layout_width="match_parent"
- android:layout_height="wrap_content"
- android:layout_margin="20dp">
- <EditText
- android:id="@+id/editText1"
- android:layout_width="match_parent"
- android:layout_height="wrap_content"
- android:layout_weight="1"
- android:inputType="numberDecimal"
- android:textSize="20sp" />
- <EditText
- android:id="@+id/editText2"
- android:layout_width="match_parent"
- android:layout_height="wrap_content"
- android:layout_weight="1"
- android:inputType="numberDecimal"
- android:textSize="20sp" />
- </LinearLayout>
- <LinearLayout
- android:id="@+id/linearLayout2"
- android:layout_width="match_parent"
- android:layout_height="wrap_content"
- android:layout_margin="20dp">
- <Button
- android:id="@+id/Add"
- android:layout_width="match_parent"
- android:layout_height="wrap_content"
- android:layout_weight="1"
- android:text="+"
- android:textSize="30sp"/>
- <Button
- android:id="@+id/Sub"
- android:layout_width="match_parent"
- android:layout_height="wrap_content"
- android:layout_weight="1"
- android:text="-"
- android:textSize="30sp"/>
- <Button
- android:id="@+id/Mul"
- android:layout_width="match_parent"
- android:layout_height="wrap_content"
- android:layout_weight="1"
- android:text="*"
- android:textSize="30sp"/>
- <Button
- android:id="@+id/Div"
- android:layout_width="match_parent"
- android:layout_height="wrap_content"
- android:layout_weight="1"
- android:text="/"
- android:textSize="30sp"/>
- </LinearLayout>
- <TextView
- android:id="@+id/textView"
- android:layout_width="match_parent"
- android:layout_height="wrap_content"
- android:layout_marginTop="50dp"
- android:text="The Answer is"
- android:textSize="30sp"
- android:gravity="center"/>
- </LinearLayout>
Step 5
Go to Main Activity.java, This Java program is the back-end language for Android. Add the following code.
- package com.example.hpworld.nativecalculator;
- import android.os.Bundle;
- import android.support.v7.app.AppCompatActivity;
- import android.text.TextUtils;
- import android.view.View;
- import android.view.View.OnClickListener;
- import android.widget.Button;
- import android.widget.EditText;
- import android.widget.TextView;
- public class MainActivity extends AppCompatActivity implements OnClickListener
- {
- //Defining the Views
- EditText Num1;
- EditText Num2;
- Button Add;
- Button Sub;
- Button Mul;
- Button Div;
- TextView Result;
- @Override
- public void onCreate(Bundle savedInstanceState)
- {
- super.onCreate(savedInstanceState);
- setContentView(R.layout.activity_main);
- //Referring the Views
- Num1 = (EditText) findViewById(R.id.editText1);
- Num2 = (EditText) findViewById(R.id.editText2);
- Add = (Button) findViewById(R.id.Add);
- Sub = (Button) findViewById(R.id.Sub);
- Mul = (Button) findViewById(R.id.Mul);
- Div = (Button) findViewById(R.id.Div);
- Result = (TextView) findViewById(R.id.textView);
- // set a listener
- Add.setOnClickListener(this);
- Sub.setOnClickListener(this);
- Mul.setOnClickListener(this);
- Div.setOnClickListener(this);
- }
- @Override
- public void onClick (View v)
- {
- float num1 = 0;
- float num2 = 0;
- float result = 0;
- String oper = "";
- // check if the fields are empty
- if (TextUtils.isEmpty(Num1.getText().toString()) || TextUtils.isEmpty(Num2.getText().toString()))
- return;
- // read EditText and fill variables with numbers
- num1 = Float.parseFloat(Num1.getText().toString());
- num2 = Float.parseFloat(Num2.getText().toString());
- // defines the button that has been clicked and performs the corresponding operation
- // write operation into oper, we will use it later for output
- switch (v.getId())
- {
- case R.id.Add:
- oper = "+";
- result = num1 + num2;
- break;
- case R.id.Sub:
- oper = "-";
- result = num1 - num2;
- break;
- case R.id.Mul:
- oper = "*";
- result = num1 * num2;
- break;
- case R.id.Div:
- oper = "/";
- result = num1 / num2;
- break;
- default:
- break;
- }
- // form the output line
- Result.setText(num1 + " " + oper + " " + num2 + " = " + result);
- }
- }
Step 6
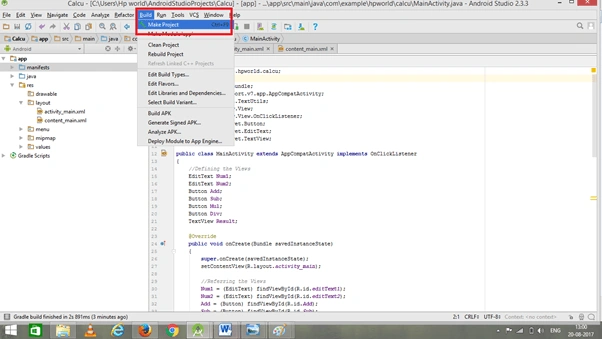
Now, either go to the menu bar and click "Make a project" or press ctrl+f9 to debug the error.
Step 7
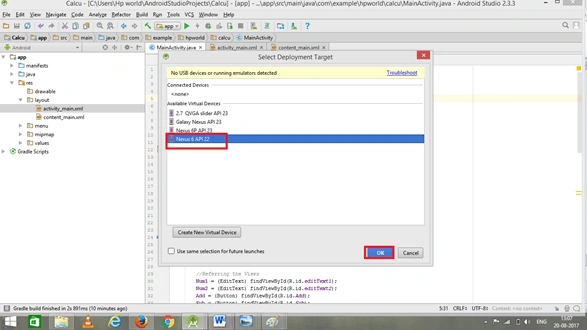
Then, click the Run button or press shift+f10 to run the project. Select the "virtual machine" option and click OK.
Conclusion
We have successfully created a Calculator app for Android using Android Studio.
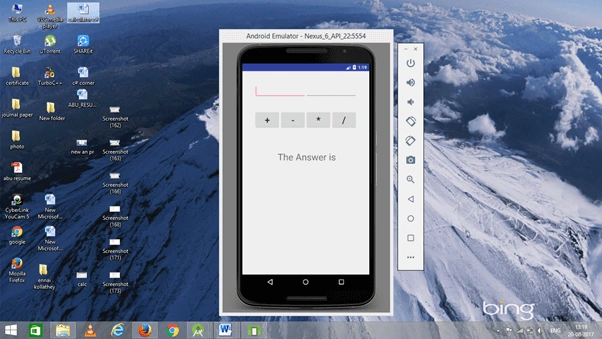
Result
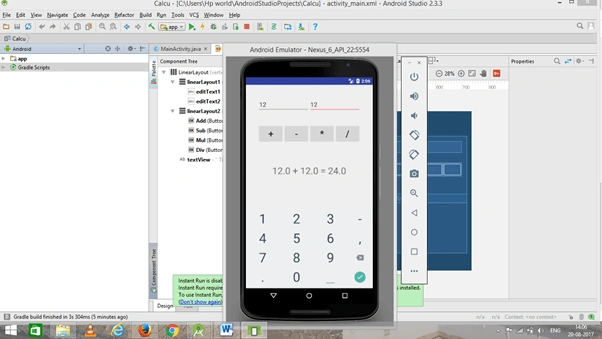
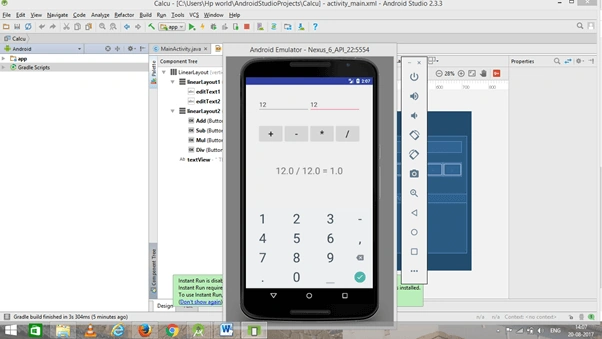
Addition Operation
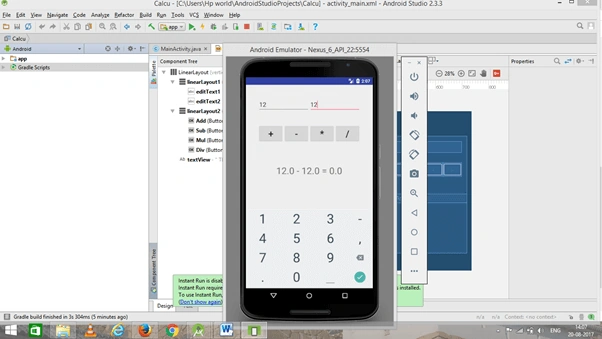
Subtraction Operation
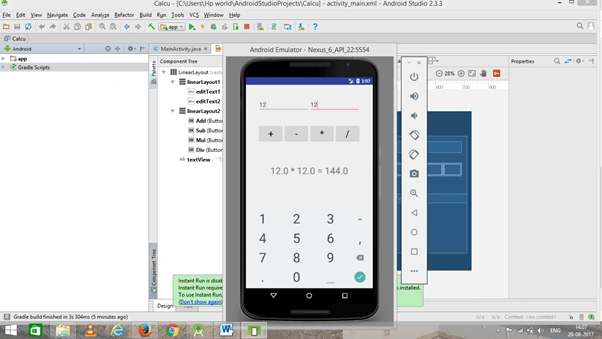
Multiplication Operation
Division Operation
Prabakaran MPosted Aug 23, 2017, 4:58 AM
Nice thanks for sharing........keep it up shithik