

In the era of digital transformation, having a custom copilot for your team can be a game-changer. A copilot can assist in various tasks, making your team more efficient and productive. This post will guide you on how to create your custom copilot and integrate it into Microsoft Teams.
Creating a custom copilot involves training an AI model with specific skills that your team needs. This could range from coding assistance to project management tasks. The key is to identify the tasks that take up most of your team’s time and automate them using the copilot.
Let’s get started with our no-code flow for creating our own custom copilot with our own custom data in markdown format.
Setting up a team environment
The very first thing we need is to install the Visual Studio Code extension named Teams Toolkit as we are going to perform this exercise inside Visual Studio Code aka VS Code.
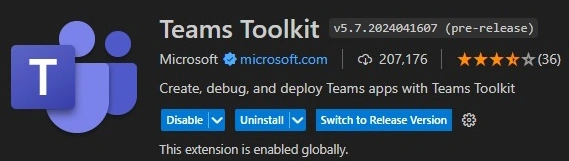
Once the extension is installed, you will see a new icon on your toolbar, as shown below.

Click on the Teams icon on the toolbar and it will open up the screen as shown below. Select the options highlighted below.
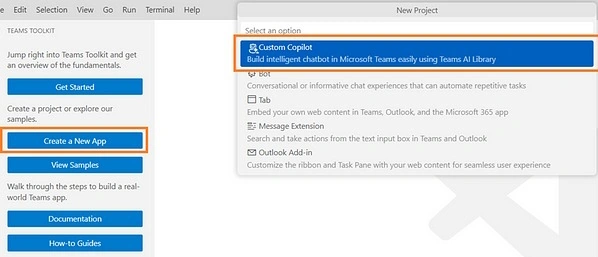
Select the Chat With Your Data option so that we can ask questions on our own data.

Select the Azure AI Search option, as we need to index our custom data in Azure AI Search.
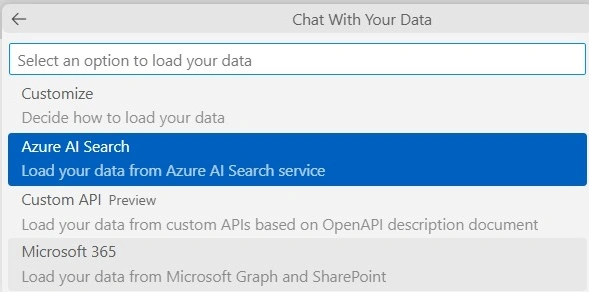
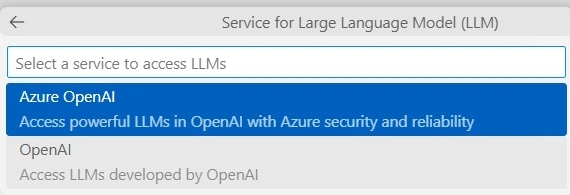
Select Python as your language and then select Azure OpenAI as our LLM.
At this point, you should have an instance of Azure OpenAI as well as Azure AI Search ready in the Azure portal. Grab those values and pass them on to the guided wizard.
If everything is done correctly, then you will see all the files listed in your VS Code under your app name:
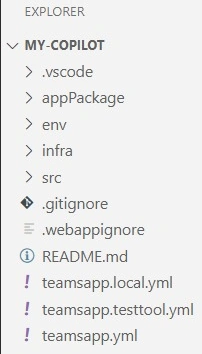
Till here, we are done with our initial setup. The next steps are pretty straightforward, as we just need to follow the configuration mentioned in the README file.
Creating a Virtual Environment
It is recommended to create a virtual environment for every Python project so that we don’t mix up the dependencies. In this example, we already have the requirements.txt file ready under the src directory, so we will be using that as an input to create our virtual environment. Here is my requirements.txt.
python-dotenv
aiohttp
azure-search
azure-search-documents
teams-ai~=1.0.1
Furnishing Azure Resource Details
The next step is to provide the configuration for Azure OpenAI and Azure AI Search. For that, navigate to env/.env.testtool.user and env/.env.local.user to provide all the required details for the placeholders.
Setting Up The Index
In order to set up the index, run the command python src/indexers/setup.py, and it will go ahead and create an index for you. Here is the code from my setup.py.
import asyncio
import os
from dataclasses import dataclass
from typing import List, Optional

from azure.core.credentials import AzureKeyCredential
from azure.search.documents import SearchClient
from azure.search.documents.indexes import SearchIndexClient
from azure.search.documents.indexes.models import (
    SearchIndex,
    SimpleField,
    SearchableField,
    SearchField,
    SearchFieldDataType,
    ComplexField,
    CorsOptions,
    VectorSearch,
    VectorSearchProfile,
    HnswAlgorithmConfiguration
)
from teams.ai.embeddings import AzureOpenAIEmbeddings, AzureOpenAIEmbeddingsOptions

from get_data import get_doc_data

from dotenv import load_dotenv

load_dotenv(f'{os.getcwd()}/env/.env.testtool.user')

@dataclass
class Doc:
    docId: Optional[str] = None
    docTitle: Optional[str] = None
    description: Optional[str] = None
    descriptionVector: Optional[List[float]] = None

async def upsert_documents(client: SearchClient, documents: list[Doc]):
    return client.merge_or_upload_documents(documents)

async def create_index_if_not_exists(client: SearchIndexClient, name: str):
    doc_index = SearchIndex(
        name=name,
        fields = [
            SimpleField(name="docId", type=SearchFieldDataType.String, key=True),
            SimpleField(name="docTitle", type=SearchFieldDataType.String),
            SearchableField(name="description", type=SearchFieldDataType.String, searchable=True),
            SearchField(name="descriptionVector", type=SearchFieldDataType.Collection(SearchFieldDataType.Single), searchable=True, vector_search_dimensions=1536, vector_search_profile_name='my-vector-config'),
        ],
        scoring_profiles=[],
        cors_options=CorsOptions(allowed_origins=["*"]),
        vector_search = VectorSearch(
            profiles=[VectorSearchProfile(name="my-vector-config", algorithm_configuration_name="my-algorithms-config")],
            algorithms=[HnswAlgorithmConfiguration(name="my-algorithms-config")],
        )
    )

    client.create_or_update_index(doc_index)

async def setup(search_api_key, search_api_endpoint):
    index = 'contoso-electronics'

    credentials = AzureKeyCredential(search_api_key)

    search_index_client = SearchIndexClient(search_api_endpoint, credentials)
    await create_index_if_not_exists(search_index_client, index)

    print("Create index succeeded. If it does not exist, wait for 5 seconds...")
    await asyncio.sleep(5)

    search_client = SearchClient(search_api_endpoint, index, credentials)

    embeddings = AzureOpenAIEmbeddings(AzureOpenAIEmbeddingsOptions(
        azure_api_key=os.getenv('SECRET_AZURE_OPENAI_API_KEY'),
        azure_endpoint=os.getenv('AZURE_OPENAI_ENDPOINT'),
        azure_deployment=os.getenv('AZURE_OPENAI_EMBEDDING_DEPLOYMENT')
    ))
    data = await get_doc_data(embeddings=embeddings)
    await upsert_documents(search_client, data)

    print("Upload new documents succeeded. If they do not exist, wait for several seconds...")

search_api_key = os.getenv('SECRET_AZURE_SEARCH_KEY')
search_api_endpoint = os.getenv('AZURE_SEARCH_ENDPOINT')
asyncio.run(setup(search_api_key, search_api_endpoint))
print("setup finished")
Using The Chat Bot
Now comes the final step testing the bot. For this, open the Teams toolkit and start debugging by pressing F5. Doing this will open up a new app on localhost.
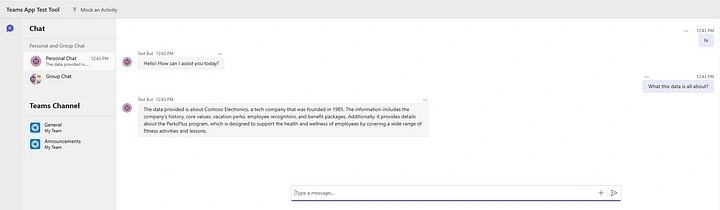
Hope you enjoyed creating your own custom copilot. If there is anything that is not clear, I would recommend you watch my recording having a complete end-to-end flow here.
Join the conversation! Your thoughts help the community grow.