

Introduction
React.js is a popular JavaScript library used for building user interfaces. In this article, we will guide you through the process of creating a simple calculator using React.js. We will also include code snippets to help you follow along.
Step 1. Set Up the React Environment
Before we can start building the calculator, we need to set up the React environment. Assuming you have Node.js installed, open your terminal and run the command below to create a new React project:
npx create-react-app calculator-app
Once the project is created, navigate to the project folder by running:
cd calculator-app
Step 2. Creating Components
In React, components are the building blocks of a user interface. We will create three components: Calculator, Display, and Keypad.
Inside the src folder, create a new folder called components. Inside this folder, create three files: Calculator.js, Display.js, and Keypad.js.
Open the Calculator.js file and add the following code.
import React from "react";
import Display from "./Display";
import Keypad from "./Keypad";

class Calculator extends React.Component {
  render() {
    return (
      <div className="calculator">
        <Display />
        <Keypad />
      </div>
    );
  }
}

export default Calculator;
Next, open the Display.js file and add the following code.
import React from "react";

class Display extends React.Component {
  render() {
    return <input type="text" className="display" />;
  }
}

export default Display;
Finally, open the Keypad.js file and add the following code.
import React from "react";

class Keypad extends React.Component {
  render() {
    return (
      <div className="keypad">
        {/* keypad buttons */}
      </div>
    );
  }
}

export default Keypad;
Step 3. Implementing the Calculator Logic
Now that we have our components set up, let's implement the logic for our calculator. Let's start by adding the keypad buttons inside the Keypad component.
import React from "react";

class Keypad extends React.Component {
  render() {
    return (
      <div className="keypad">
        {/* keypad buttons */}
        <button>1</button>
        <button>2</button>
        <button>3</button>
        {/* and so on */}
      </div>
    );
  }
}

export default Keypad;
Next, let's handle the clicking of the keypad buttons and update the display accordingly.
import React from "react";

class Keypad extends React.Component {
  handleClick = (value) => {
    // handle the button click here
  };

  render() {
    return (
      <div className="keypad">
        {/* keypad buttons */}
        <button onClick={() => this.handleClick(1)}>1</button>
        <button onClick={() => this.handleClick(2)}>2</button>
        <button onClick={() => this.handleClick(3)}>3</button>
        {/* and so on */}
      </div>
    );
  }
}

export default Keypad;
Praveen KumarPosted Aug 8, 2024, 5:33 AM
The code has now been updated to work perfectly. Thanks!
John SmithPosted Aug 1, 2024, 4:39 PM
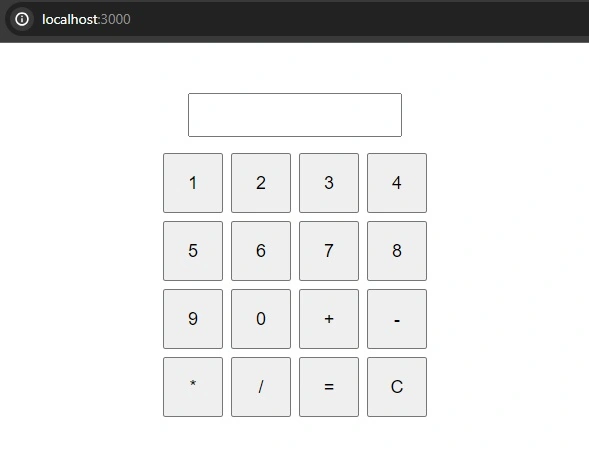
This is complete fake code. The screenshot attached is fake. The code doesn't work
John SmithPosted Aug 1, 2024, 4:32 PM
This code has lots of bugs, it's not working code. Stop pasting code without testing. Waste of time
John SmithPosted Aug 1, 2024, 4:32 PM
Its a wrong code. The browser shows empty screen
Cr BhargaviPosted Aug 30, 2023, 4:18 AM
Excellent Article!
Mahesh ChandPosted Aug 29, 2023, 10:16 PM
Nice!! Thank you!