

Introduction
Azure Virtual WAN is a managed networking service that integrates networking, connectivity, security, monitoring, and routing features. Azure Virtual WAN is supported ExpressRoute, Point-to-Site VPN, Site-to-Site VPN, and VNet-to-VNet. In this article, we are going to learn how to configure Azure Virtual WAN.
Step 1
In the Azure portal, type Virtual WAN into the search box and select Virtual WANs.

Step 2
On the Virtual WAN page, select + Create.

Step 3
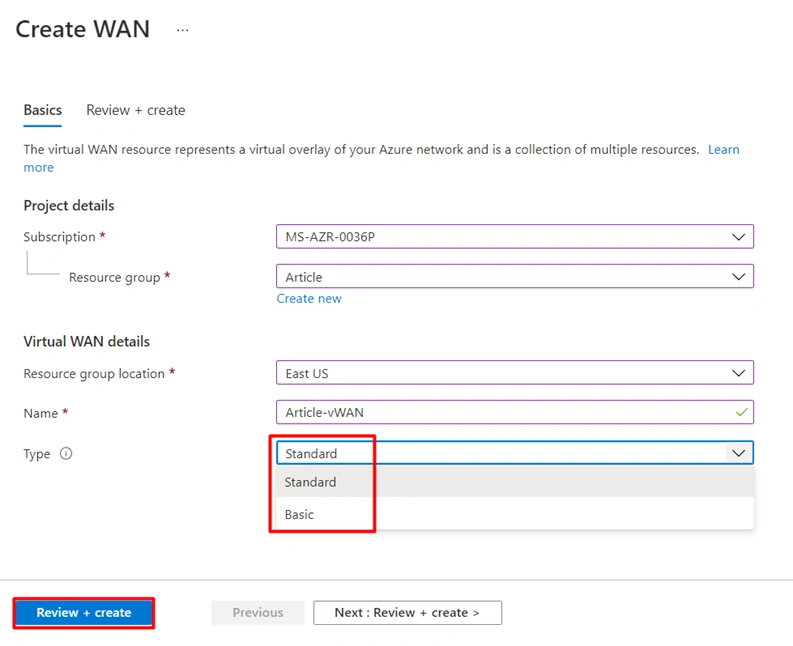
On the Create WAN page, on the Basics tab, fill in the following fields,
- Select the Subscription.
- Select the Resource group.
- Select the Resource group location.
- Enter the Name for the Virtual WAN
- Type (Virtual WAN SKU): Standard
| Virtual WAN type | Available Configurations |
| Basic | Site-to-site VPN only |
| Standard | ExpressRoute User VPN (P2S) VPN (site-to-site) VNet-to-VNet |
When you have finished filling out the fields, select Review +Create.
Step 4
After creating the Virtual WAN, Select the Hubs under Connectivity, and click + New Hub.

Step 5
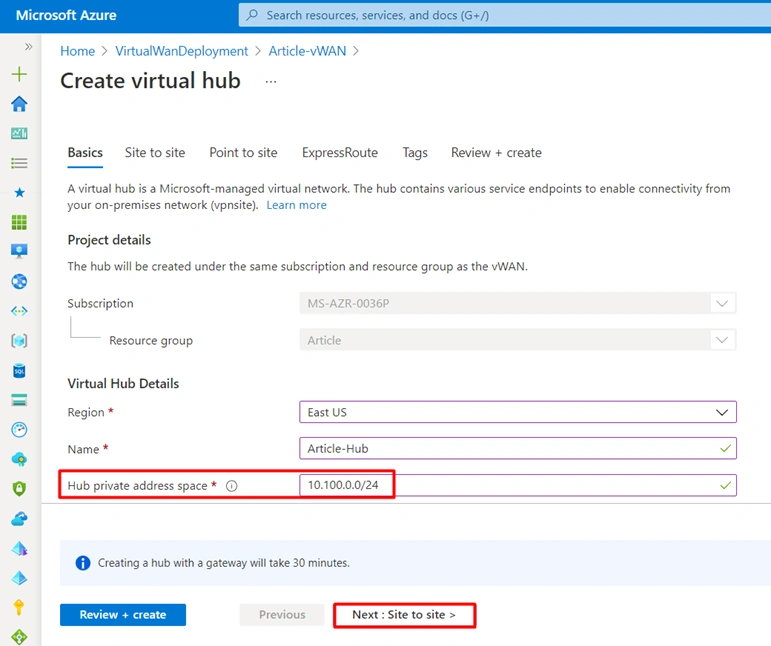
On the Create virtual hub page Basics tab, complete the following fields, and Select Next: Site-to-site.
- Select the Virtual WAN Region.
- Name of the Virtual Hub.
- Assign the Hub private address space.
Step 6
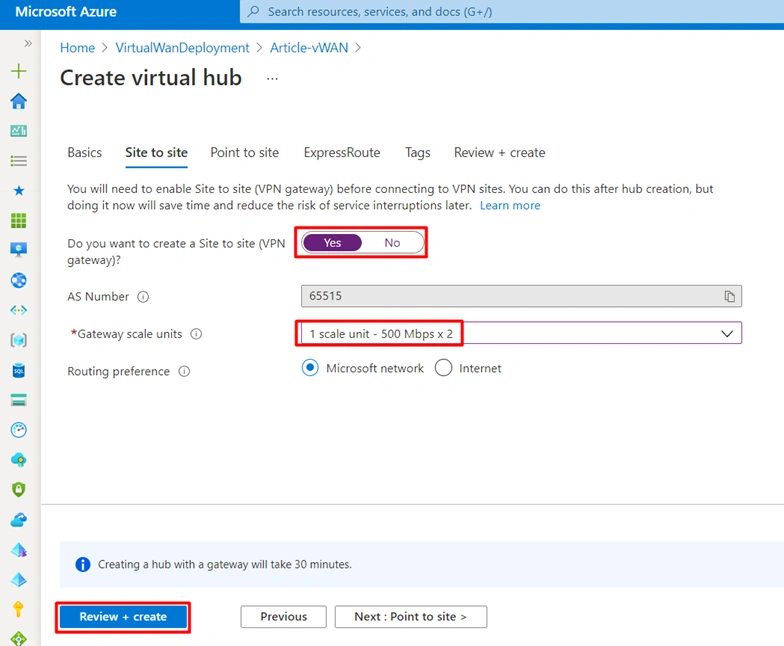
On the Site-to-site tab, complete the following fields,
- Do you want to create a Site to site (VPN gateway)?: Yes
- The AS Number field cannot be edited.
- Gateway scale units: 1 scale unit = 500 Mbps
- Routing preference: Microsoft network
If you have to configure Point-to-Point and ExpressRoute, you can choose; Yes, I'm choosing Site-to-Site Connection only in this demo.
Step 7
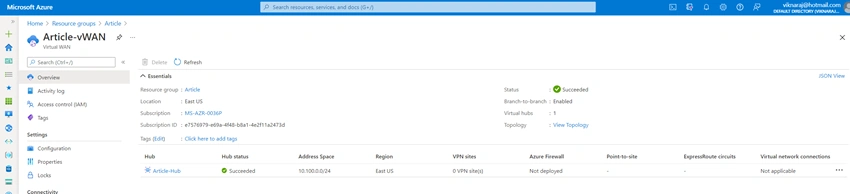
Now we can verify that our Hub is created.
Summary
In this article, we have learned how to create the Azure Virtual WAN; in our next article, we will learn how to connect VPN connections to the Virtual WAN.
Hadshana KamalanathanPosted Dec 17, 2021, 4:56 PM
Nice Article!