

Introduction
Schema Builder is one of the Drag and Drop features in the Salesforce Lightning platform. It displays a structure of all custom & standard objects in the lightning platform and enables adding and removing the objects and fields using the drag & drop feature in schema builder. In my previous article, I explained creating custom fields and objects in “Object manager”. The object manager process takes time to create a custom field and objects, but by using Schema builder you can create a custom object and fields within a minute.
Previous articles:
In this article, you will learn how to create a custom object and fields using Schema Builder.
Prerequisites
-
Before starting this process, you must sign up on the Salesforce Trailhead lightning platform. Click here to sign up
Step 1
Login to trailhead lightning platform.
Step 2
Launch our Trailhead playground or developer edition in your Org.
Step 3
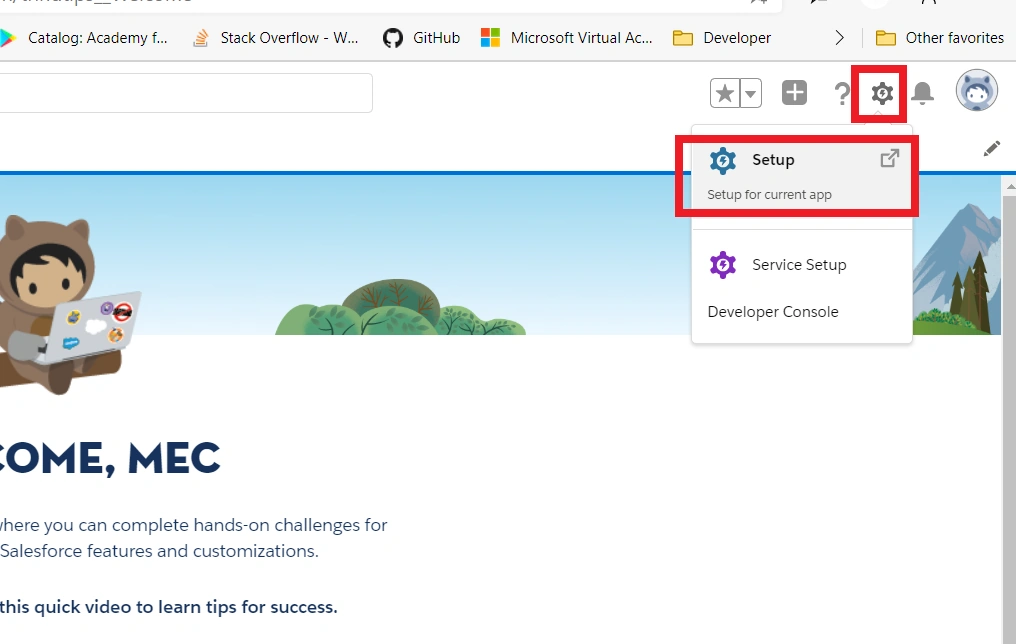
After the playground is launched, click the “Gear” icon and then select the “Setup” option to launch the setup window.
Step 4
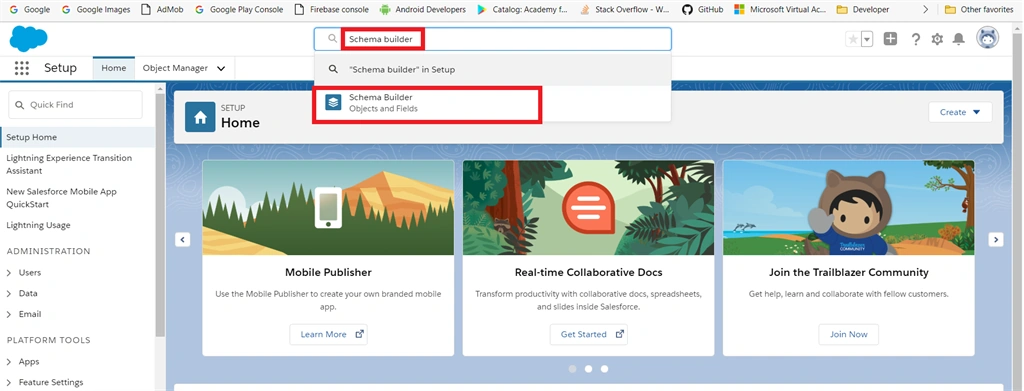
In the Setup page, search “Schema Builder” in the quick find the search box, then click the “Schema builder” option from the suggestions.
Step 5
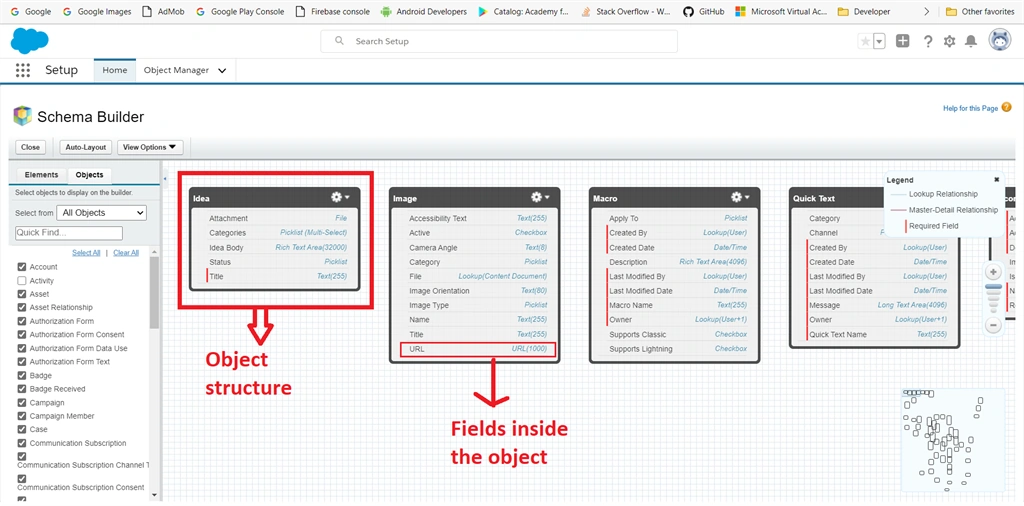
Our schema builder page is opened and the objects and fields are displayed like structures.
Step 6
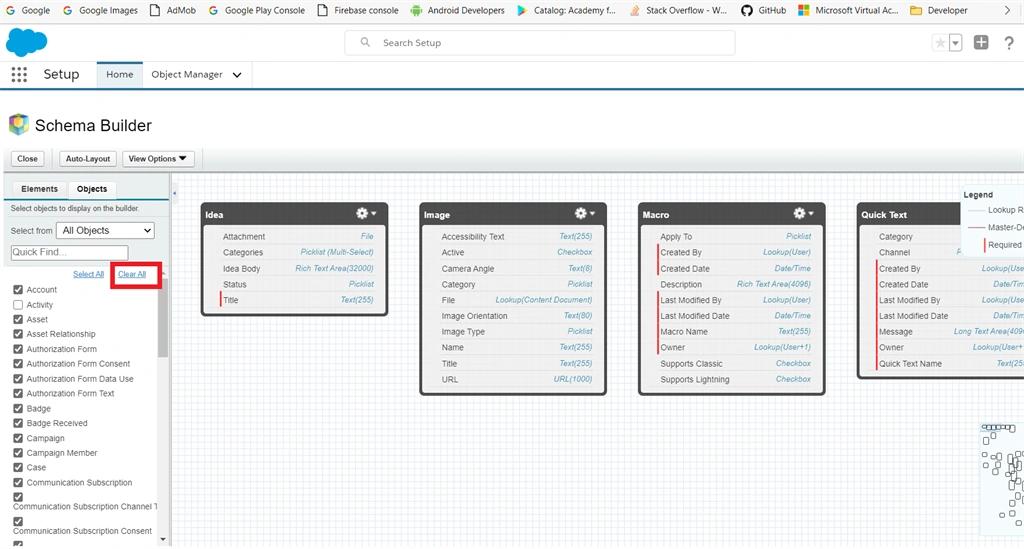
In the left side pane, click the “Clear All” option from the left side pane to clear all object structure from the screen.
Step 7
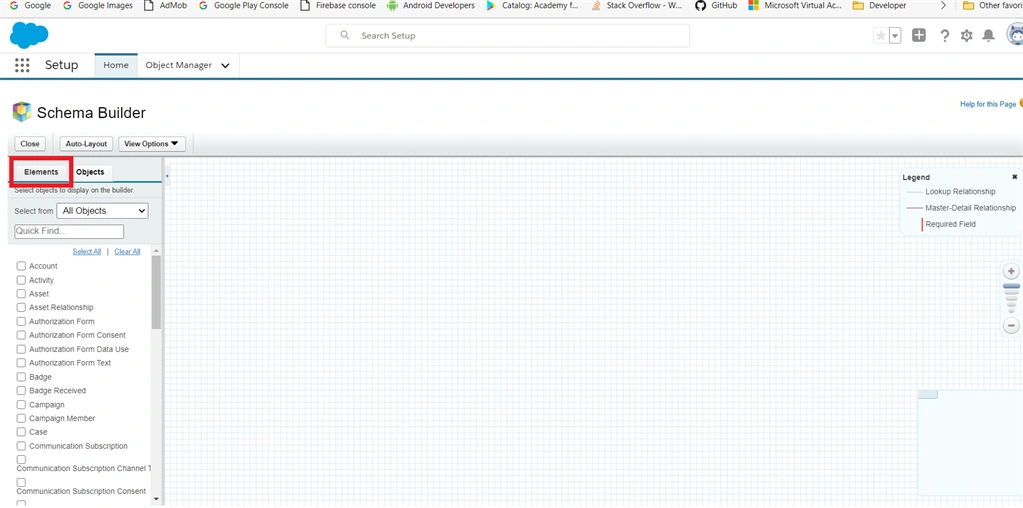
Now select the “Element” tab from the left side pane.
Step 8
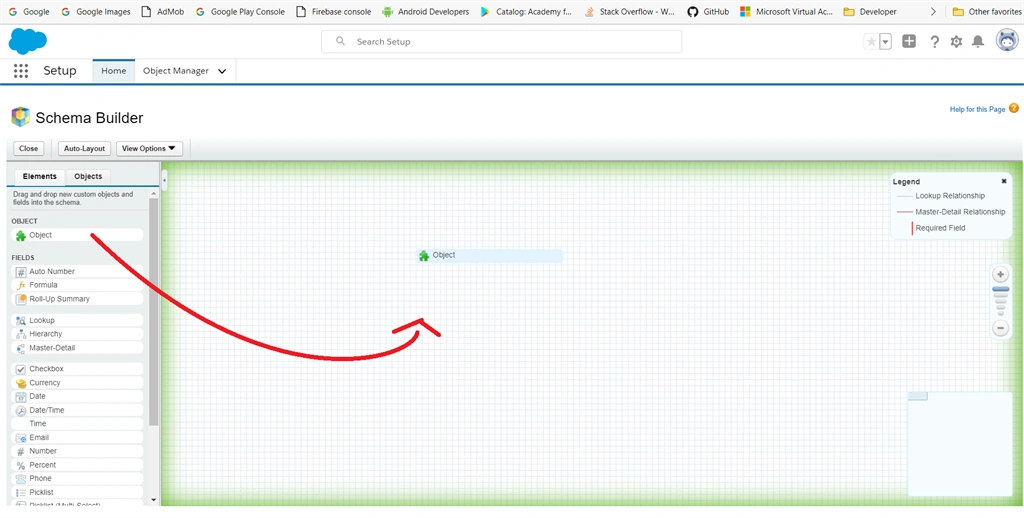
In the elements page, drag the “Object” from the side panel and drop to the schema builder empty space.
Step 9
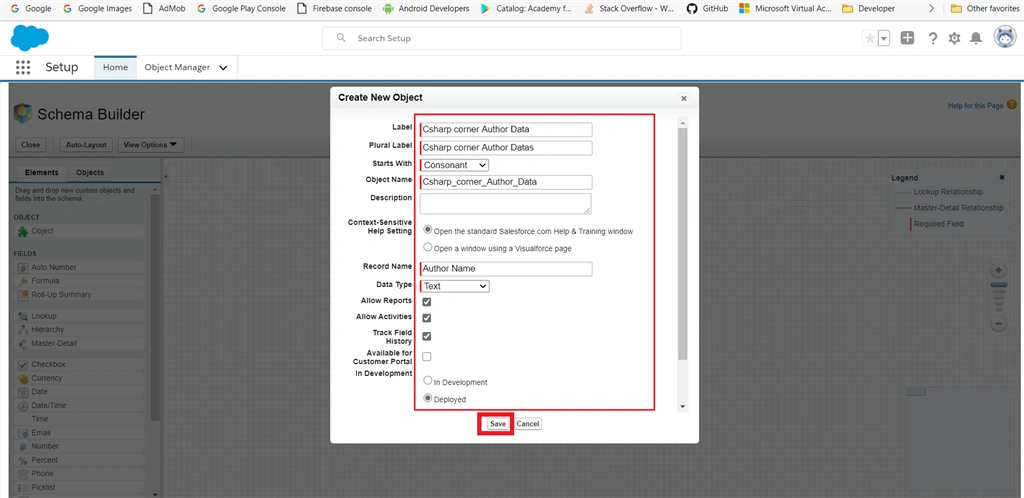
After dropping the element, a prompt to create a new object window will appear on the page. In this window, fill all the fields and then click on the “Save” button.
Step 10
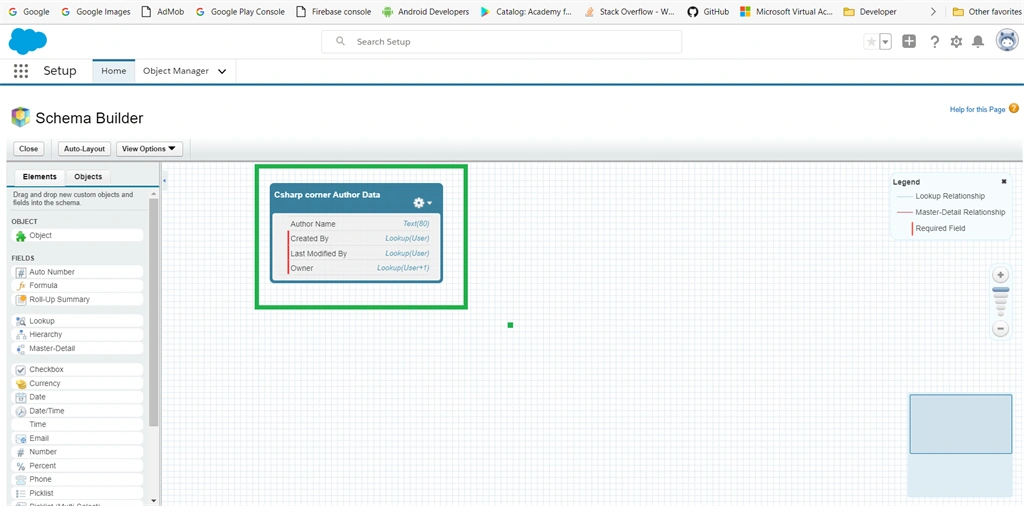
Your custom object will be created and displayed in the schema builder page. Next, we are adding two custom fields: “Date of birth” and “Mobile number” in our created custom object.
Step 11
Now we drag and drop the “Date” field from the left pane to the custom object structure.
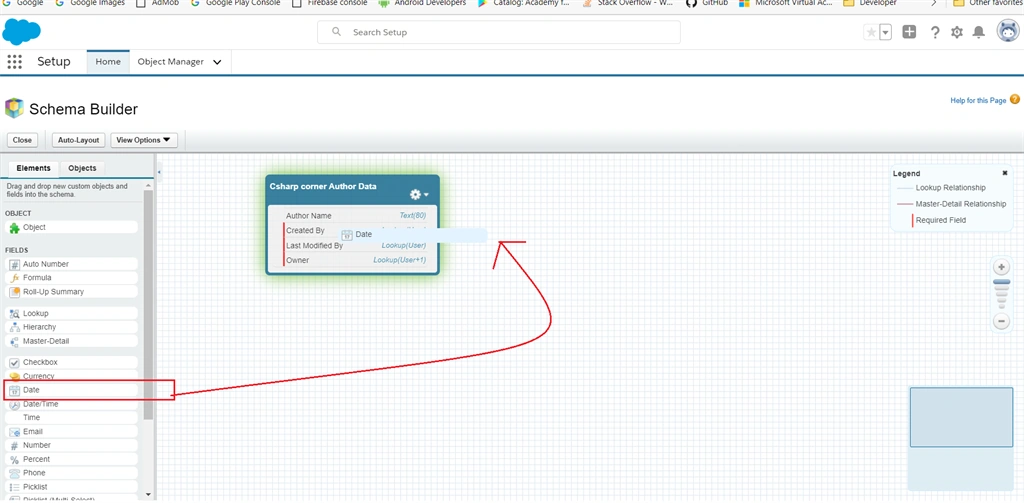
Step 12
After dropping this field, you will be prompted to create a field window that will fill fields. Give the field name and check the “Always require to save” checkbox, then click the “Save” button.
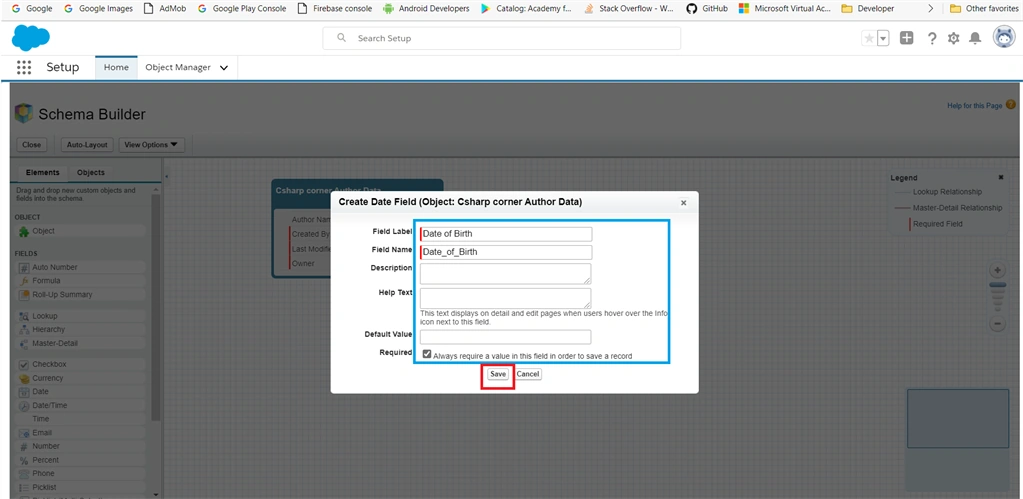
The “Date of birth” field is added to our custom object.
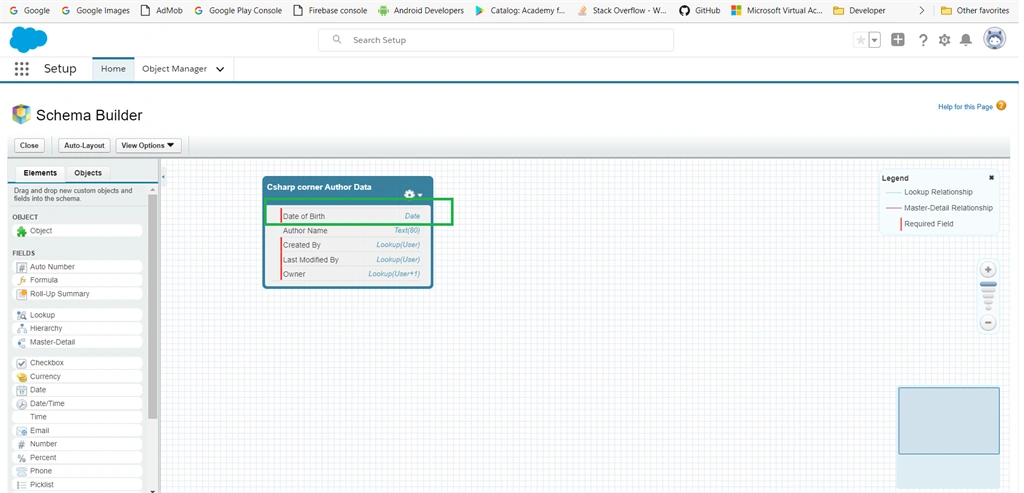
Step 13
Next, we can drag and drop the “Phone” field to store a mobile number and give the field name, then click on the “Save” button.
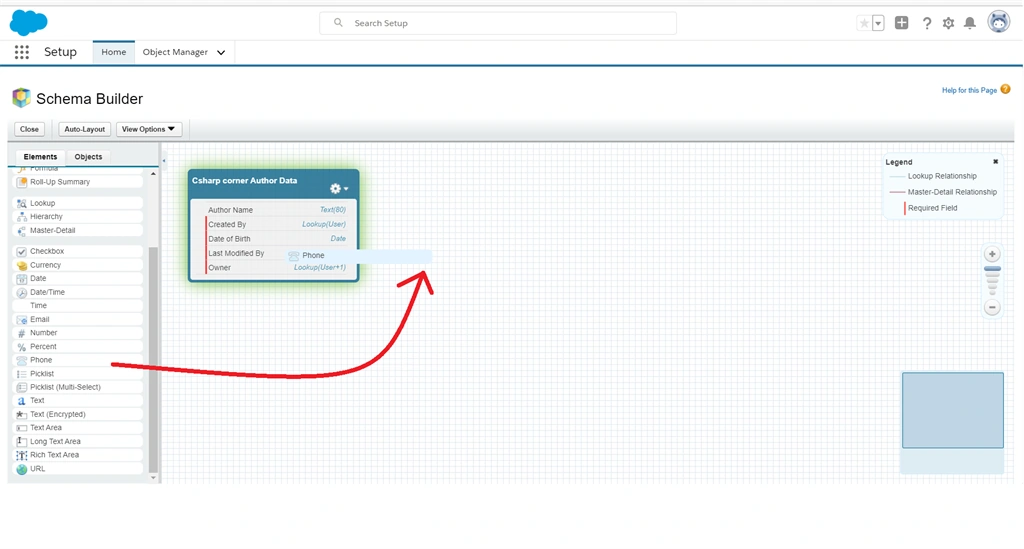
Our “Mobile Number” field is added to our custom object.
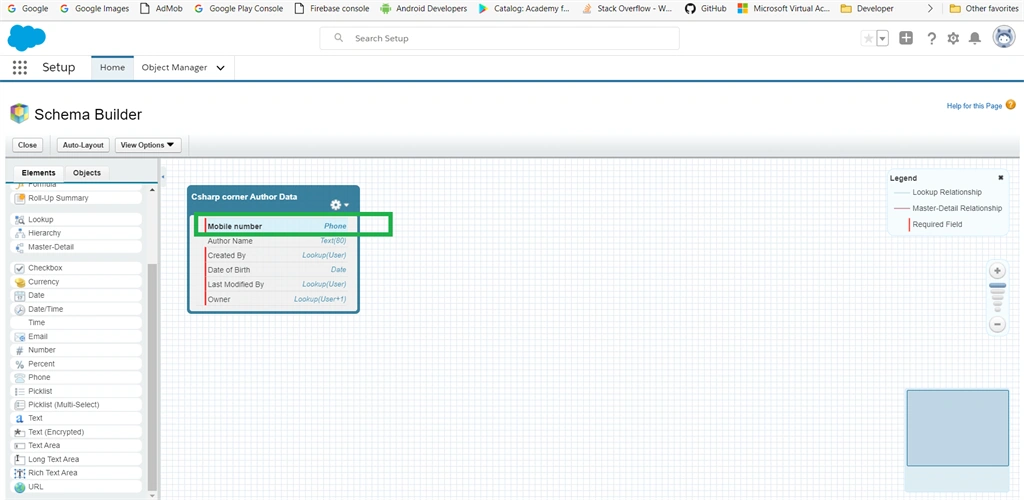
Step 14
Now we can set up a tab for custom objects. You can search “tabs” in the quick find search box and then select “Tabs” from the suggestions.
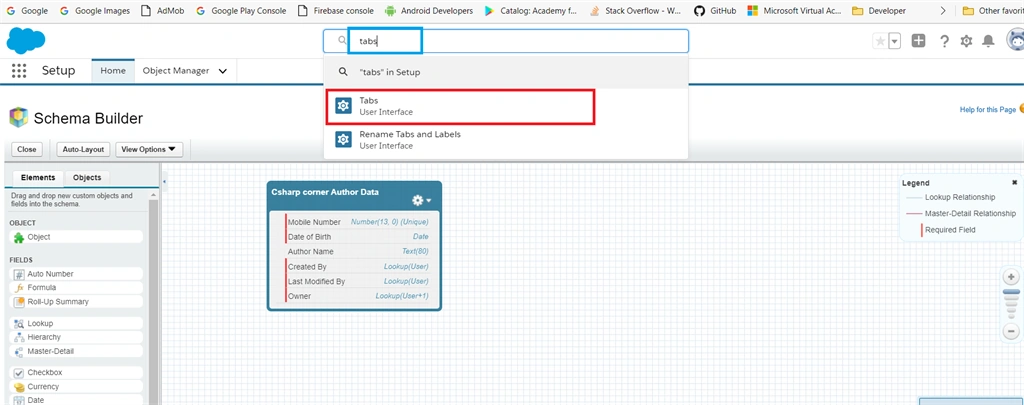
Step 15
Click the “New” button from the “Custom objects tab”.
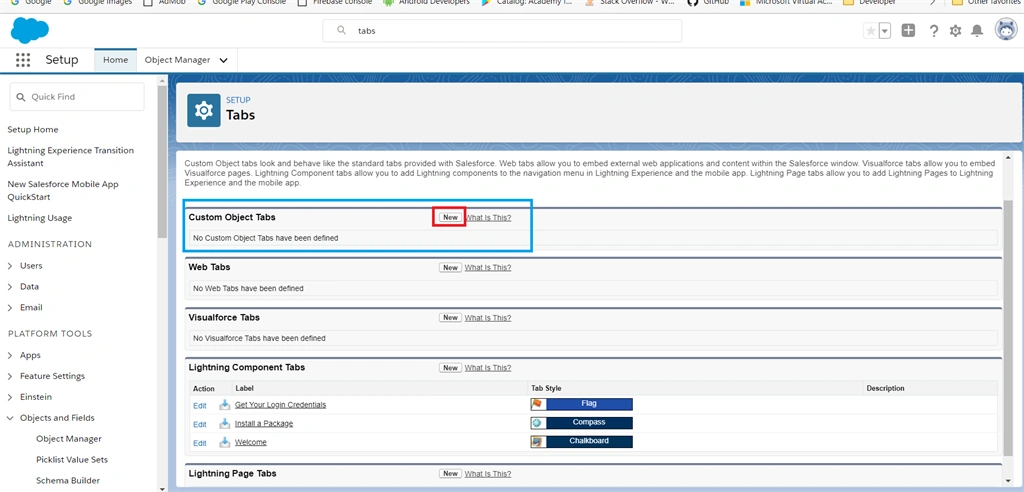
Step 16
Select our object & tab style and then click the “Next” button.
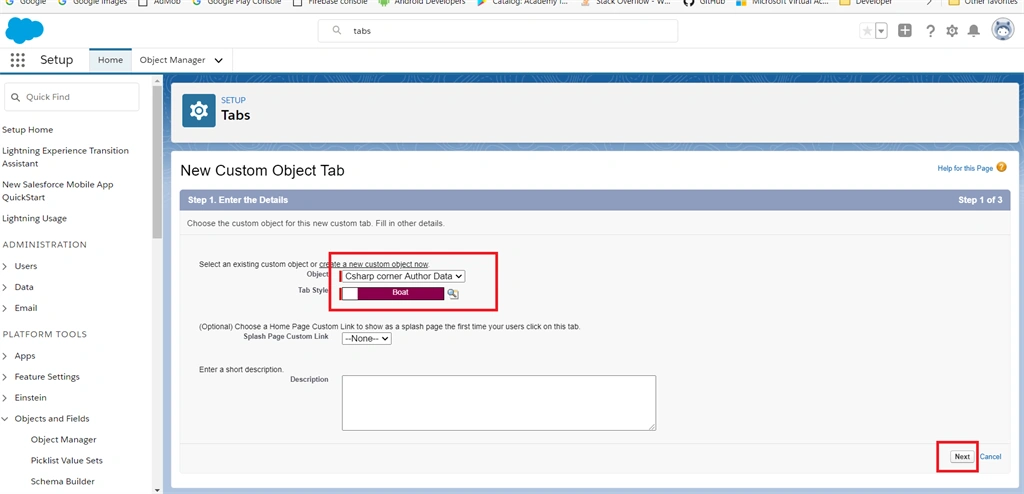
Step 17
You do not need to change the next page. On the final page, click the “save” button.
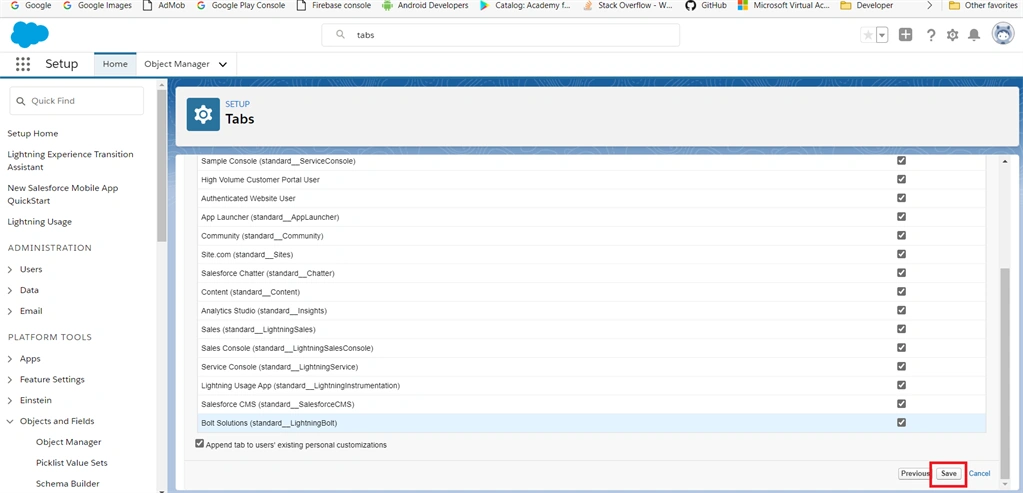
We successfully created the custom object and fields using a schema builder.
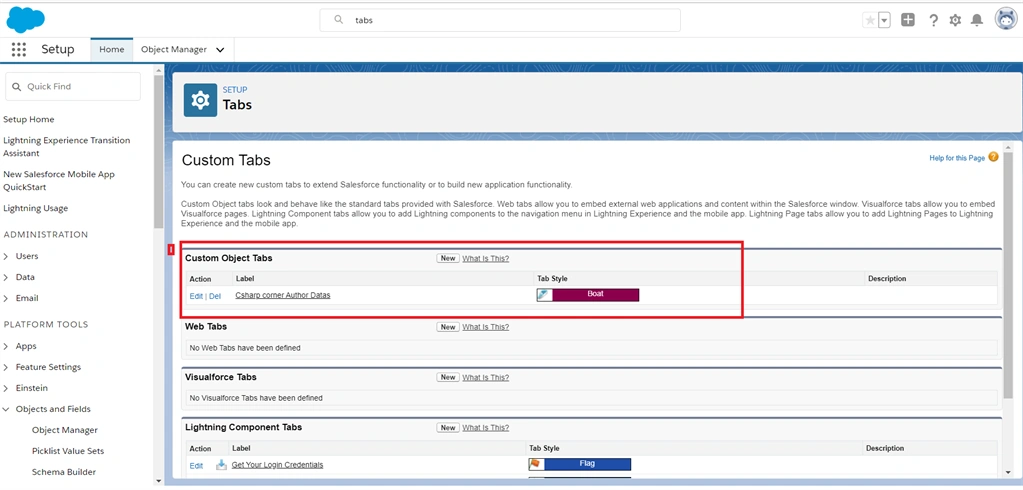
Test Our Custom Object and Fields
Step 1
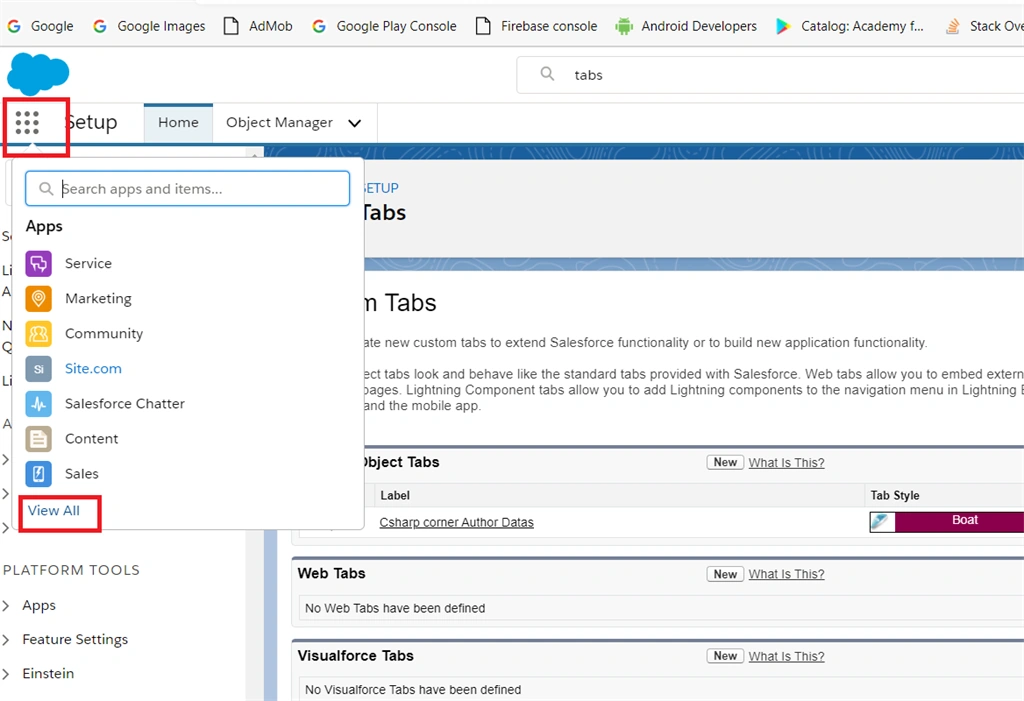
Click the “App Launcher” icon and then click the “View all” option.
Step 2
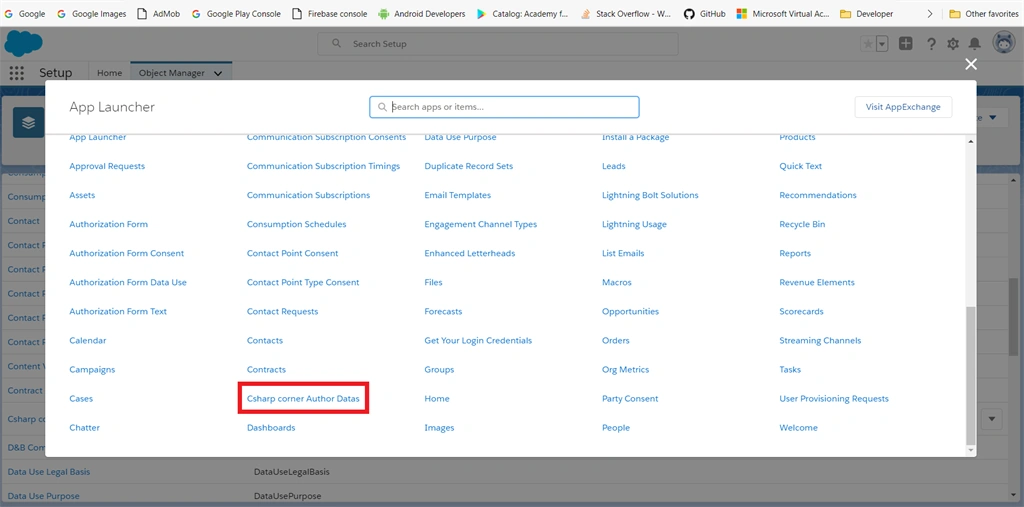
The app launcher window will be opened, just scroll down and click the custom object name in the app launcher.
Step 3
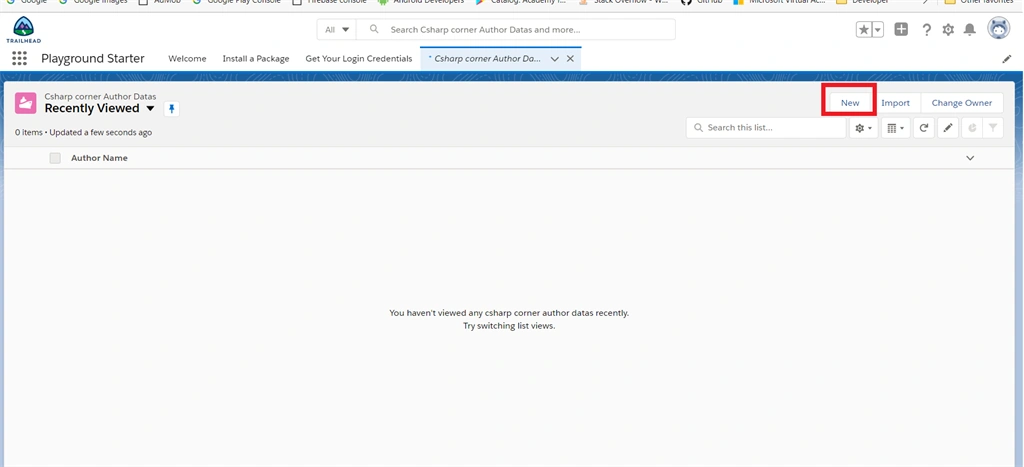
Our custom object page is opened, click on the “New” button.
Step 4
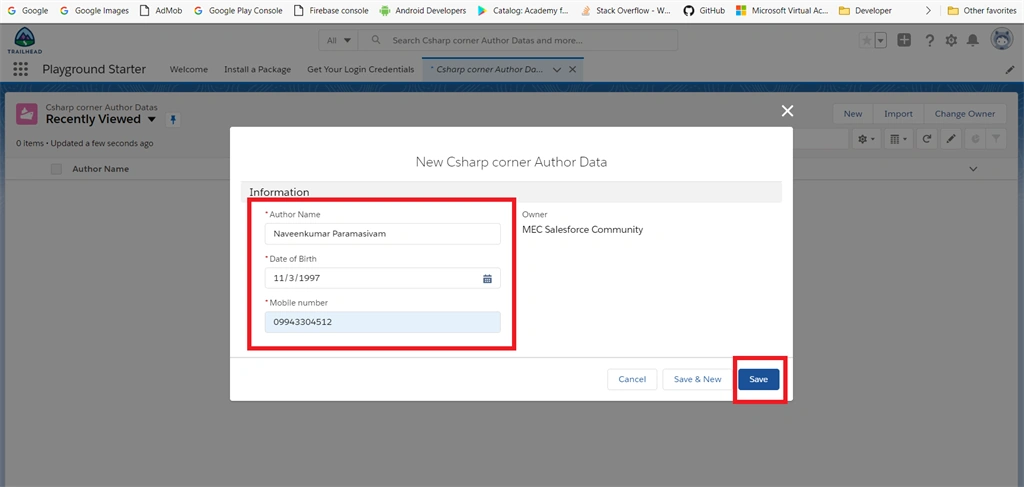
A new window will be opened and ask for details. Fill all required fields and then click on the “Save” button.
Summary
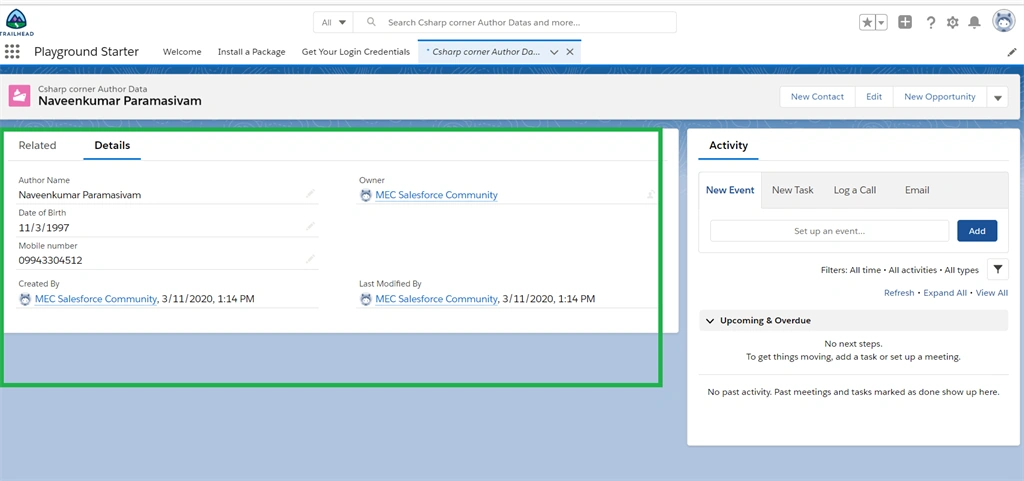
Our information is successfully stored in our created custom object.
Join the conversation! Your thoughts help the community grow.