

Let us go ahead and see how to create and run a very basic MVC Application.
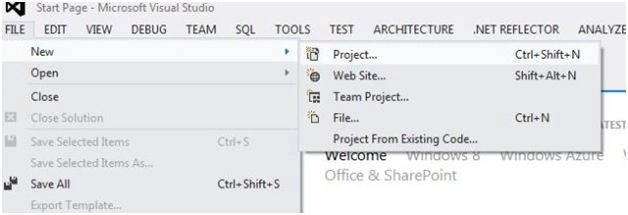
Step 1: Go to Visual Studio, FILE, New, then click Project. It will open a popup.
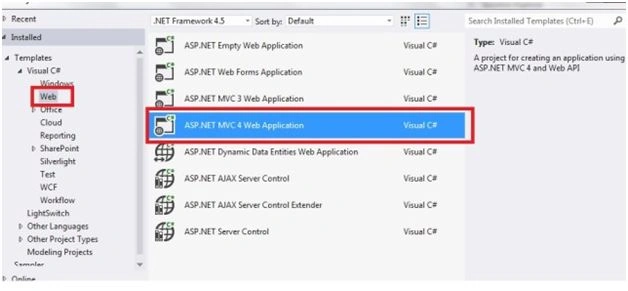
Step 2: Select Web from the left hand pane. On the right hand side Select ASP.NET MVC 4 Web Application.
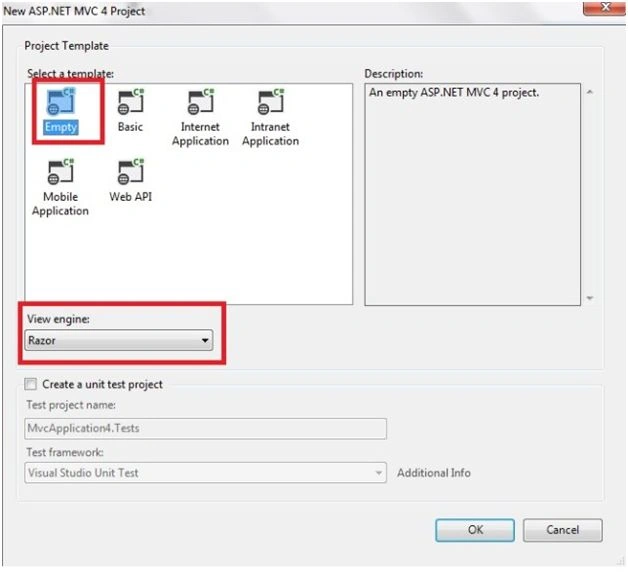
Step 3: Select Empty template as we do not want pre generated code and class files as of now. We will be using Razor Engine so it is auto selected and need not be changed. Click OK.
Visual Studio creates the following folders under MVC project. Let us see the contents generated by the Visual Studio in the application.
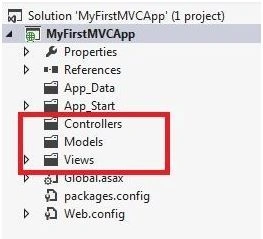
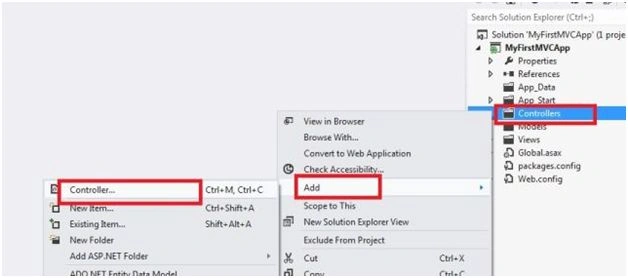
We get three folders named Model, View and controller. Since in MVC the user interacts with a controller so let us now add a controller to the application. Right Click on Controllers folder-> Go to Add-> Select Controllers.
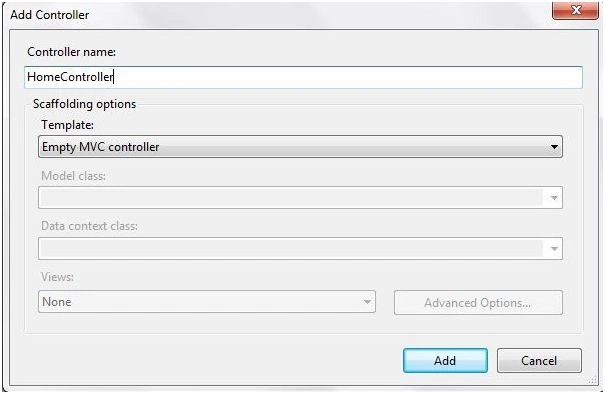
The following popup appears next. We will name our controller here. Name it “Home”. Controller keyword is auto appended. So it is recommended not to remove it from the textbox. We would be selecting Empty MVC controller as the template.
Following is the content in the controller we just created.
- using System;
- usingSystem.Collections.Generic;
- usingSystem.Linq;
- usingSystem.Web;
- usingSystem.Web.Mvc;
- namespaceMyFirstMVCApp.Controllers
- {
- public class HomeController: Controller
- {
- //
- // GET: /Home/
- publicActionResult Index()
- {
- return View();
- }
- }
- }
- publicActionResult Display()
- {
- return View();
- }
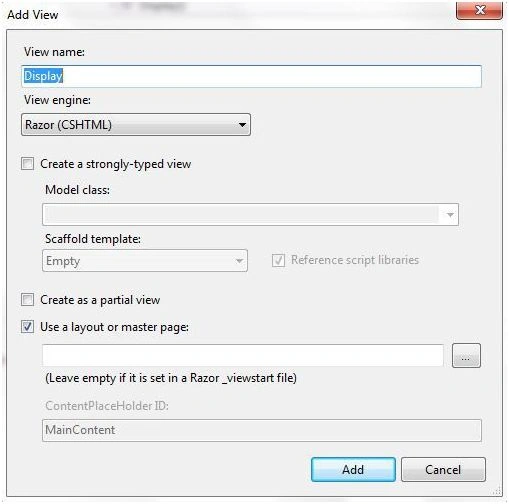
Right click on Display method-> Go to Add View at the top. Click on it.

The following popup appears for entering the name of the view. The name shown here is the same name as that of the ActionResult. It is auto populated and needs to remain the same. We will use Razor Engine and since there are no models as of now to deal with so we will keep the checkbox unselected. Hit Add.
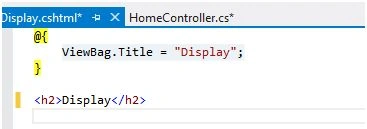
The following is the text generated in the View.
When we create a view for a particular Actionresult a folder is created in the View folder corresponding to the ActionResult method. Let us check whether this folder is created or not.
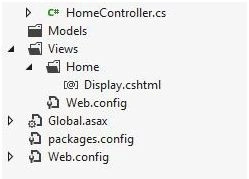
Let us now change the display message in the view to something like.
- @{
- ViewBag.Title = "Display";
- }
- <h2>This is my First MVC Application!!</h2>
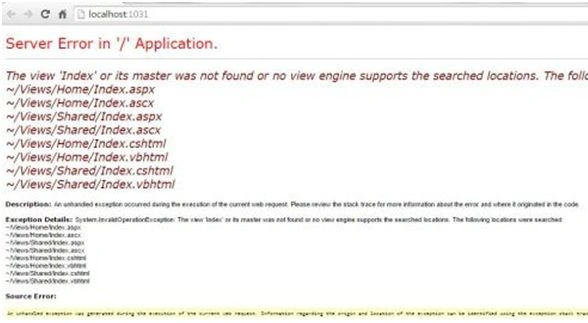
Oops we get an error instead of some meaningful message. Well this is because the default route specified in the route config is something else. We can find the route config file under App_Start folder.
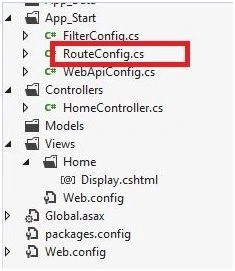
The route specified in Rout config under App_Start folder is:
- routes.MapRoute(
- name: "Default",
- url: "{controller}/{action}/{id}",
- defaults: new { controller = "Home", action = "Index", id = UrlParameter.Optional }
- );
Localhost:1031/Home/Display
This is because when we run our MVC application the default route runs or it is prioritized. We can always define our own custom routes. Let us change the URL and run the application now.

So we just created our first MVC application. In the further posts we will be studying the use of models , views and controllers in detail.
Ravi KandelPosted Jul 14, 2016, 12:10 PM
Thanks for sharing.
Ravi KandelPosted Jul 14, 2016, 12:10 PM
Thanks for sharing.
Vikki KumarPosted May 23, 2016, 1:04 AM
Nice Articles Sir
NitinPosted May 20, 2016, 11:42 PM
Thanks @Debasis
Debasis SahaPosted May 20, 2016, 10:53 AM
Nice One..
Pradeep SahooPosted May 20, 2016, 7:08 AM
Nice share....
Sonu ChaudharyPosted May 19, 2016, 11:36 AM
good one
Thiruppathi RPosted May 18, 2016, 2:36 AM
Good..
Neeraj KumarPosted May 17, 2016, 2:51 PM
Nice article
Bhuvanesh MohankumarPosted May 17, 2016, 2:21 PM
Good one
sreenivasa kPosted May 17, 2016, 12:26 PM
good
Kuppurasu NagarajPosted May 17, 2016, 10:57 AM
Nice sharing..