

Welcome to the comprehensive guide on creating RESTful API with Java Spring Boot. In this article, we will see how to create an API using Java, MySQL, Spring Boot, JPA, and Maven. We will also perform some CRUD operations to add, modify, and delete data from the database. This guide will help you with the knowledge to develop efficient and scalable APIs for your Java projects.
Create a New Spring Starter App
Create a New Spring Starter Project. Here we give the name of the project as Rest-API. Select the type as Maven. I'm choosing the java version 17 for this project. For the package select jar and for the artifact you can have your name or simply mention it as a project. You can add a description of your own and it is optional. Click Next.
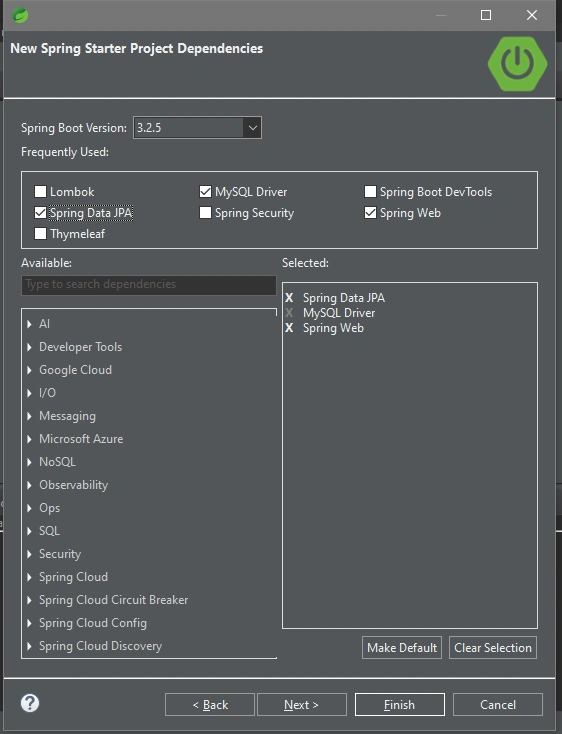
Select the dependencies for the project. I'm using Spring Boot version 3.2.5 for this project. Since we are using MySQL for the database and it is a web project, choose the dependencies MySQL Driver, Spring Web, and Spring Data JPA(Java Persistence API).
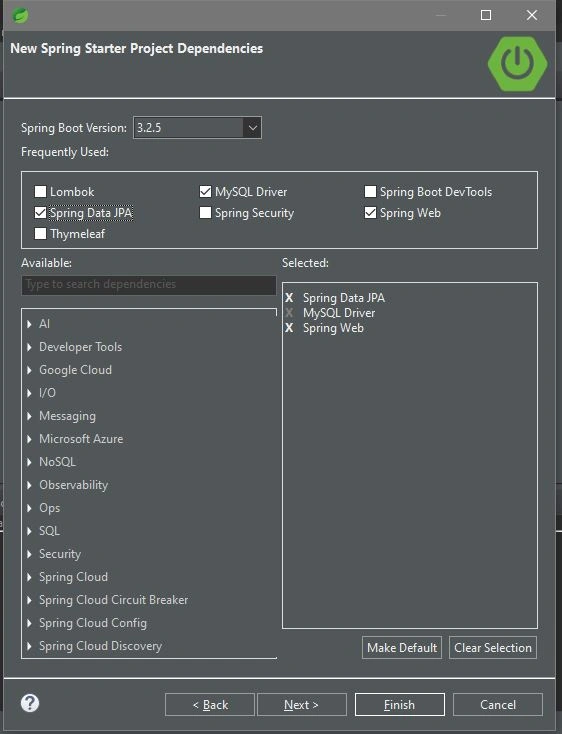
Clicking Finish will create a new project with all the dependencies selected. You can check the dependencies in the pom.xml file.
Create User Model Class
Create a user model class and add the following code.
package com.dhan.Models;

import jakarta.persistence.Column;
import jakarta.persistence.Entity;
import jakarta.persistence.GeneratedValue;
import jakarta.persistence.GenerationType;
import jakarta.persistence.Id;

@Entity
public class User {

    @Id
    @GeneratedValue(strategy = GenerationType.IDENTITY)
    @Column
    private long id;

    @Column
    private String firstName;

    @Column
    private String lastName;

    @Column
    private int age;

    @Column
    private String occupation;

    public long getId() {
        return id;
    }

    public void setId(long id) {
        this.id = id;
    }

    public String getFirstName() {
        return firstName;
    }

    public void setFirstName(String firstName) {
        this.firstName = firstName;
    }

    public String getLastName() {
        return lastName;
    }

    public void setLastName(String lastName) {
        this.lastName = lastName;
    }

    public int getAge() {
        return age;
    }

    public void setAge(int age) {
        this.age = age;
    }

    public String getOccupation() {
        return occupation;
    }

    public void setOccupation(String occupation) {
        this.occupation = occupation;
    }
}
- @Entity: Indicates that this class is a JPA entity, meaning it is mapped to a database table. Each instance of this class represents a row in the table.
- @Column: Specifies the mapping of the annotated field to the corresponding column in the database table.
- @Id: Indicates the primary key of the entity.
Create an API controller class
Create a package called controller and create a new class inside of the package. Add the following code to the controller.
package com.dhan.Controller;

import java.util.List;

import org.springframework.beans.factory.annotation.Autowired;
import org.springframework.web.bind.annotation.DeleteMapping;
import org.springframework.web.bind.annotation.GetMapping;
import org.springframework.web.bind.annotation.PathVariable;
import org.springframework.web.bind.annotation.PostMapping;
import org.springframework.web.bind.annotation.PutMapping;
import org.springframework.web.bind.annotation.RequestBody;
import org.springframework.web.bind.annotation.RestController;

import com.dhan.Models.User;
import com.dhan.Repo.UserRepo;

@RestController
public class ApiControllers {

    @Autowired
    private UserRepo userRepo;

    @GetMapping("/")
    public String page() {
        return "Welcome";
    }

    @GetMapping("/users")
    public List<User> getUsers(){
        return userRepo.findAll();
    }

    @PostMapping("/save")
    public String saveUsers(@RequestBody User user) {
        userRepo.save(user);
        return "Saved...";
    }

    @PutMapping("update/{id}")
    public String updateUser(@PathVariable long id, @RequestBody User user) {
        User updatedUser = userRepo.findById(id).get();
        updatedUser.setFirstName(user.getFirstName());
        updatedUser.setLastName(user.getLastName());
        updatedUser.setOccupation(user.getOccupation());
        updatedUser.setAge(user.getAge());
        userRepo.save(updatedUser);
        return "Updated... ";
    }

    @DeleteMapping("/delete/{id}")
    public String deleteUser(@PathVariable long id) {
        User deleteUser = userRepo.findById(id).get();
        userRepo.delete(deleteUser);
        return "Deleted user with id " + id;
    }
}
Mapping HTTP Request to methods
- @GetMapping("/"): Maps HTTP GET requests for the root URL ("/") to the page() method, which returns "Welcome".
- @GetMapping("/users"): Maps HTTP GET requests for "/users" to the getUsers() method, which fetches all users from the repository.
- @PostMapping("/save"): Maps HTTP POST requests for "/save" to the saveUsers() method, which saves a new user.
- @PutMapping("update/{id}"): Maps HTTP PUT requests for "/update/{id}" to the updateUser() method, which updates an existing user with the specified ID.
- @DeleteMapping("/delete/{id}"): Maps HTTP DELETE requests for "/delete/{id}" to the deleteUser() method, which deletes the user with the specified ID.
Controller methods
- page(): Returns a simple welcome message.
- save users (User user): Saves a new user to the repository. (CREATE)
- getUsers(): Retrieves all users from the repository. (READ)
- updateUser(long id, User user): Updates an existing user with the provided ID. (UPDATE)
- delete user (long id): Deletes a user with the specified ID from the repository. (DELETE)
Create a user Repository
Create a class for the user repository, providing a way to interact with the User entity in the database using Spring Data JPA. Add the following code to the class.
package com.dhan.Repo;
import org.springframework.data.jpa.repository.JpaRepository;
import com.dhan.Models.User;
public interface UserRepo extends JpaRepository<User, Long>{
}
By extending JpaRepository, the UserRepo interface inherits a wide range of methods for performing CRUD (Create, Read, Update, Delete) operations on the User entity. These methods include saving, deleting, and finding entities, as well as pagination and sorting capabilities. This interface allows developers to write repository interfaces with minimal boilerplate code, as Spring Data JPA automatically generates the implementation based on the provided method signatures and naming conventions.
Connect MySQL Database
Everything is done. But, we have not linked our database yet. Open the application.properties file and add the following code.
spring.application.name=Rest-API
spring.jpa.hibernate.ddl-auto=update
spring.datasource.driver-class-name=com.mysql.cj.jdbc.Driver
spring.jpa.show-sql=true
spring.datasource.url=jdbc:mysql://localhost:3306/crudusers
spring.datasource.username=root
spring.datasource.password=root
spring.jpa.properties.hibernate.dialect=org.hibernate.dialect.MySQLDialect
- spring.application.name will be loaded by default while creating the project.
- Mention the name of our database which is 'crudusers' after the link in spring. data source.url = jdbc:mysql://localhost:3306/crudusers.
- Give the username and password that you have for your MySQL database. I have the same username and password for the database which is root.
We have linked the database, but we have not created a database. So, now open the MySQL workbench.
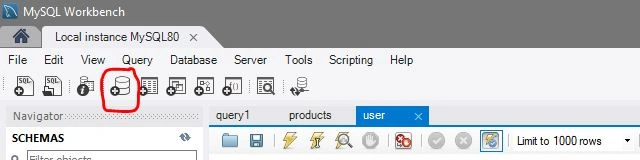
Create a new schema by selecting the icon mentioned in the image.
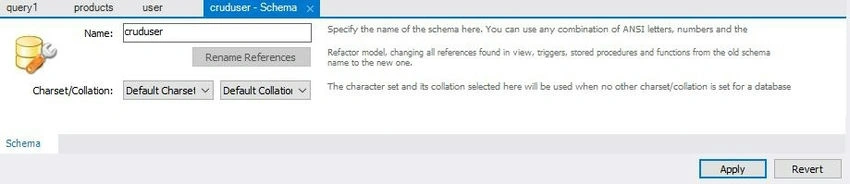
Specify the name of the database. In this case, we have given cruder and click Apply.
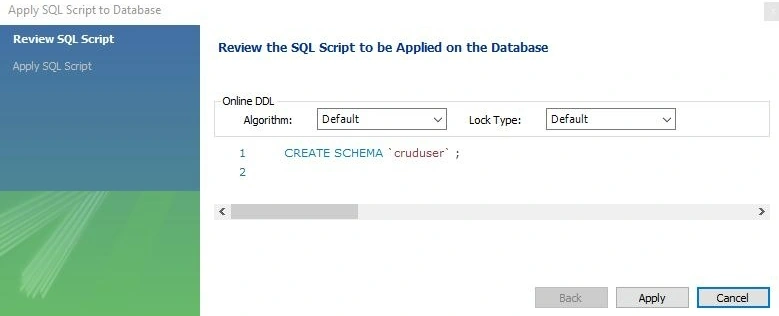
Click Apply again to confirm.
Now, refresh the database and you can see the table created as a user with columns id, age, first_name, last_name, and occupation that we defined in the model class.
Using the Postman App to Post and Get Requests
- Run the application by right-clicking the project folder and selecting Run as -> SpringBoot App
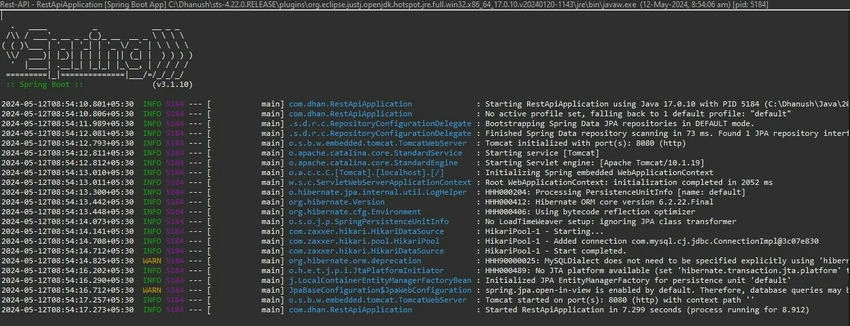
- We can see our Spring Boot application running successfully in port 8080.
- Open the Postman app, select post, and paste the link http://localhost:8080/save.
- Under the body tag, select raw and JSON options. Add the JSON code in the format below with the name of your choice and click send.
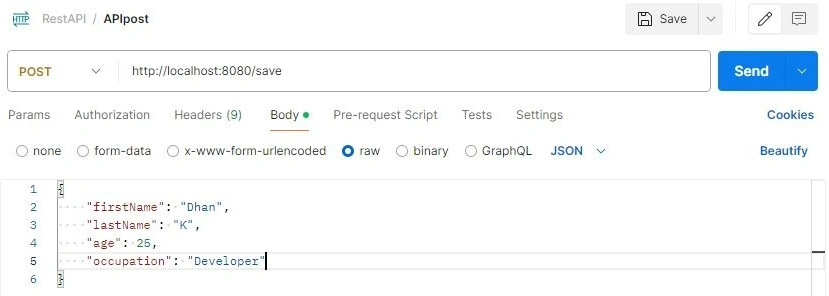
- You will see the response message as saved.
- Now, if you check the database, you will find the data added to the table.
- To update the database, select put and paste the link http://localhost:8080/update/
- Under the body tag, select raw and JSON options. Add the JSON code in the format below with the name of your choice and click send.
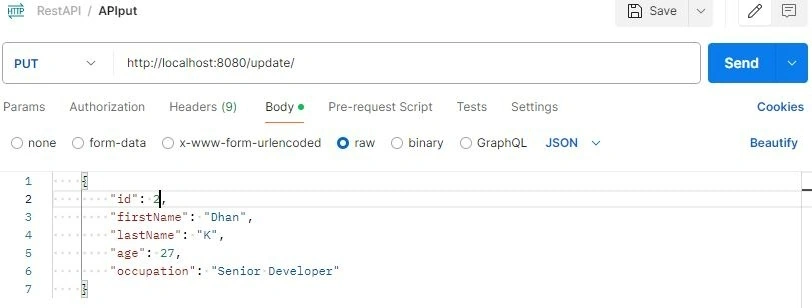
- Now, check the database and you will find the table updated with data modified.
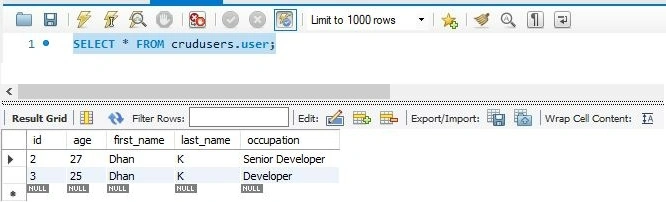
- Similarly, you can perform delete operations and view options.
Conclusion
Building a RESTful API with Spring Boot and testing it using Postman offers developers a powerful and streamlined approach to creating robust and scalable web services. Throughout this article, we've explored the essential steps involved in setting up a Spring Boot project, defining REST endpoints, handling HTTP requests and responses, and integrating with a database using Spring Data JPA. The combination of Spring Boot framework knowledge and Postman API empowers developers to rapidly prototype, develop, and test RESTful APIs, accelerating the software development lifecycle and delivering high-quality web services that meet the demands of modern applications.
Join the conversation! Your thoughts help the community grow.