

Introduction
In this article, we are going to learn about how to create a simple custom keyboard in Xamarin ios.
Solution
Here are the steps to create a custom keyboard in Xamarin ios
Step 1
Create your Xamarin iOS solution in Visual Studio/Xamarin Studio
Step 2
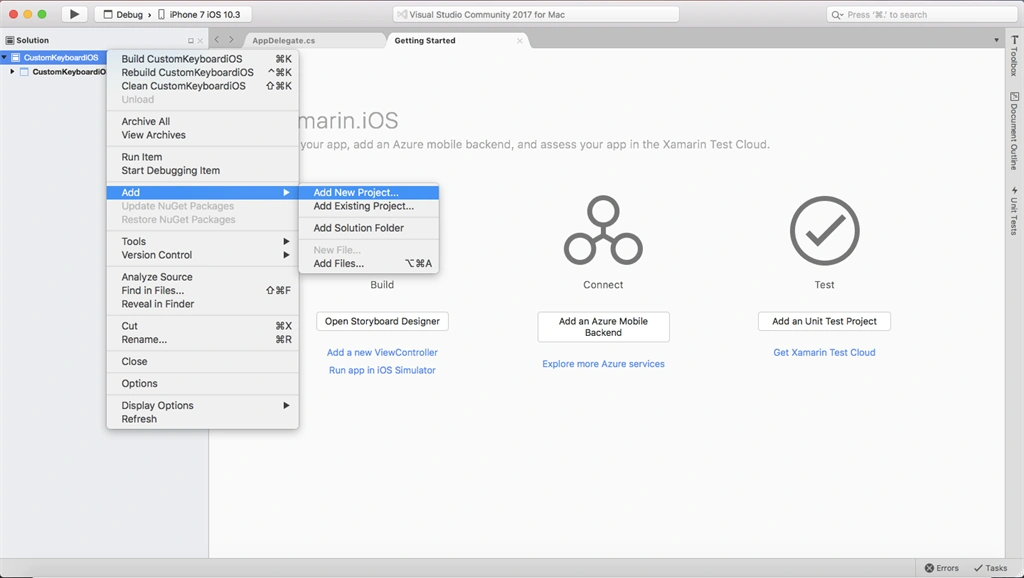
Rigth click on Solution and choose Add --> Add New Project...
Step 3
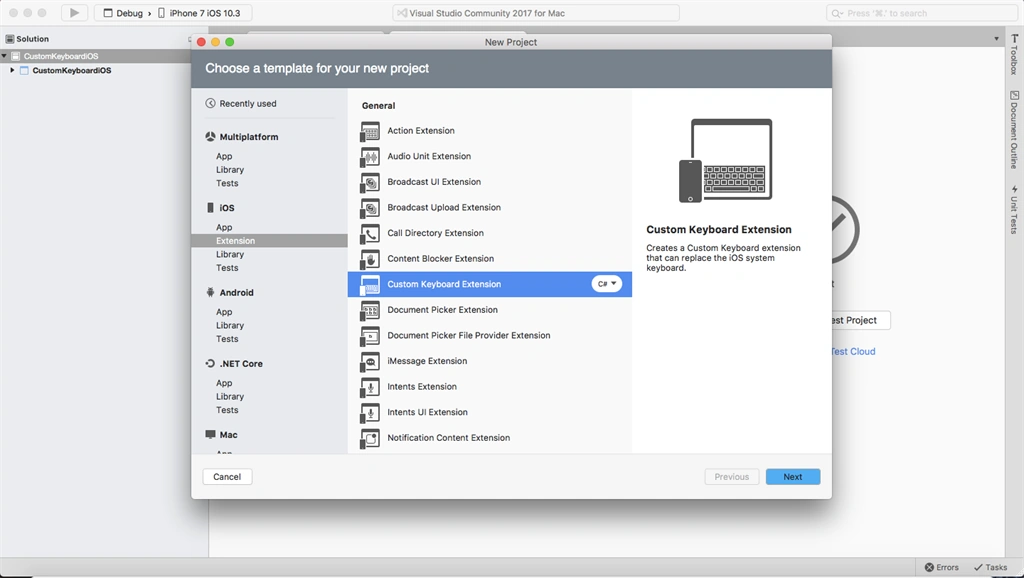
Choose iOS --> Extension --> Custom Keyboard Extension and click Next.
Step 4
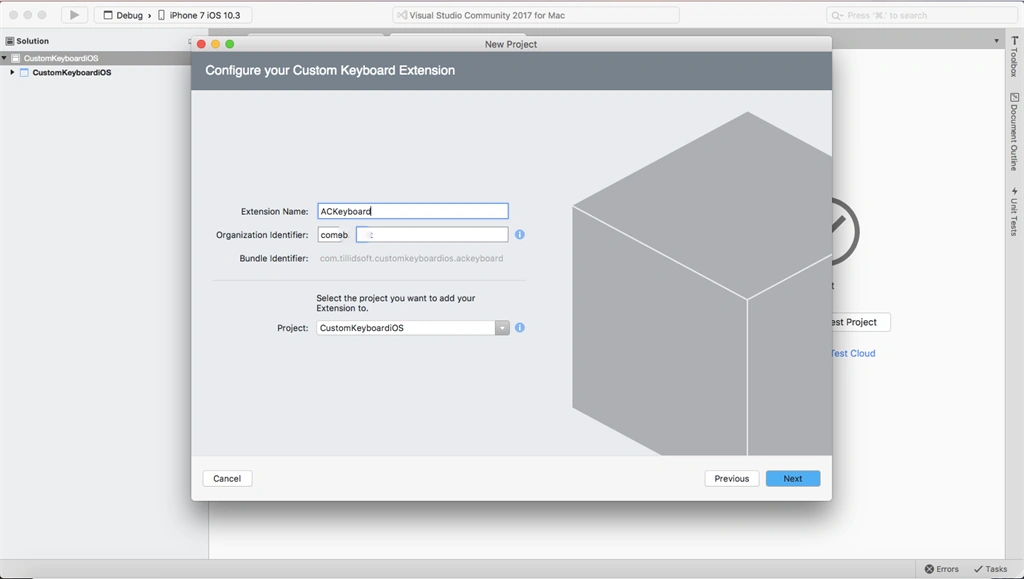
Set Extension Name as your need like "ACKeyBoard" and click next
Step 5
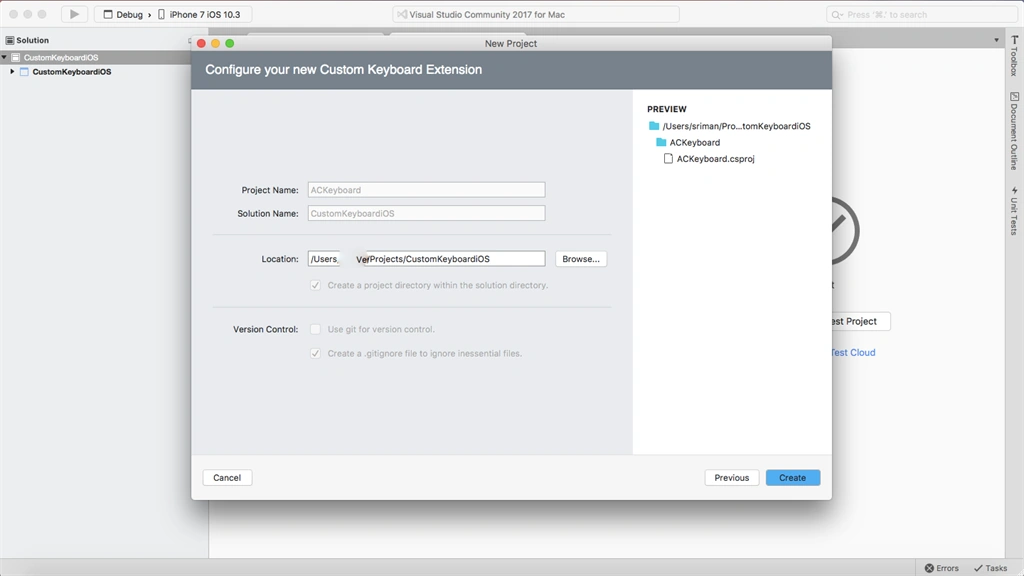
Now a window appears with your Projet Name and Solution Name, Click "Create".
Step 6
After that, a new Extension Project is added to the existing project.
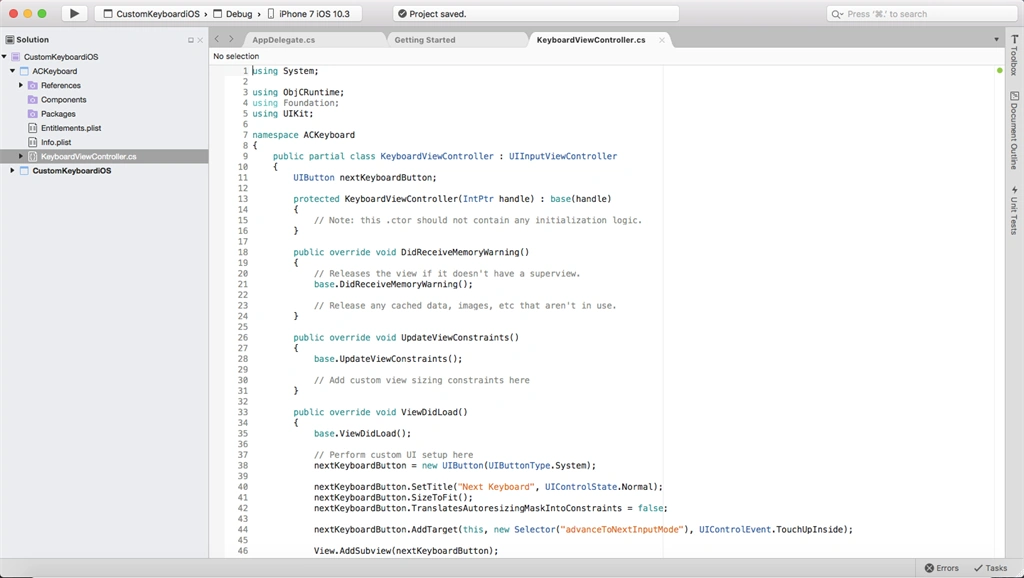
Inside the Extension project a class file is created with name KeyboardViewController that inherits UIInputViewController.
Step 7
In that keyboardViewController you can modify according to your own UI.
In this article, we are going to learn about how to create a simple custom keyboard in Xamarin ios.
Solution
Here are the steps to create a custom keyboard in Xamarin ios
Step 1
Create your Xamarin iOS solution in Visual Studio/Xamarin Studio
Step 2
Rigth click on Solution and choose Add --> Add New Project...
Step 3
Choose iOS --> Extension --> Custom Keyboard Extension and click Next.
Step 4
Set Extension Name as your need like "ACKeyBoard" and click next
Step 5
Now a window appears with your Projet Name and Solution Name, Click "Create".
Step 6
After that, a new Extension Project is added to the existing project.
Inside the Extension project a class file is created with name KeyboardViewController that inherits UIInputViewController.
Step 7
In that keyboardViewController you can modify according to your own UI.
- public partial class KeyboardViewController: UIInputViewController {
- UIButton nextKeyboardButton;
- protected KeyboardViewController(IntPtr handle): base(handle) {
- // Note: this .ctor should not contain any initialization logic.
- }
- public override void DidReceiveMemoryWarning() {
- // Releases the view if it doesn't have a superview.
- base.DidReceiveMemoryWarning();
- // Release any cached data, images, etc that aren't in use.
- }
- public override void UpdateViewConstraints() {
- base.UpdateViewConstraints();
- // Add custom view sizing constraints here
- }
- public override void ViewDidLoad() {
- base.ViewDidLoad();
- // Perform custom UI setup here
- nextKeyboardButton = new UIButton(UIButtonType.System);
- nextKeyboardButton.SetTitle("Next Keyboard", UIControlState.Normal);
- nextKeyboardButton.SizeToFit();
- nextKeyboardButton.TranslatesAutoresizingMaskIntoConstraints = false;
- nextKeyboardButton.AddTarget(this, new Selector("advanceToNextInputMode"), UIControlEvent.TouchUpInside);
- View.AddSubview(nextKeyboardButton);
- var nextKeyboardButtonLeftSideConstraint = NSLayoutConstraint.Create(nextKeyboardButton, NSLayoutAttribute.Left, NSLayoutRelation.Equal, View, NSLayoutAttribute.Left, 1.0 f, 0.0 f);
- var nextKeyboardButtonBottomConstraint = NSLayoutConstraint.Create(nextKeyboardButton, NSLayoutAttribute.Bottom, NSLayoutRelation.Equal, View, NSLayoutAttribute.Bottom, 1.0 f, 0.0 f);
- View.AddConstraints(new [] {
- nextKeyboardButtonLeftSideConstraint,
- nextKeyboardButtonBottomConstraint
- });
- }
- public override void TextWillChange(IUITextInput textInput) {
- // The app is about to change the document's contents. Perform any preparation here.
- }
- public override void TextDidChange(IUITextInput textInput) {
- // The app has just changed the document's contents, the document context has been updated.
- UIColor textColor = null;
- if (TextDocumentProxy.KeyboardAppearance == UIKeyboardAppearance.Dark) {
- textColor = UIColor.White;
- } else {
- textColor = UIColor.Black;
- }
- nextKeyboardButton.SetTitleColor(textColor, UIControlState.Normal);
- }
- }
Step 8
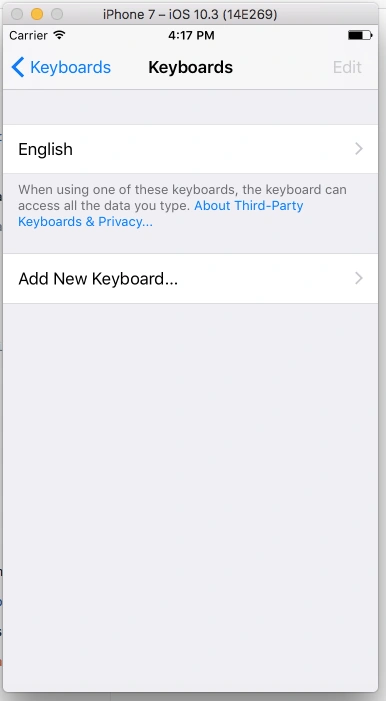
Save and Run the project. In simulator you have to do some changes to add new custom keyboard. open simulator Go to Setting --> Genaral --> Keyboard --> Add New Keyboard.
Step 9
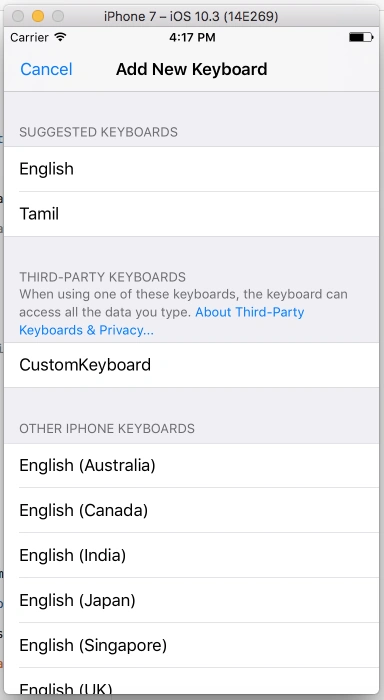
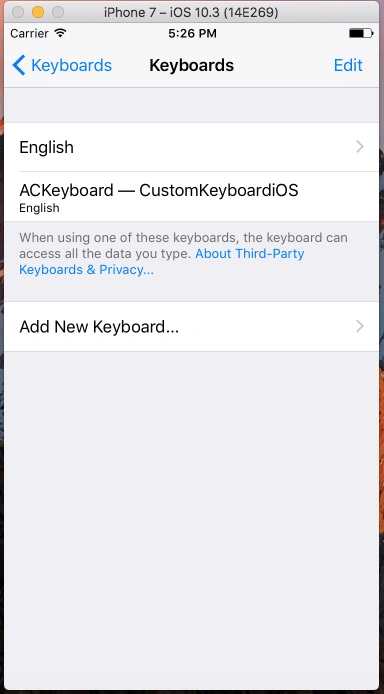
Inside Add New Keyboard, Select CustomKeyboard under Third-Party Keyboards that have installed. Now you can find Customkeyboard that created is added to keyboards.
Thus the newly generated keyboard is now added.
Save and Run the project. In simulator you have to do some changes to add new custom keyboard. open simulator Go to Setting --> Genaral --> Keyboard --> Add New Keyboard.
Step 9
Inside Add New Keyboard, Select CustomKeyboard under Third-Party Keyboards that have installed. Now you can find Customkeyboard that created is added to keyboards.
Thus the newly generated keyboard is now added.
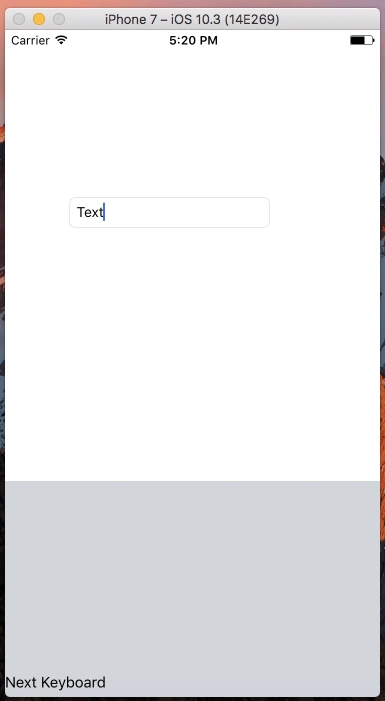
Keyboards can be switched by clicking "Next Keyboard".
Step 10
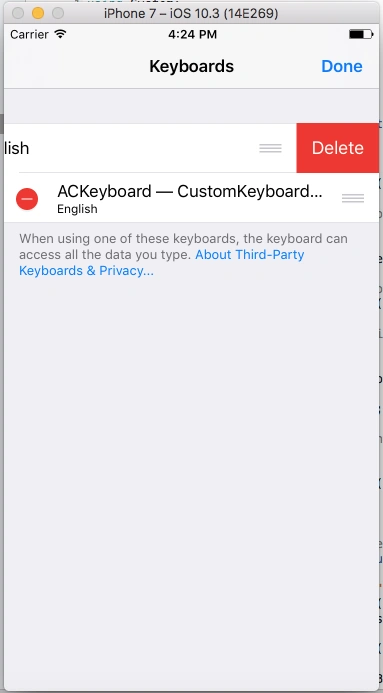
To Remove added Keyboard choose Keyboards --> Edit.
Step 10
To Remove added Keyboard choose Keyboards --> Edit.
TUYÊN ĐENPosted Sep 18, 2019, 11:52 AM
Is the same on MS Visual Studio?
Arvind ChourasiyaPosted Aug 24, 2017, 2:05 AM
Nice article. Keep sharing knowledge.