

Introduction
- We want the users to see a similar UI irrespective of browsers and operating systems.
- Customized UI looks great and it changes the look and feels of the application.
And we do it by downloading a CSS file, Jquery file or combination of CSS and Jquery file. Well, that’s great – but actually that has some size which will increase the load time of our application and you don't have control over them.
So, the next question will be how to do it?
We can customize the UI using CSS. In the case of HTML input type - button, text, textarea, and dropdown we can customize the UI using CSS by modifying its height and width, adding some border, changing the hover style, etc.
But it doesn’t work well in the case of radio buttons and checkboxes.
So, in this article - I am going to explain how we can use CSS and FontAwesome to customize the checkbox and radio button.
Prerequisites
- Html
- Css
- Jquery
Let’s Start.
Creating Checkbox
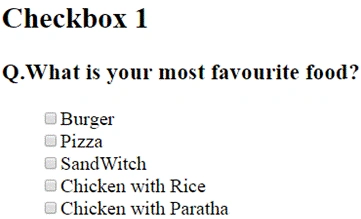
Create a HTML page with some checkbox
- <!DOCTYPE html>
- <html>
- <head>
- <meta charset="utf-8" />
- <title>Custom Checkbox using </title>
- <link href="https://maxcdn.bootstrapcdn.com/font-awesome/4.7.0/css/font-awesome.min.css" rel="stylesheet">
- <script src="https://ajax.googleapis.com/ajax/libs/jquery/3.1.1/jquery.min.js"></script>
- <style>
- body {
- font-size: 20px;
- }
- </style>
- </head>
- <body>
- <div class="checkbox1">
- <h2>Checkbox 1</h2>
- <h3>Q.What is your most favourite food?</h3>
- <ul style="list-style-type:none;">
- <li><input type="checkbox" /><label>Burger</label></li>
- <li><input type="checkbox" /><label>Pizza</label></li>
- <li><input type="checkbox" /><label>SandWitch</label></li>
- <li><input type="checkbox" /><label>Chicken with Rice</label></li>
- <li><input type="checkbox" /><label>Chicken with Paratha</label></li>
- </ul>
- </div>
- </body>
- </html>
- <style>
- input[type=checkbox] {
- display: none;
- }
- input[type=checkbox]+label:before {
- font-family: FontAwesome;
- display: inline-block;
- }
- /* checkbox1 */
- /* unchecked icon */
- .checkbox1 input[type=checkbox]+label:before {
- content: "\f096";
- letter-spacing: 10px;
- }
- /* checked icon */
- .checkbox1 input[type=checkbox]:checked+label:before {
- letter-spacing: 5px;
- content: "\f046";
- }
- </style>
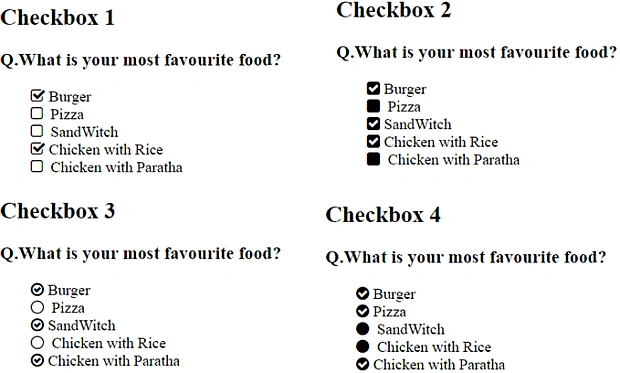
Above code will modify the Checkbox UI. So the next question will be what is the above CSS code doing? So here is the trick.
- We are hiding the Checkbox –so the original checkbox won’t be visible.
- We are selecting the checkbox and label by selector – “input[type=checkbox] + label ” and using pseudo-CSS Selector “before” to change everything.
- We are changing the font family to “font-awesome” and displaying it to “inline-block”.
- We have two situations – (i) To show the checkbox when it is checked (ii) To show the checkbox when it is unchecked. So we are using the native work of checkbox but not UI.
- So when the checkbox will be checked, the content will be something else (“\f096” ) and when the checkbox will not be checked, the content will be something else (“\f046”). And these all are being done by CSS.
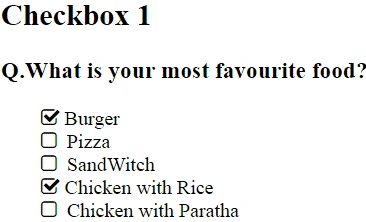
Now, if you will render the above page in the browser, you will see the customized checkbox, but when you will click on it - it won't work. That is because currently the customized checkbox is only an icon (you can say a picture) so we will have to manually change the icon when the user clicks on the icon.
Add Jquery to click on the checkbox.
- <script>
- $('ul li').click(function() {
- var CheckBox = $(this).find('input[type="checkbox"]');
- if (CheckBox.attr('checked')) {
- CheckBox.attr('checked', false);
- } else {
- CheckBox.attr('checked', true);
- }
- })
- </script>
- <!DOCTYPE html>
- <html>
- <head>
- <meta charset="utf-8" />
- <title>Custom Checkbox using </title>
- <link href="https://maxcdn.bootstrapcdn.com/font-awesome/4.7.0/css/font-awesome.min.css" rel="stylesheet">
- <script src="https://ajax.googleapis.com/ajax/libs/jquery/3.1.1/jquery.min.js"></script>
- <style>
- body {
- . font-size: 20px;
- }
- </style>
- </head>
- <body>
- <div class="radio1">
- <h2>Radio1</h2>
- <h3>Q.What is your most favourite food?</h3>
- <ul style="list-style-type:none;">
- <li><input type="radio" name="radio1" /><label>Burger</label></li>
- <li><input type="radio" name="radio1" /><label>Pizza</label></li>
- <li><input type="radio" name="radio1" /><label>SandWitch</label></li>
- <li><input type="radio" name="radio1" /><label>Chicken with Rice</label></li>
- <li><input type="radio" name="radio1" /><label>Chicken with Paratha</label></li>
- </ul>
- </div>
- </body>
- </html>
- <style>
- input[type=radio] {
- display: none;
- }
- input[type=radio]+label:before {
- font-family: FontAwesome;
- display: inline-block;
- }
- /* radio1 */
- /* unchecked icon */
- .radio1 input[type=radio]+label:before {
- content: "\f1db";
- letter-spacing: 10px;
- }
- /* checked icon */
- .radio1 input[type=radio]:checked+label:before {
- letter-spacing: 5px;
- content: "\f192";
- }
- </style>
- <script>
- $('ul li').click(function() {
- var $radio = $(this).find('input[type="radio"]');
- $radio.prop('checked', !$radio.prop('checked'));
- $radio.prop('checked', true);
- })
- </script>
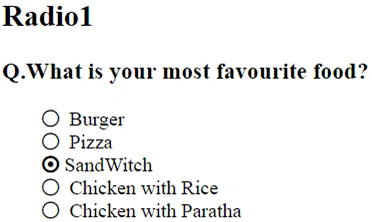
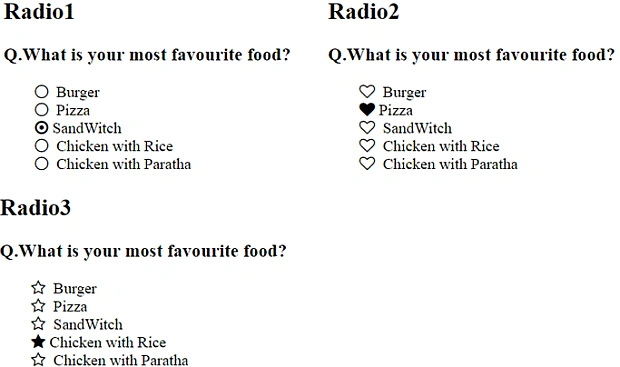
Join the conversation! Your thoughts help the community grow.