

Introduction
Every application has some essential controls, whether it is a Web app or Desktop app or a Smart Phone app. And, they are as essential since you can't imagine a single app without them.
And in this demonstration we are taking on a few of them.
So, this time we have chosen the Edit Text Control.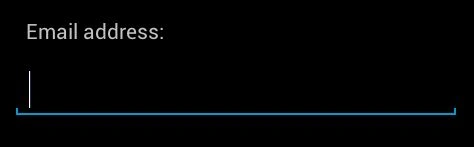
So, what do we with an EditText (or a TextBox) in any application?
Right, we get the data the user has inserted. I know, it is something lame. Since this is a beginner's stage where we are learning how to accept the text.
So, let's start the edit text.
Procedures
Step 1
After creating a successful Blank Android Project, we will first design a XML page that describes the layout of your app's activity.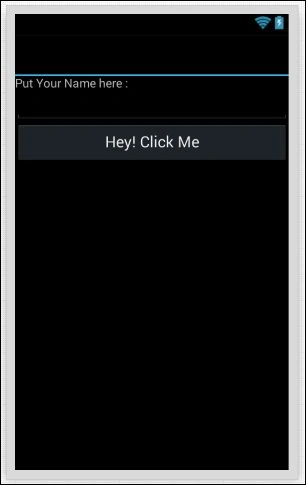
I would recommend you to do this by XML code. Since it will deal with the inner and outer of the UI.
Within that Liner Layout, create a TextView first then a EditBox and a Button.
So, it will be like the following:
<code>
- <code>
- <?xml version="1.0" encoding="utf-8"?>
- <LinearLayout xmlns:android="http://schemas.android.com/apk/res/android"
- android:orientation="vertical"
- android:layout_width="fill_parent"
- android:layout_height="fill_parent"
- android:minWidth="25px"
- android:minHeight="25px">
- <TextView
- android:id="@+id/myLabel"
- android:layout_width="wrap_content"
- android:layout_height="wrap_content"
- android:text="Put Your Name here :" />
- <EditText
- android:id="@+id/myEditBox"
- android:layout_width="match_parent"
- android:layout_height="wrap_content" />
- <Button
- android:id="@+id/myButton"
- android:layout_width="match_parent"
- android:layout_height="wrap_content"
- android:text="Hey! Click Me" />
- </LinearLayout>
- </code>
Step 2
We have done the layout. Now to code the backend file. So, open your MainActivity.cs file that is in the root folder of your project.
Note: Delete the unused commands like Button and its event.
Before we code, grasp the concept first.
Whatever control we have in a XML page (in other words UI Page). In a C# file we will map every single control we have in a XML file.
It is not mandatory at all, but make sure those controls are mapped that you want to use in a C# file.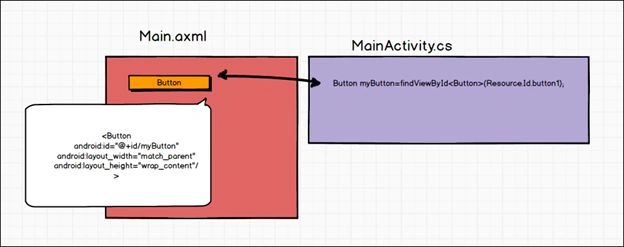
In .NET App development, we rarely do this because Visual Studio is quite intelligent in this.
So, first we will map our controls.
Since we have three controls here: TextView, EditBox and Button.
- //Intialize the Content Here
- myLabel = FindViewById<TextView>(Resource.Id.myLabel);
- myEditBox = FindViewById<EditText>(Resource.Id.myEditBox);
- myButton = FindViewById<Button>(Resource.Id.myButton);
And, globally define the references of the controls.
- // Refrences
- TextView myLabel;
- EditText myEditBox;
- Button myButton;
Step 3
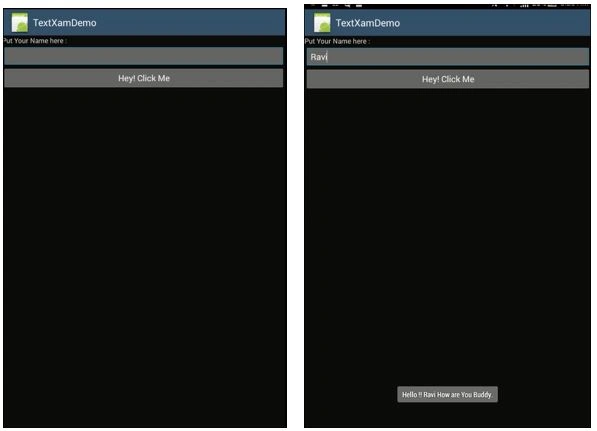
We will now create the click event for that button. When we click on that, it will show the contents of the Edit Box.
// We will now code the Button's Click Event
- // Now, we will code the Button's Click Event
- myButton.Click += myButton_Click;
That will generate the event handler method.
- void myButton_Click(object sender, EventArgs e)
- {
- string message = "Hello !! "+myEditBox.Text.ToString()+" How are You Buddy.";
- // Make a Toast PopUp Box
- Toast.MakeText(this, message,ToastLength.Long).Show();
- }
Output Window
Conclusion
Everything is easy here, we can do this in a single click when we are dealing with a native C# application. But, this time we have a Xamarin app. So, there is much more to do. Apart from this, if you experience any problem then try to solve it from the enclosed source file, or drop a message wherever you find me.
Until then, keep living your days.
Vithal WadjePosted Nov 24, 2014, 3:40 AM
good to see,C# code for Android