

Introduction
This article demonstrates how to deploy a website to Azure using Visual Studio.
Prerequisites
First of all, login to the Azure portal. Click here to go to the Azure login page.

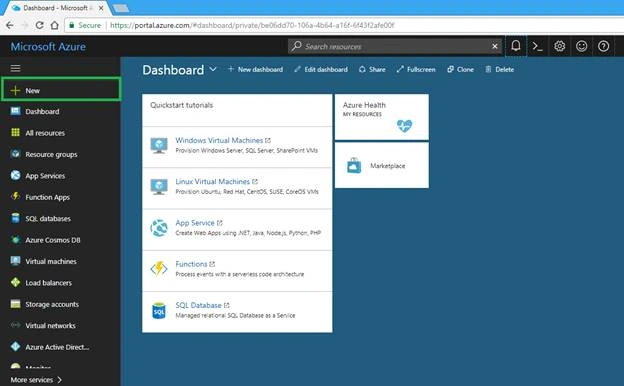
After Signing in the Azure portal, click on "New" from the left panel of the website as shown in the below image.
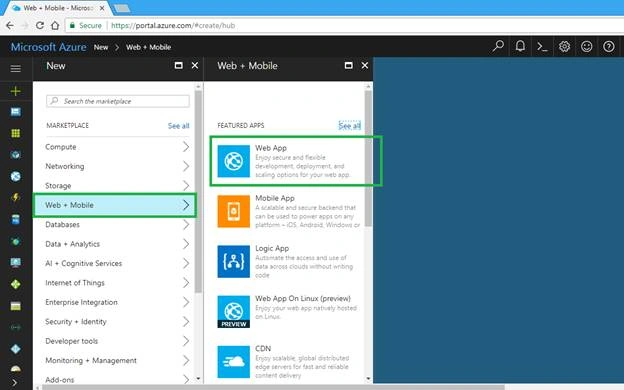
Now, click Web + Mobile >> Web App.
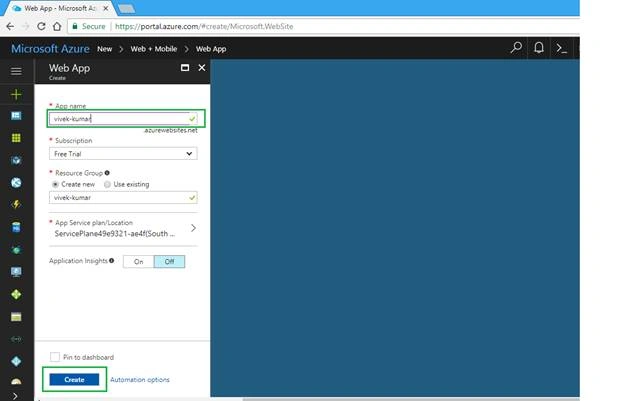
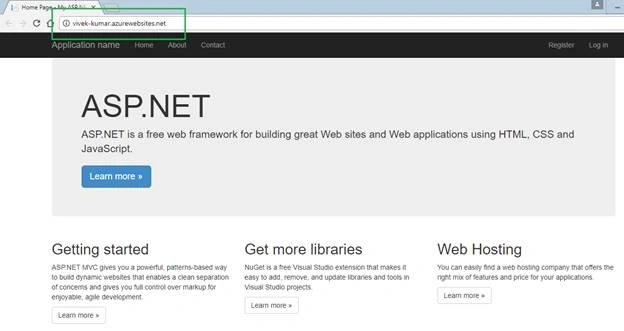
Enter the name of the App. Here, we are giving the name as vivek-kumar, so our website name will be vivek-kumar.azurewebsites.net.
Click on "Create" button.
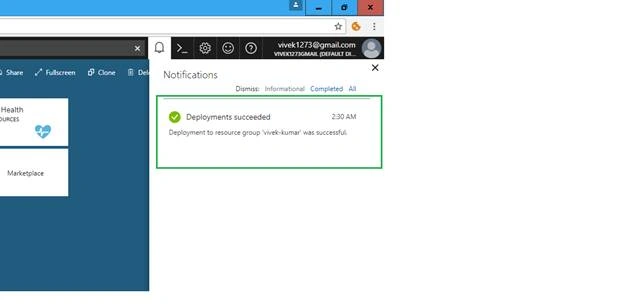
We will get a notification message if the Deployment succeeds.
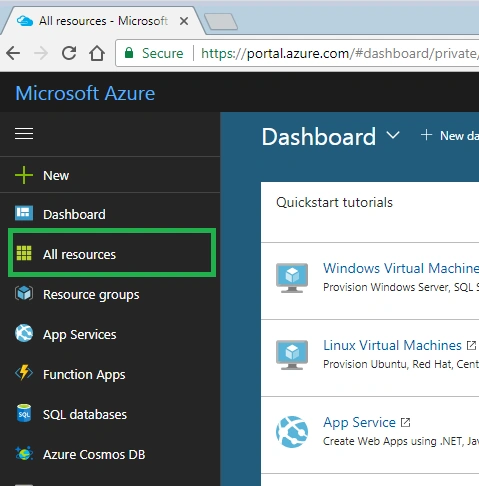
Now, click on "All resources" from the left panel of the website.
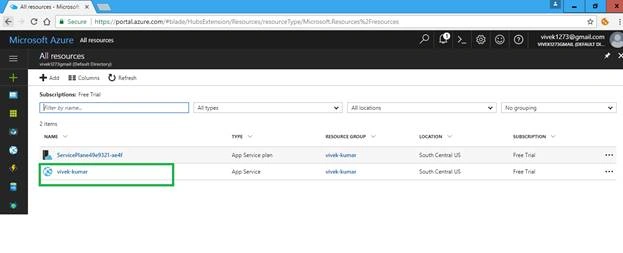
Click on the name of the newly-created app.
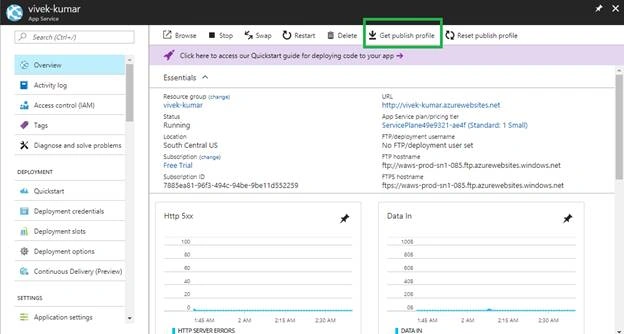
We can see all the details of our website. Now, click the "Get publish profile" to download the profile, as shown below.
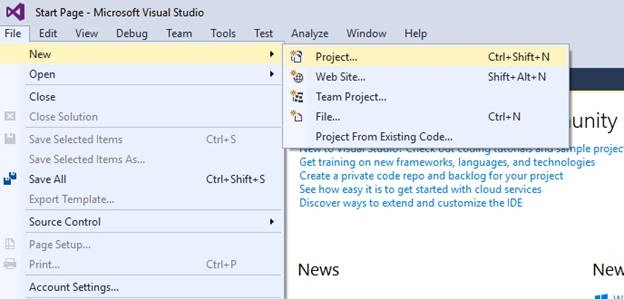
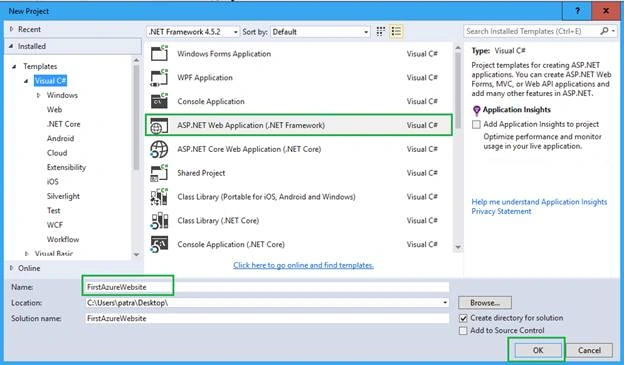
Next, open Visual Studio and click New -> Project.
Select ASP.NET Web Application (.Net Framework), type the name as a FirstAzureWebsite in the name field, and click OK button.
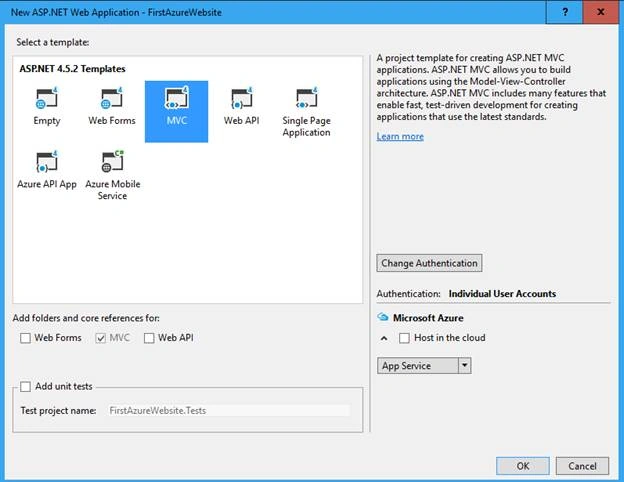
Select MVC and click OK button as in the below image.
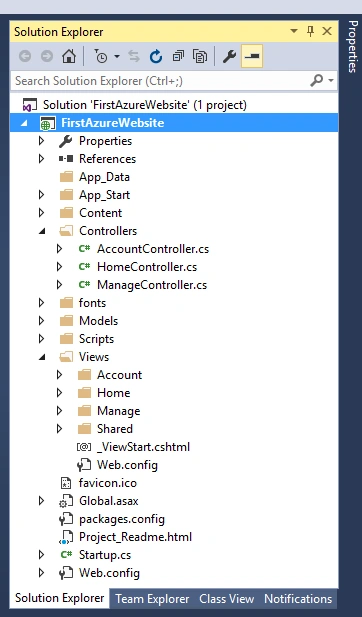
Now, we got the sample MVC application.
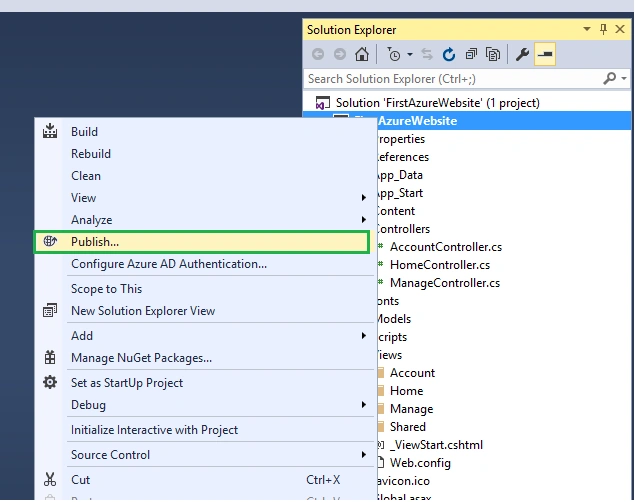
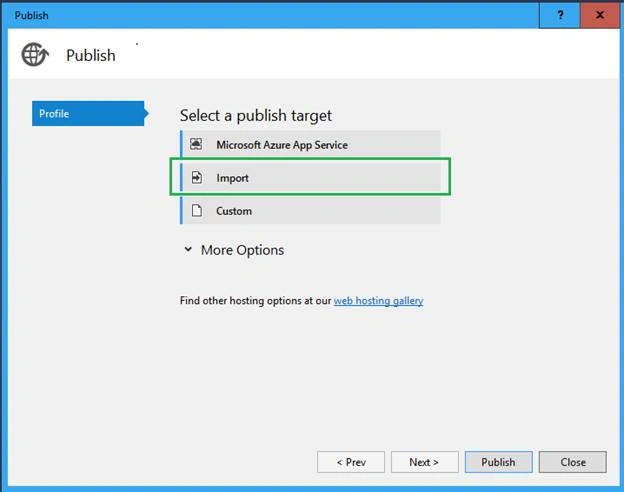
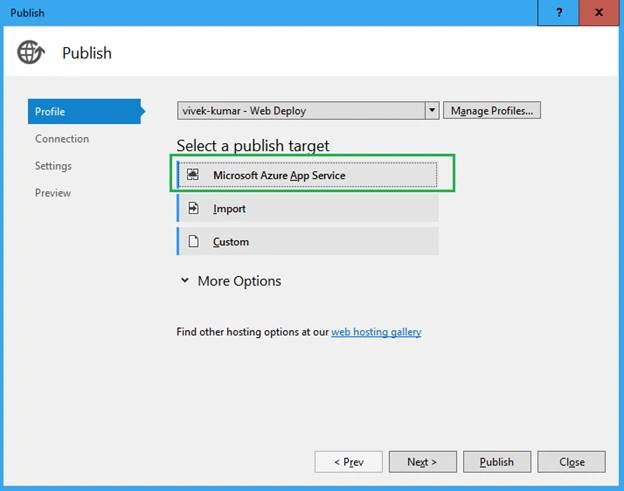
Right click on the project and click on "Publish…"
Select "Import" from the publishing target menu as shown in the below image.
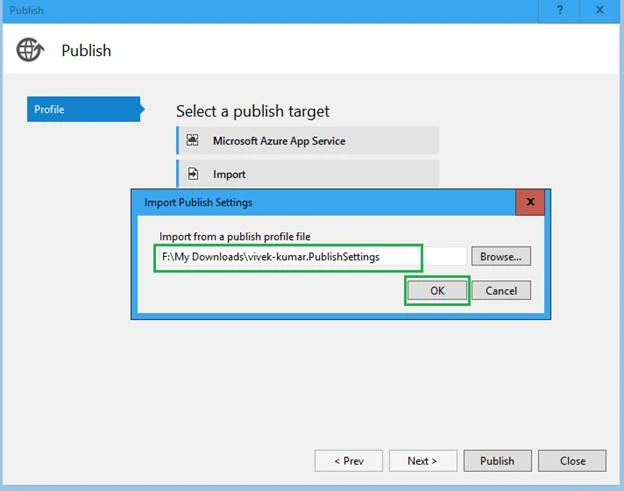
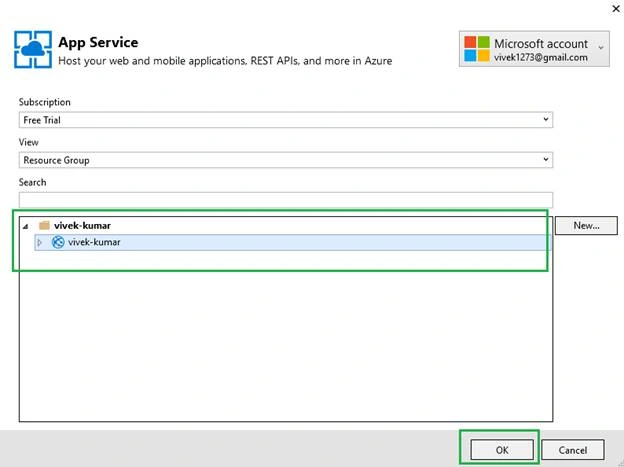
Browse for the downloaded publish profile and click OK.
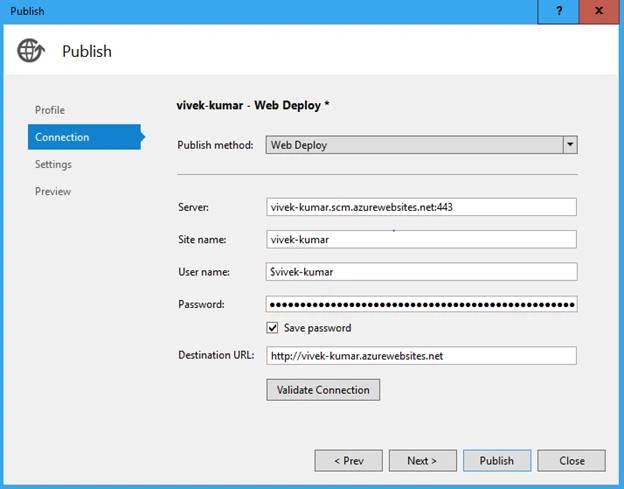
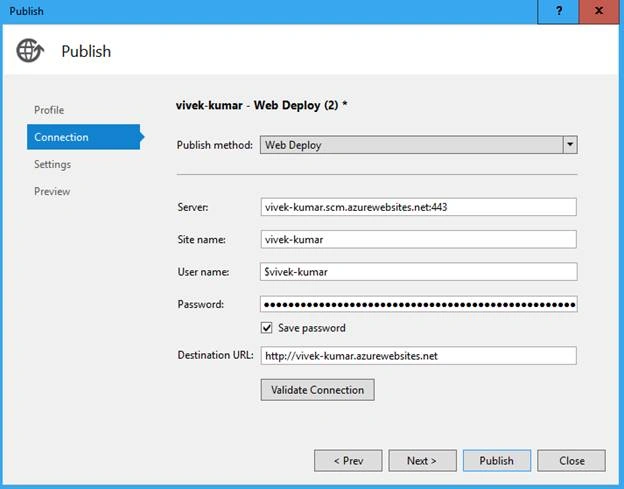
Now, we will see that our all required credentials are filled in the popup.
Click on "Validate Connection" for checking the connection details.
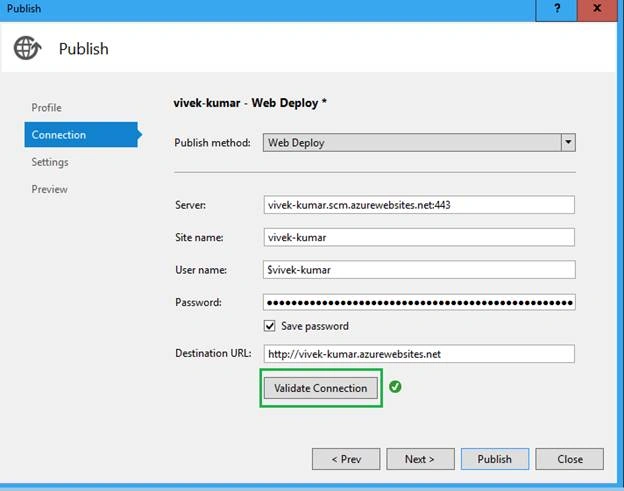
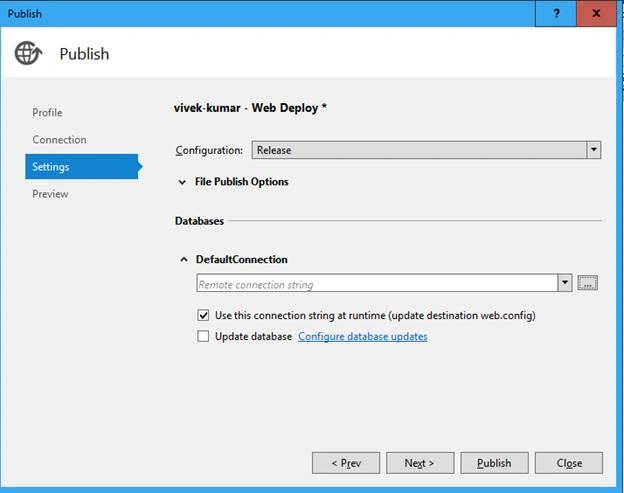
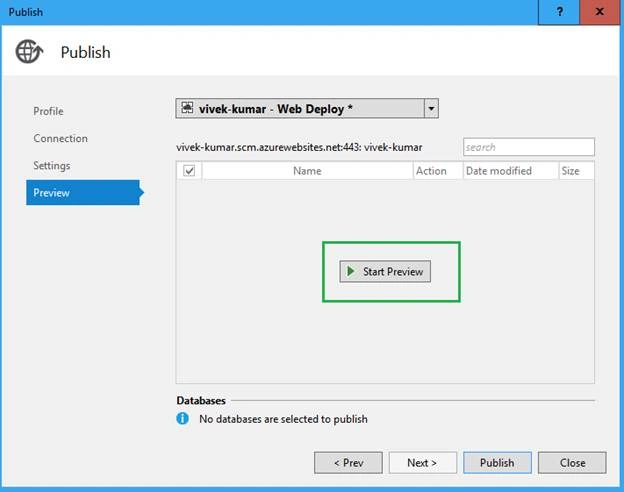
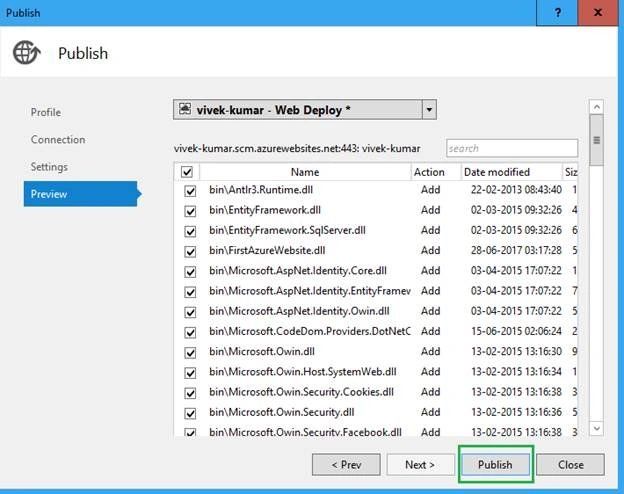
Click on Next.
Join the conversation! Your thoughts help the community grow.