

Introduction
In this article, we explain how to disable Automatic Maintenance in Windows 8. One of the refreshing Windows 8 features is automatic system maintenance that checks for software updates, system diagnostics, and security scanning tasks, on a very regular basis. This option ensures that maintenance tasks are performed at a particular time that must be made when you're not around and the system is idle.
But some users don't want to use Automatic Maintenance that checks for software updates, system diagnostics etc. You can disable this feature if you think you don't need it.
How to disable Automatic Maintenance in Windows 8?
Step 1
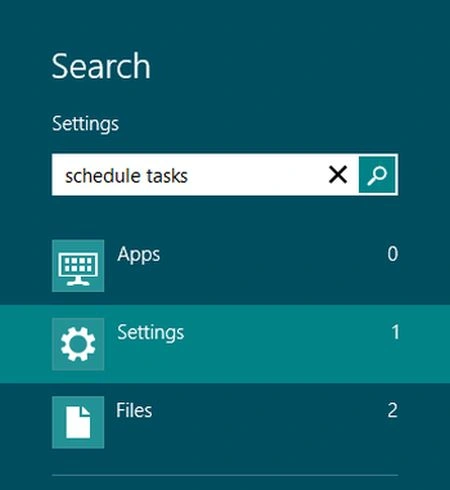
Go to the search box and type "schedule tasks" and click on "Setting". Click on the icon that appears in the results.
Step 2
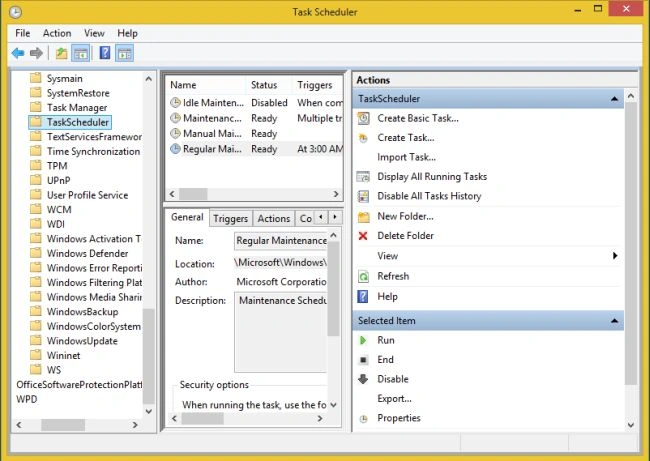
A task scheduler window will be opened. In this window the left pane allows you to select the task, the center pane has the information regarding the selected task, while the right pane contains additional relevant actions.

Step 3
In this window navigate to "Task Scheduler Library > Microsoft > Windows > TaskScheduler".
Step 4
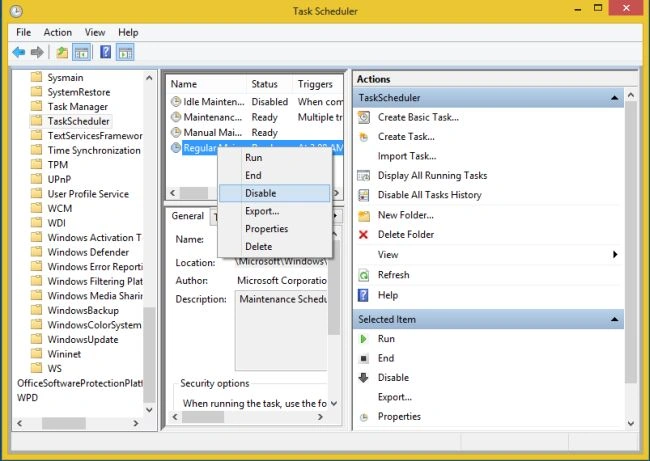
In this step right-click on "Regular Maintenance" from the center pane and select "Disable". And exit from this window.
Summary
In this article, we learned about Disable Automatic Maintenance in Windows 8.
Marc LalancettePosted Apr 27, 2013, 6:36 PM
You are misleading people here. The Maintenance Configurator task will reset the Automatic Maintenance tasks even if you disable them, and that task (MC) cannot be disabled. So unless you shut down your computer when AM is supposed to run and constantly disable it after the MC task resets it, you have no way to control AM. Despite valid reasons to want to disable or at least control this, and many user complaints, Microsoft keeps telling us it knows better...