

We can use the Arc XAML element to draw arcs in XAML. Besides drawing arcs using the Arc element, we can also use the ArcSegment element. The ArcSegment is useful when an arc becomes a part of a graphics path or a larger geometric object.
In this article, we will see how to use the ArcSegment to draw arcs in XAML and WPF.
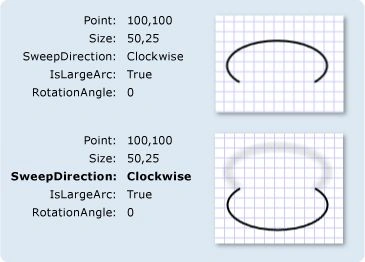
The ArcSegment object represents an elliptical arc between two points. The ArcSegment class has the five properties Point, Size, SweepDirection, IsLargeArc and RotationAngle.
- The Point property represents the endpoints of an arc.
- The Size property represents the x and y radiuses of an arc.
- The SweepDirection property specifies whether an arc sweep direction is clock wise or counter clock wise.
- The IsLargeArc property returns true if an arc is greater than 180 degrees.
- The RotationAngle property represents the angle by which an ellipse is rotated about the x-axis.
The following figure provided by the MSDN documentation shows these property values and their results.
<ArcSegment Size="300,50" RotationAngle="30"
IsLargeArc="True" SweepDirection="CounterClockwise" Point="200,100" />
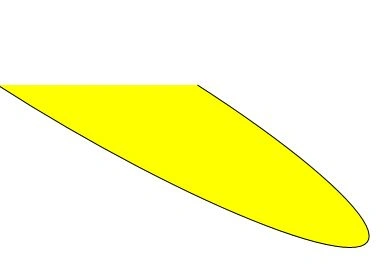
A Path object is used to draw an arc by setting a PathGeomerty as Path.Data. The following code snippet creates a Path and sets a ArcSegment as a part of PathFigure.Segments.
<Path Stroke="Black" StrokeThickness="1">
<Path.Data>
<PathGeometry>
<PathGeometry.Figures>
<PathFigureCollection>
<PathFigure StartPoint="0,100">
<PathFigure.Segments>
<PathSegmentCollection>
<ArcSegment Size="300,50" RotationAngle="30"
IsLargeArc="True"
SweepDirection="CounterClockwise"
Point="200,100" />
</PathSegmentCollection>
</PathFigure.Segments>
</PathFigure>
</PathFigureCollection>
</PathGeometry.Figures>
</PathGeometry>
</Path.Data>
</Path>

Join the conversation! Your thoughts help the community grow.