

Introduction
In this article, I will show you how to Enable and Disable WI-FI in Android apps using Android Studio. The information that an application can access includes connected network's link speed, IP address, negotiation state, other network information. Applications can also scan, add, save, terminate, and initiate Wi-Fi connections.
Requirements
- Android Studio version 2.3.3
- Little bit XML and JAVA knowledge.
- Android Emulator (or) Android mobile
- Download link (Android Studio)
Steps should be followed
These are the steps to create a changed background and audio player Android app. I have included the source code below.
Step 1
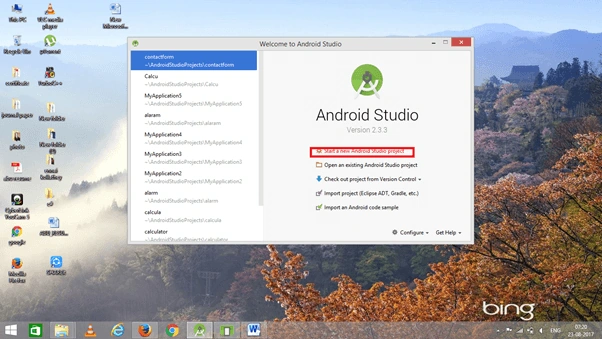
Open Android Studio and start a new Android Studio Project.
Step 2
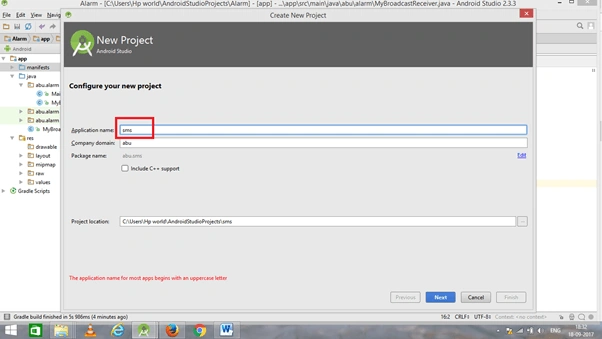
You can choose your application name and choose where your project is stored on the location. If you wish to use C++ for coding the project, mark the "Include C++ support", and click the "Next" button.
Step 3
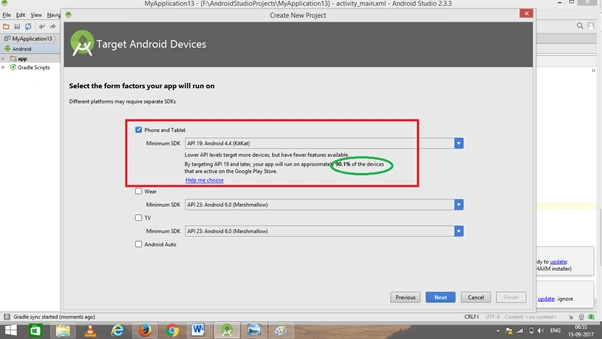
Now, select the version of Android and select the target Android devices. We need to choose the SDK level which plays an important role in running the application.
Step 4
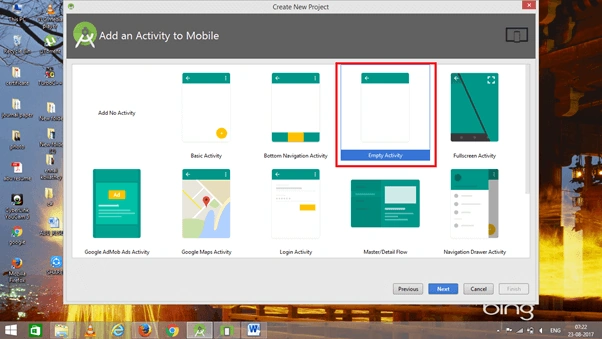
Now, add the activity and click the "Next" button.
Step 5
Add activity name and click "Finish".
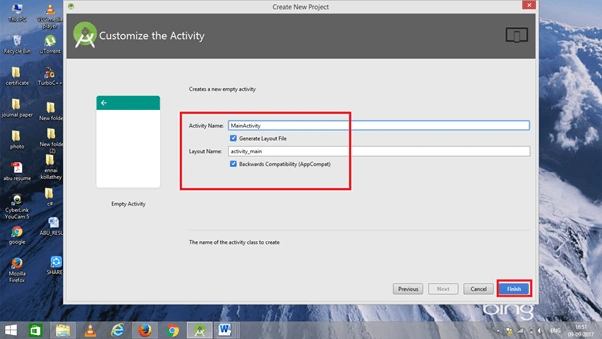
Step 6
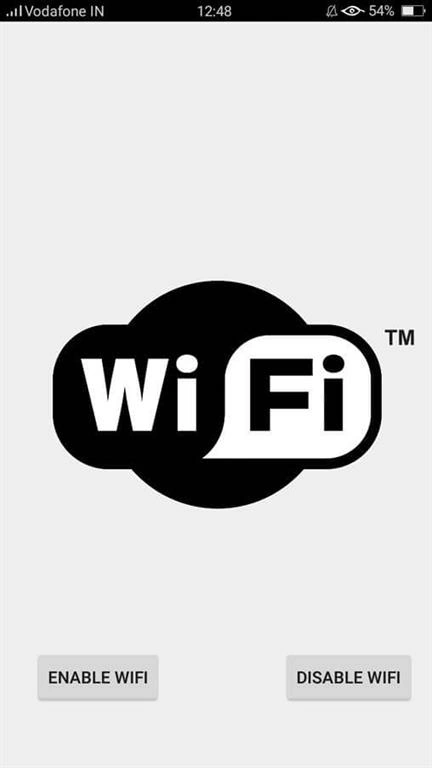
Go to activity_main.xml. This XML file contains the designing code for the Android app in the activity_main.xml.
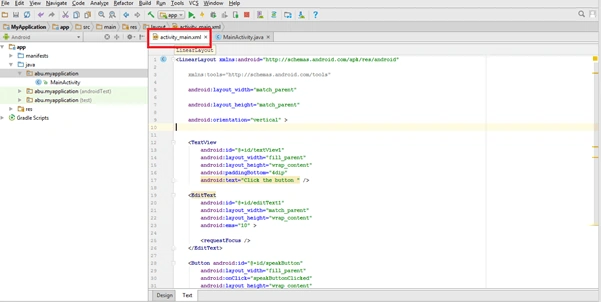 The XML code is given below
- <?xml version="1.0" encoding="utf-8"?>
- <RelativeLayout xmlns:android="http://schemas.android.com/apk/res/android"
- xmlns:tools="http://schemas.android.com/tools" android:layout_width="match_parent"
- android:layout_height="match_parent"
- tools:context=".MainActivity">
- <ImageView
- android:layout_width="wrap_content"
- android:layout_height="wrap_content"
- android:id="@+id/imageView"
- android:src="@drawable/wifi"
- android:layout_alignParentTop="true"
- android:layout_alignParentStart="true"
- android:layout_marginStart="14dp" />
- <Button
- android:id="@+id/button1"
- android:layout_width="wrap_content"
- android:layout_height="wrap_content"
- android:layout_marginLeft="76dp"
- android:text="Enable Wifi"
- android:layout_alignParentStart="true"
- android:layout_marginStart="28dp"
- android:layout_alignBottom="@+id/button2" />
- <Button
- android:id="@+id/button2"
- android:layout_width="wrap_content"
- android:layout_height="wrap_content"
- android:text="Disable Wifi"
- android:layout_marginBottom="52dp"
- android:layout_marginEnd="14dp"
- android:layout_alignParentBottom="true"
- android:layout_alignParentEnd="true" />
- </RelativeLayout>
Tom TomPosted Apr 11, 2018, 4:06 PM
Amazing Article. Have shared that in the form of video kindly review it :) https://youtu.be/HwOaGI3b0tM