

Overview
We have come across the following real-life scenario in which we need to generate the Offer Letter for every new joiner in the organization using the predefined values.
Whenever a new person is selected, their entry will be added to the SharePoint list. We trigger the flow upon the new item creation. First, we need to read the Word template with Quick Parts values and then we will replace the Quick Parts values with the fetched SharePoint list item value. In the end, we will store the generated Offer Letter in a separate Document Library on the SharePoint Site.
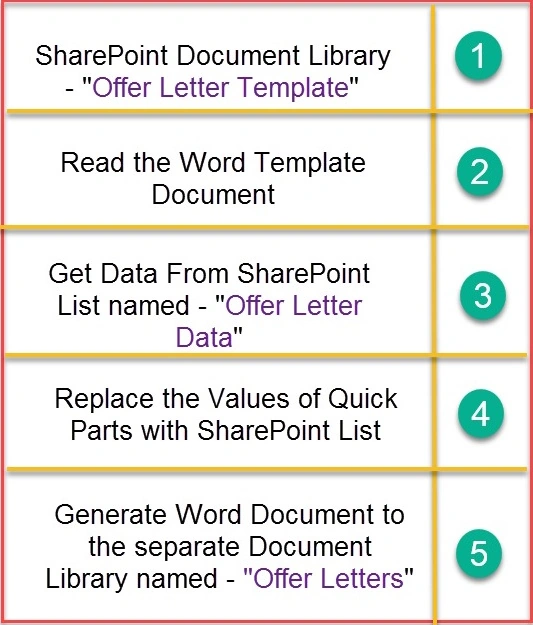
So basically, it’s a Trio – SharePoint Word Template – MS Flow – and SharePoint Word Document creation in a separate library.
Example
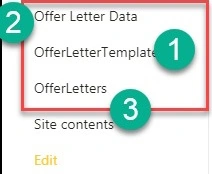
We have the following three lists.
- Offer Letter Template: Whenever a new person is selected, their entry is added to this list.
- Offer Letters: The predefined word template will be stored here.
- Offer Letters: The Generated document for each new joiner will be stored in this document library.
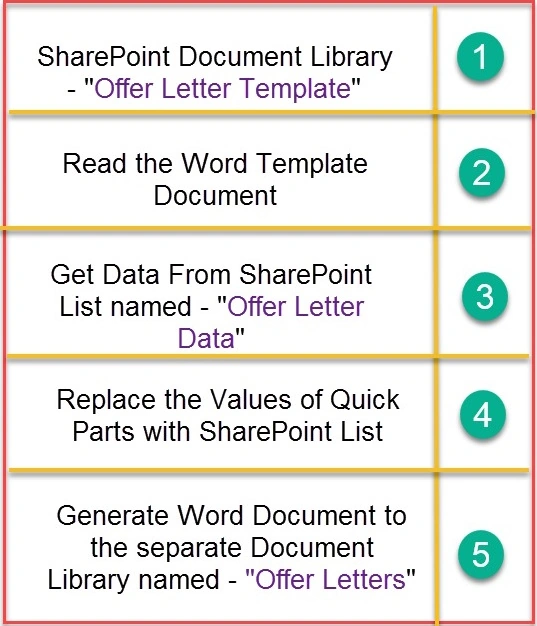
The overall procedure is mentioned in the step-by-step chart.
- MS Flow will read the Word Template stored in one of the Document Library.
- Quick Parts are replaced with the fetched Value from the SharePoint list.
- A newly created Word Template will be stored in a different document library.
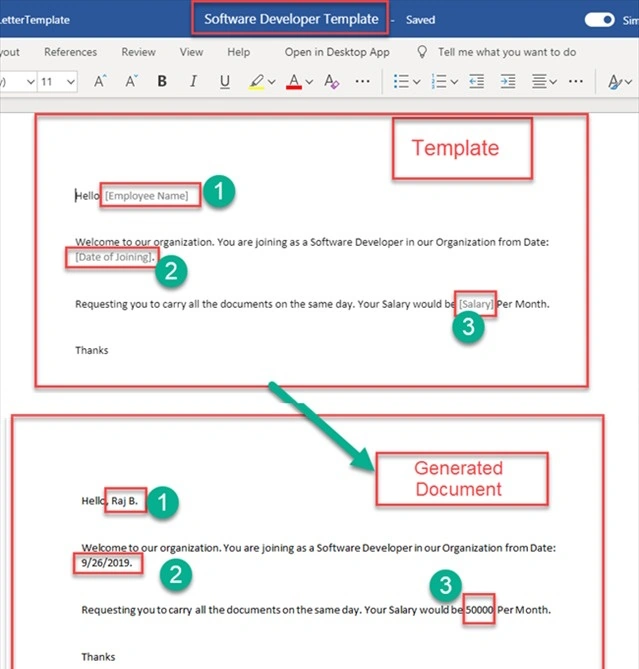
At the end of this article, we will convert the document template to the proper documents.
Now, let’s get started!
Step 1. Create Site Columns
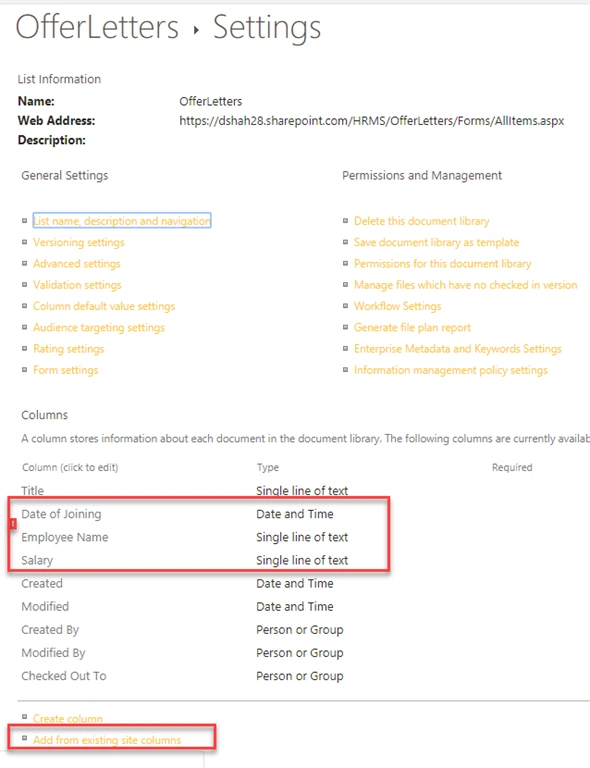
- To create a list and document library structure, first, create Site Columns for your site collection. The reason is, if we create a list column or library column, it will not replace the proper value in the Word document.
- To create a site column, go to Site Settings.
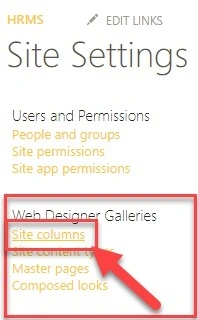
- Click on the Create button.
- Give the Column name and click the Ok button.
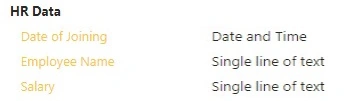
- We created three site columns and add to our custom group named “HR Data”.
Step 2. Create a List and Library.
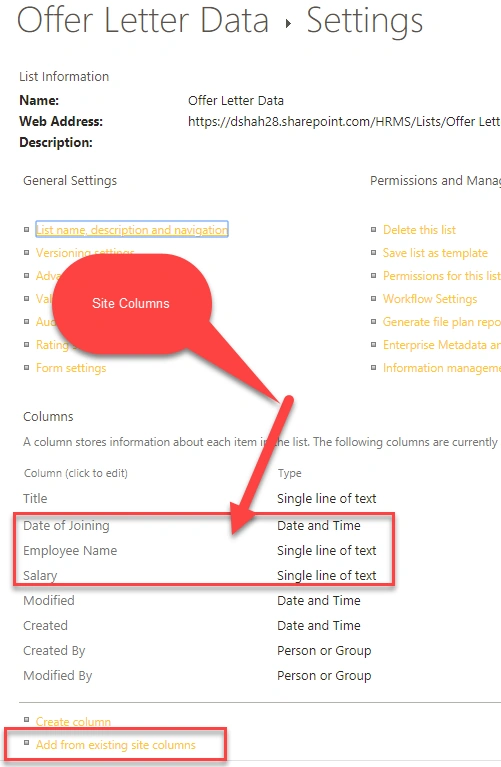
- Create a Custom List named “Offer Letter Data”.
- Add three Site columns to the list.
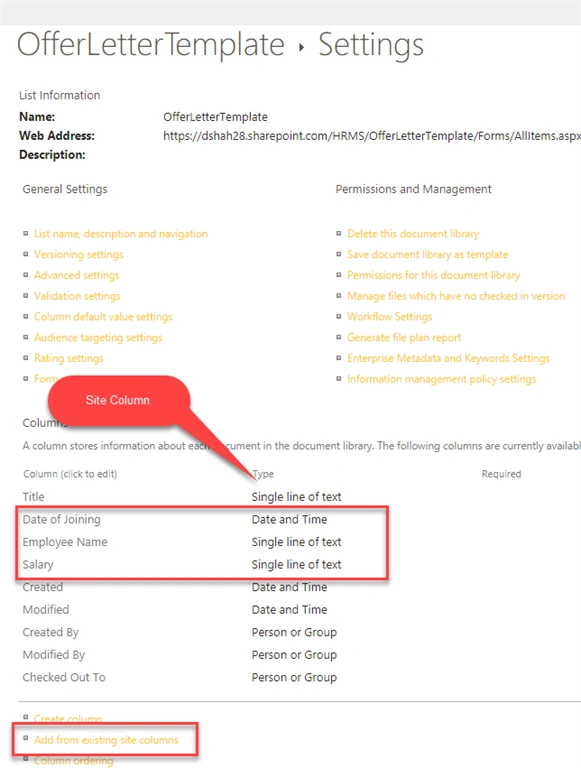
- Create a Document Library named “OfferLetterTemplate”.
- Add three Site columns to the library.
- Create a Document Library named “OfferLetters”.
- Add three Site columns to the library.
Step 3. Create a Word Document Template in the library. This is a very important step. Follow the below steps very carefully.
- Go to Offer Letter Template Document Library.
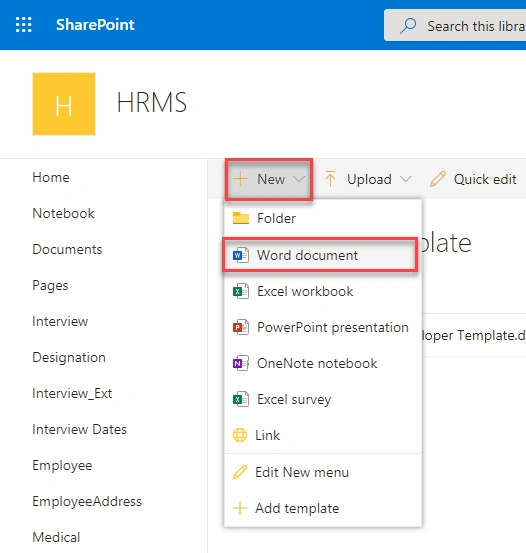
- From New, Click on Word document.
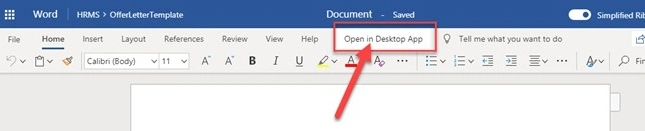
- Click on Open in Desktop App.
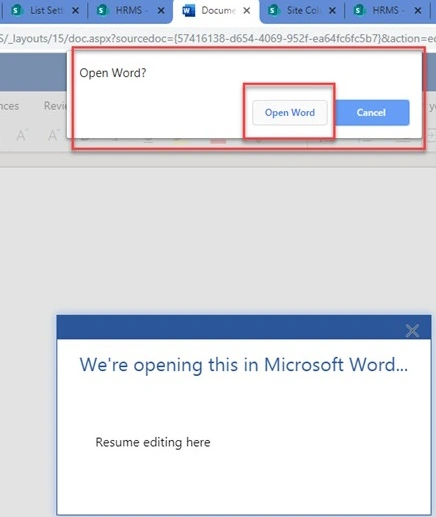
- From Pop Up, click on the Open Word button.
- Type your content.
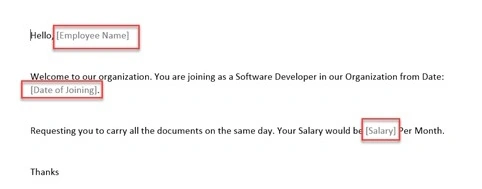
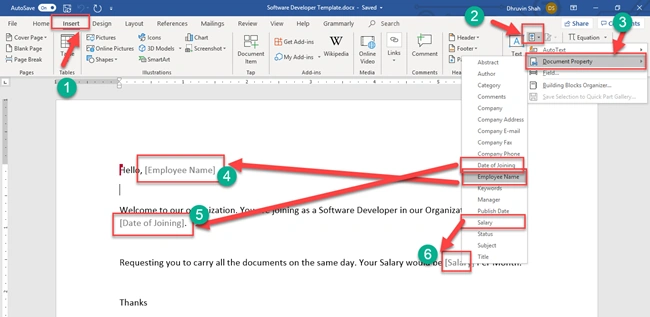
- To add the Quick Parts, Go to the Insert > Quick Parts > Document Property. Set the Document Property in your Document.
- Save the file and close the file.
Step 4. Create Microsoft Flow to create a Word Document and Replace Quick Part with List Values.
- Go here.
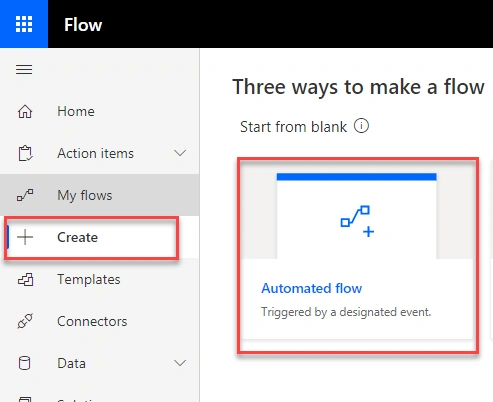
- Create > Automated Flow.
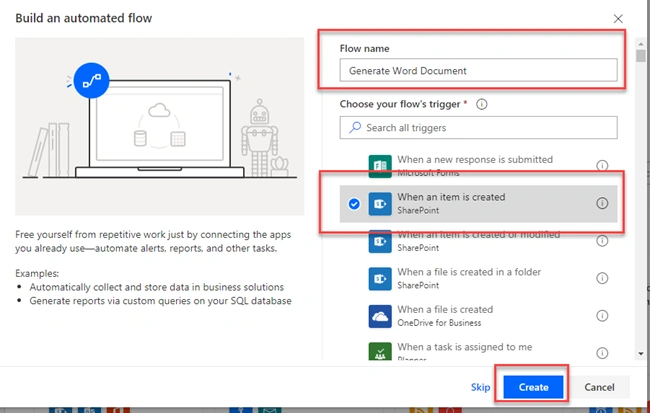
- Give the Name of the Flow and Triggering Action.
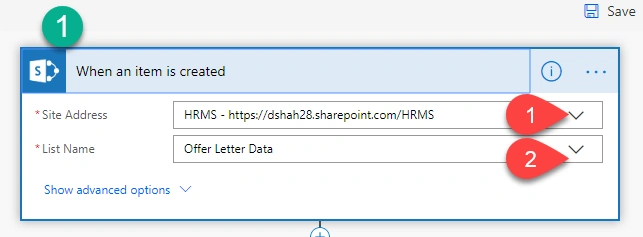
- In the first step > Add the Site Address and List Name.
- Second Step
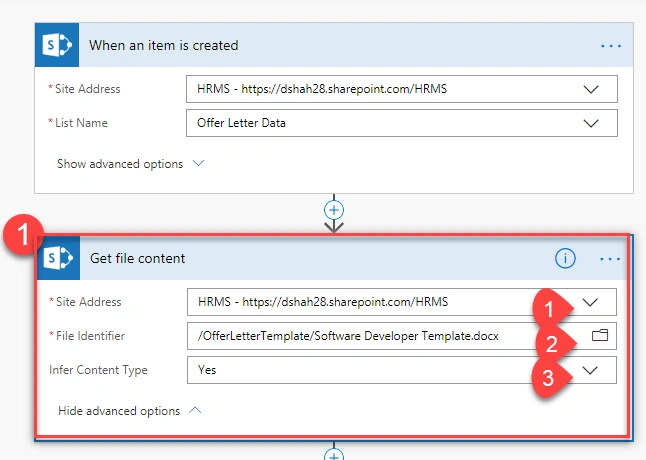
- Add an Action > Get file Content.
- Add the Document Library address where we have stored our template. We stored our template in the OfferLetterTemplate library and the name of the template file is – “Software Developer Template”.
- Third Step
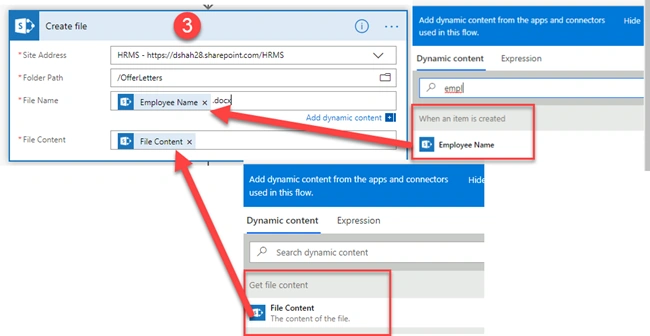
- Create a file.
- Give the URL for the destination library where we wish to store our documents.
- In the File name, we will assign the file name as “EmployeeName”.docx.
- Pass File Content from the Get File Content section.
- Step 4
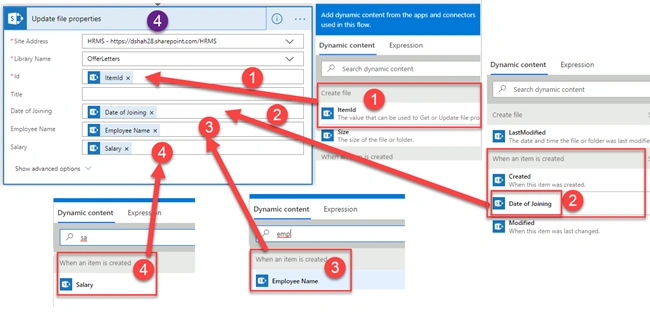
- Update file Properties,
- Here, we will update the file properties for the OfferLetters library.
- Id = ItemId from the Create file section.
- Date of Joining, Employee Name, and Salary Appropriate field from When an item is created section.
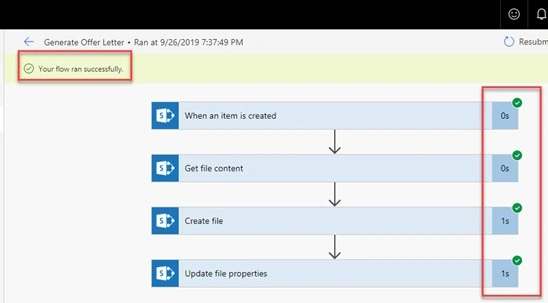
- The overall flow will look like in the following screenshot.
Now, It’s time for testing.
- Add a new Entry in the Offer Letter Data list.
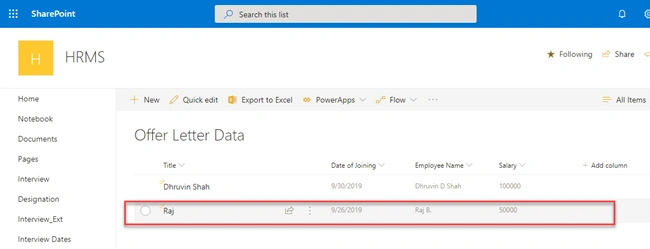
- The flow will trigger.
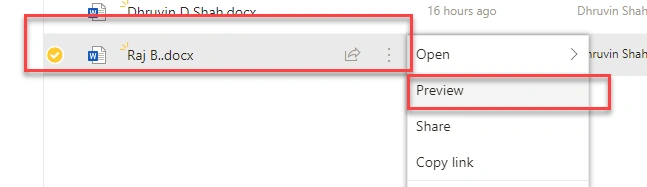
- The document will be stored in the OfferLetters document library.
- Click on the ellipses icon and click on the Preview document.
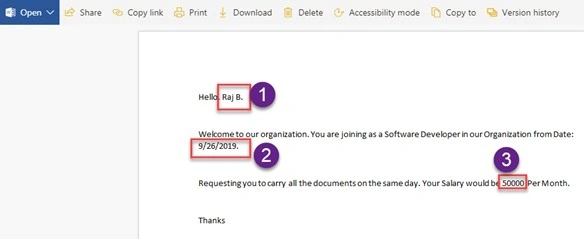
- Here, you can see replaced values.
Note. The created Word document will not work with Word Online Edit mode. The reason is, that Quick Parts only supports the desktop version of the Application. You have to open the Word file in Desktop Mode of Word to save any changes.
Conclusion
This is how we can create Word documents from the document template using MS Flow. I hope you love this article! Stay connected with me for amazing MS Flow Articles.
Kata SarkadiPosted Jul 28, 2023, 1:56 PM
I love this solution, but I have plain HTML as a source. What could I do to see the formed result?
Laura StirlingPosted Jun 9, 2022, 1:28 PM
Hi Dhruvin, thank you for this helpful tutorial. while in principle it works, I am finding the results are sporadic (sometimes correct and sometimes do not pick up the results), are there limitations to what can be collected? OR auto-populated? Does quickparts for example have limitations? Also we have a column in sharepoint which is a 3 choice Colum, and I cannot get the above process to collect those results? Do you have any advice? thank you !
guillaume chevallierPosted Oct 28, 2021, 4:04 PM
Hi Druvin, I followed your tutorial which is very well explained. But I don't get the wanted result. the word document is not populated with the values from columns. thanks
lovkesh patelPosted Aug 17, 2021, 2:49 PM
This post was good and usefull, Can we add HTML in Quick part and place that quick part in msword?
Sara HicksPosted Apr 19, 2021, 5:52 PM
Hi Dhruvin! This post was great and easy to follow. My only question is would it be possible to have a choice column or lookup column that could function?
D AlexanderPosted Mar 8, 2021, 3:38 PM
This is a fantastic article! Thank you so much for posting this. I have a question I'm hoping you can answer: is there a way to populate the population of multiple items on a list into a single word document. I'm using your methodology for our weekly highlights, and it generates a single word doc for each highlight. I love to be able to have it so that it collects all the submitted list items from the previous 7 days and adds them all to a single Word document? Is there a way to accomplish this?
ANGELA HILLPosted Mar 2, 2021, 7:54 PM
First of all, absolutely excellent post. One piece I am getting wrong and can't figure out. I have the code showing up in my final document. For instance I expect the words ANY OTHER COMMENT to populate, but get <div class="ExternalClassF2082BEEC1B1422B9EE141E23D3E78B2">ANY OTHER COMMENT</div> instead. Any suggestions from anyone? I am quite a novice trying to figure this out for my school district. Any help would be awesome! Thanks in advance.
Love ThakkerPosted Feb 26, 2021, 6:04 AM
Hi Druvin, is it possible to add picture control? Can you provide any demo for same?
Stephanie AllisonPosted Aug 13, 2020, 3:09 PM
Hi Dhruvin, thanks so much for the information. It has been SUPER helpful. This appears to only work if all the columns have values. Even if one field is blank, it won't populate any of the data. What should I do if I have a few fields that may or may not be null?
Jose Luis SuárezPosted Apr 4, 2020, 6:28 AM
Hello Dhruvin! Greate post. I would like to know if the capabilities with these way to generate word documents has been increased. I am thinking in generate word tables based on a lot of rows and not just an item. Probably, format them based in one value of each field from one row.
RinuPosted Mar 15, 2020, 1:10 AM
One of the best and in detailed blogs i have seen. One thing though, does it have to be site column?