

This post focuses on creating Azure Automation using Microsoft Azure and some of the things I learned along the way.
Before getting started, please go through the following article to gain some information about Microsoft Azure.
What is Automation?
Azure Automation is a solution provided to the users for automating their tasks. It saves time and increases administration tasks for schedules and is automatically performed at the stipulated account.
The following are the automation topics,
- Creating Runbook
- Automating Runbook
- DSC configuration with Azure Automation
- Modules and Configuration
The only requirement needed to complete this article is
- Azure Account
If you don’t have an Azure account, click here to get an account free of cost.
The following are the steps followed to complete this article.
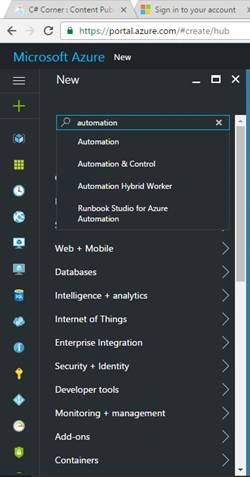
Once the Dashboard appears, search for “Automation” whose publisher must be Microsoft.
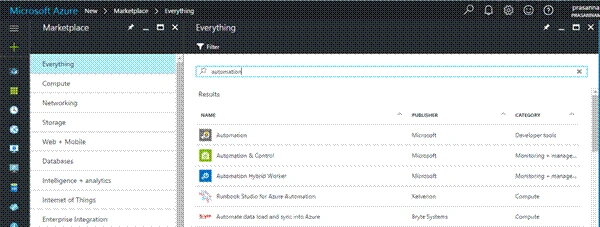
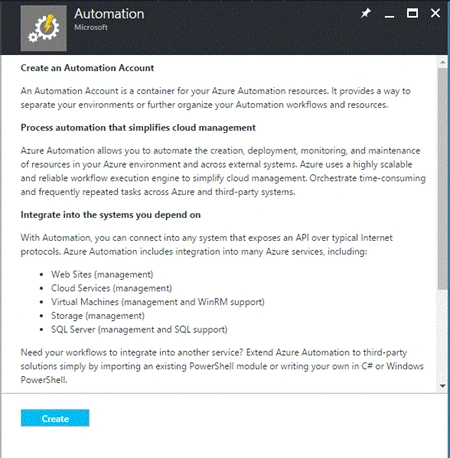
Carefully read the Automation Account license agreement and click on "Create" button. Here, we are not purchasing but we are accepting Automation policies.
In "Add Automation" wizard, please enter the following credentials to create an Automation Account.
- Name
Provide the name of your Automation account which is the URL of your Automation Account.
- Subscription
Please choose default subscription. Some of the subscription levels are Visual Studio Enterprise, Azure Pass, DreamSpark and so on.
- Resource Group
Use existing resource group instead of creating a new one. At some locations, creation of resource group requires Pricing.
- Location
Select the location where you need to deploy your application.
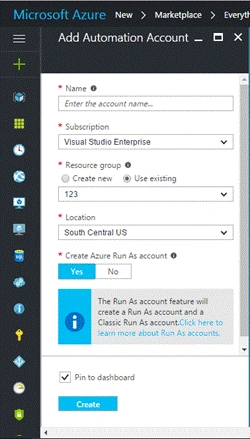
Click on "Create" button to create an Azure Automation account.
It takes some time on Azure Management portal. So, don't go anywhere, stick to Azure dashboard. Once the provision is completed, the Overview page of your Automation Account appears.
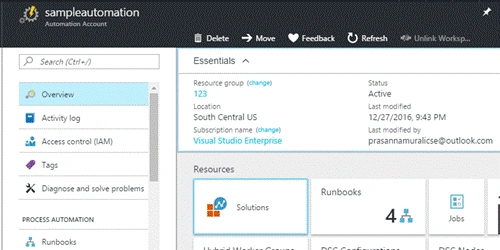
Under Resources, we are able to see
- Solutions
- Runbook
- Jobs
- DSC Configuration
- DSC Nodes
That's it! Now, our Azure Automation account is ready.
Summary
In this article, we learned how to create an Azure Automation account using Azure Management Portal.
I hope, you enjoyed reading this article. Happy Coding !!!
Join the conversation! Your thoughts help the community grow.