

Introduction
What Animation does in Mobile Applications?
- Gives the user a good experience.
- App functionality increases.
- Encourages users to use application.
Let us take an Android application and select activity using Android Studio version 2.1.
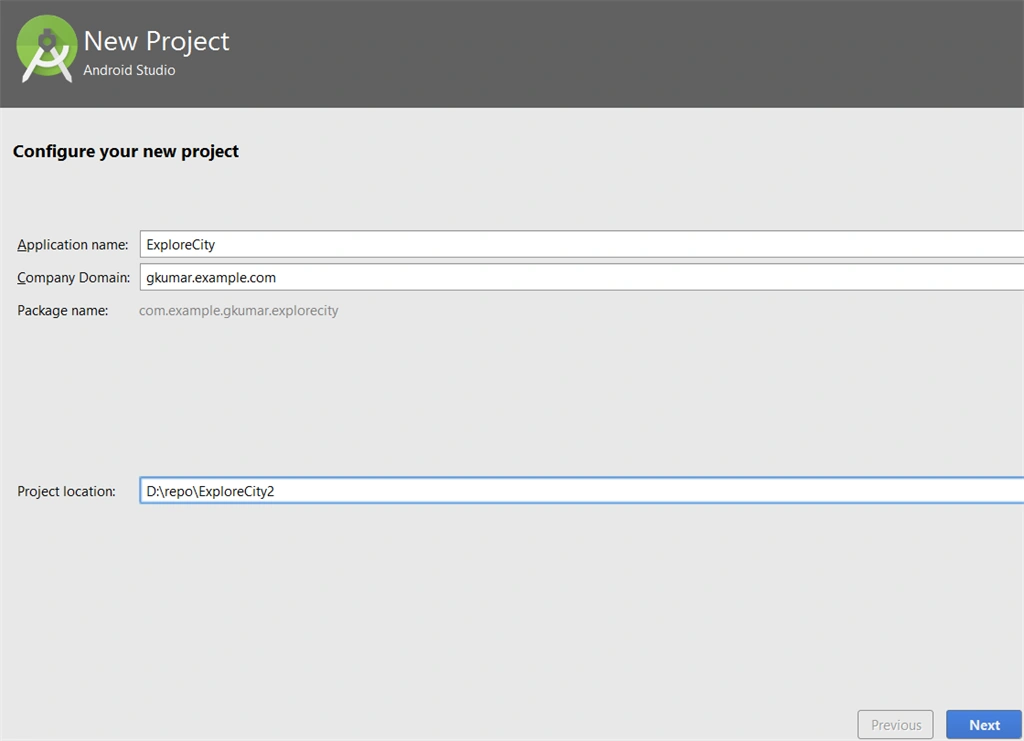
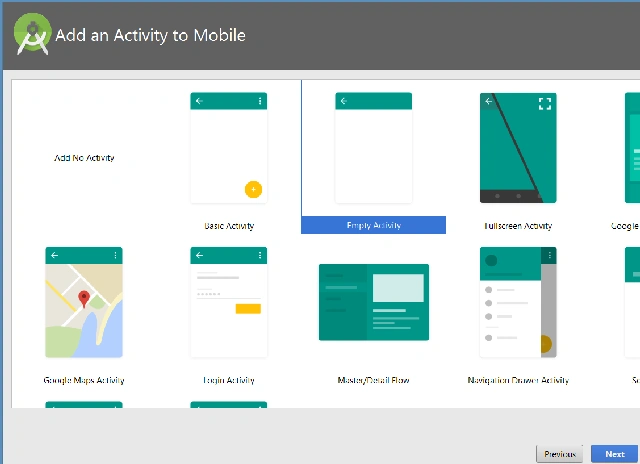
Step 2
- <?xml version="1.0" encoding="utf-8"?>
- <RelativeLayout xmlns:android="http://schemas.android.com/apk/res/android"
- xmlns:tools="http://schemas.android.com/tools"
- android:layout_width="match_parent"
- android:layout_height="match_parent"
- android:paddingBottom="@dimen/activity_vertical_margin"
- android:paddingLeft="@dimen/activity_horizontal_margin"
- android:paddingRight="@dimen/activity_horizontal_margin"
- android:paddingTop="@dimen/activity_vertical_margin"
- tools:context="com.example.gkumar.explorecity.MainActivity">
- <TextView
- android:id="@+id/basic_text_view"
- android:layout_width="wrap_content"
- android:layout_height="wrap_content"
- android:text="Explore your city today"
- android:padding="10dp"
- android:layout_centerInParent="true"
- android:layout_alignParentTop="true"
- android:background="@drawable/text_view_background"
- android:visibility="visible"/>
- <View
- android:id="@+id/line"
- android:layout_width="match_parent"
- android:layout_height="1dp"
- android:background="#7f7f7f"
- android:layout_below="@+id/basic_text_view"
- android:layout_marginTop="20dp"
- android:visibility="visible"/>
- <ListView
- android:id="@+id/categoryListView"
- android:layout_width="match_parent"
- android:layout_height="match_parent"
- android:layout_below="@+id/line"
- android:layout_marginTop="15dp"
- android:visibility="gone"
- >
- </ListView>
- </RelativeLayout>
Step 3
- <RelativeLayout xmlns:android="http://schemas.android.com/apk/res/android"
- android:id="@+id/front"
- android:layout_width="match_parent"
- android:layout_height="wrap_content"
- android:background="#ffffff"
- android:padding="8dp">
- <ImageView
- android:id="@+id/leftImageView"
- android:layout_width="40dp"
- android:layout_height="40dp"
- android:layout_alignParentLeft="true"
- android:scaleType="fitXY"
- android:src="@mipmap/ic_launcher" />
- <TextView
- android:id="@+id/NameTextView"
- android:layout_width="match_parent"
- android:layout_height="wrap_content"
- android:text="N/A"
- android:layout_marginLeft="5dp"
- android:textSize="14sp"
- android:typeface="sans"
- android:layout_centerVertical="true"
- android:layout_alignTop="@id/leftImageView"
- android:layout_toRightOf="@+id/leftImageView"
- />
- </RelativeLayout>
Step 4
- package com.example.gkumar.explorecity;
- import android.app.Activity;
- import android.content.Context;
- import android.os.AsyncTask;
- import android.support.v7.app.AppCompatActivity;
- import android.os.Bundle;
- import android.view.LayoutInflater;
- import android.view.View;
- import android.view.ViewGroup;
- import android.view.animation.Animation;
- import android.view.animation.AnimationUtils;
- import android.widget.BaseAdapter;
- import android.widget.ImageView;
- import android.widget.ListView;
- import android.widget.TextView;
- import com.squareup.picasso.Picasso;
- import java.util.ArrayList;
- public class MainActivity extends AppCompatActivity implements View.OnClickListener {
- ArrayList<String> completeCategories = new ArrayList<String>();
- private TextView basic_text_view;
- private ListView mCategoryListView;
- private ItemsAdapter mItemAdapter;
- @Override
- protected void onCreate(Bundle savedInstanceState) {
- super.onCreate(savedInstanceState);
- setContentView(R.layout.activity_main);
- basic_text_view = (TextView) findViewById(R.id.basic_text_view);
- mCategoryListView = (ListView) findViewById(R.id.categoryListView);
- completeCategories.add(0, "BreakFast/Lunch/Dinner");
- completeCategories.add(1, "Movies and Theaters");
- completeCategories.add(2, "Shopping");
- completeCategories.add(3, "Hotels/Restaurants");
- completeCategories.add(4, "Cars/Bikes");
- mItemAdapter = new ItemsAdapter(this, completeCategories);
- mCategoryListView.setAdapter(mItemAdapter);
- basic_text_view.setOnClickListener(this);
- }
- @Override
- public void onClick(View v) {
- switch (v.getId()) {
- case R.id.basic_text_view:
- mCategoryListView.setVisibility(View.VISIBLE);
- break;
- }
- }
- // Adapter class
- public class ItemsAdapter extends BaseAdapter {
- ArrayList<String> list;
- Context context;
- int commentId;
- public ItemsAdapter(Activity activity,
- ArrayList<String> mDataList) {
- super();
- list = mDataList;
- context = activity;
- }
- @Override
- public int getCount() {
- // TODO Auto-generated method stub
- return list.size();
- }
- @Override
- public Object getItem(int position) {
- // TODO Auto-generated method stub
- return list.get(position);
- }
- @Override
- public long getItemId(int position) {
- // TODO Auto-generated method stub
- return position;
- }
- @Override
- public View getView(int position, View convertView, ViewGroup parent) {
- final ViewHolder holder;
- int finalPosition = -1;
- if (convertView == null) {
- LayoutInflater vi = (LayoutInflater) context
- .getSystemService(Context.LAYOUT_INFLATER_SERVICE);
- convertView = vi.inflate(R.layout.category_list_row_data_items,
- parent, false);
- holder = new ViewHolder();
- holder.commentNameTextView = (TextView) convertView
- .findViewById(R.id.NameTextView);
- holder.categoryImage = (ImageView) convertView.findViewById(R.id.leftImageView);
- convertView.setTag(holder);
- } else {
- holder = (ViewHolder) convertView.getTag();
- }
- holder.commentNameTextView.setText(list.get(position));
- /** we can use picaso as well but no need this time**/
- // Picasso.with(getApplicationContext()).load(R.drawable.superman).into(holder.categoryImage);
- Animation animation = AnimationUtils.loadAnimation(MainActivity.this, (position > finalPosition) ? R.anim.up_from_bottom : R.anim.down_from_top);
- convertView.startAnimation(animation);
- finalPosition = position;
- return convertView;
- }
- }
- public class ViewHolder {
- TextView commentNameTextView;
- ImageView categoryImage;
- }
- }
Step 5
On the click of the button that we have already created, we will show our list using animation.
Now the code for animation is below
Firstly, put these two files in the animation directory called “anim”. You are wondering what are these two files and what do they do. So the answer would look like the following
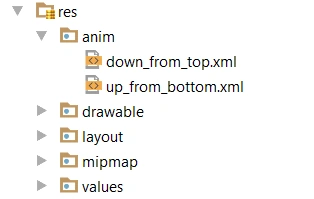
- <?xml version="1.0" encoding="utf-8"?>
- <set xmlns:android="http://schemas.android.com/apk/res/android"
- android:shareInterpolator="@android:anim/decelerate_interpolator">
- <translate
- android:fromXDelta="0%" android:toXDelta="0%"
- android:fromYDelta="-100%" android:toYDelta="100%"
- android:duration="500" />
- </set>
- <?xml version="1.0" encoding="utf-8"?>
- <set xmlns:android="http://schemas.android.com/apk/res/android"
- android:shareInterpolator="@android:anim/decelerate_interpolator">
- <translate
- android:fromXDelta="0%" android:toXDelta="0%"
- android:fromYDelta="100%" android:toYDelta="0%"
- android:duration="400" />
- </set>
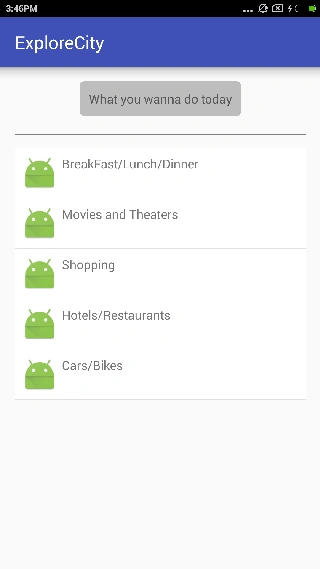
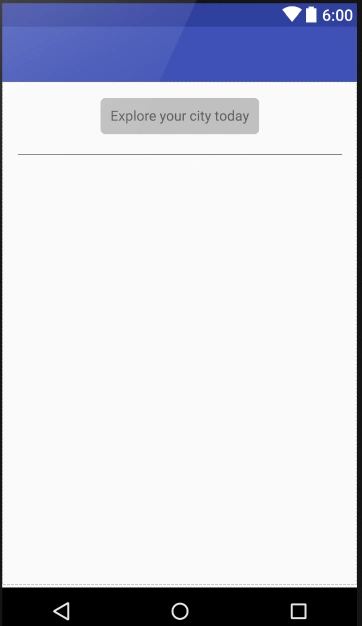
In this pic, you can't see the animation; please run this code as the entire project is provided and you will see the animation from down to up translates.
Summary
Read more articles on Android
Gopi ChandPosted Mar 27, 2016, 5:07 AM
Such a great effort. :)
Kashif SohailPosted Mar 26, 2016, 11:21 PM
Vert nice, Its just awesome
Vignesh ManiPosted Mar 26, 2016, 8:52 AM
goog one
Ankur MistryPosted Mar 26, 2016, 3:19 AM
Nice article
Debasis SahaPosted Mar 26, 2016, 12:41 AM
Nice one..
Sibeesh VenuPosted Mar 26, 2016, 12:33 AM
Nice Share
Kumaresh RajalingamPosted Mar 25, 2016, 9:47 PM
Good one