

Please you do read earlier parts of this article for complete understanding in GridView.
Using Fields with GridView Control
As to solve some of problems like enabling the GridView to render its columns automatically is that we give up any control over column formatting. For example, the BoxOfficeTotals column is displayed as a decimal amount without any currency formatting. The EnTRyDate column always displays in short-date and long-time format. The solution to such problems is to specify explicitly the fields that a GridView displays. The GridView control supports the following types of fields:
- BoundField Enables us to display the value of a data item as text.
- CheckBoxField Enables us to display the value of a data item as a check box.
- CommandField Enables us to display links for editing, deleting, and selecting rows.
- ButtonField Enables us to display the value of a data item as a button (image button, link button, or push button).
- HyperLinkField Enables us to display the value of a data item as a link.
- ImageField Enables us to display the value of a data item as an image.
- TemplateField Enables us to customize the appearance of a data item.
Using TemplateField
Introduction & Demonstration
A TemplateField enables we to add any content to a GridView column that we
need. A TemplateField can contain HTML, DataBinding expressions, or ASP.NET
controls.
TemplateFields are particularly useful when we are using a GridView to edit
database records. You can use a TemplateField to customize the user
interface and add validation to the fields being edited.
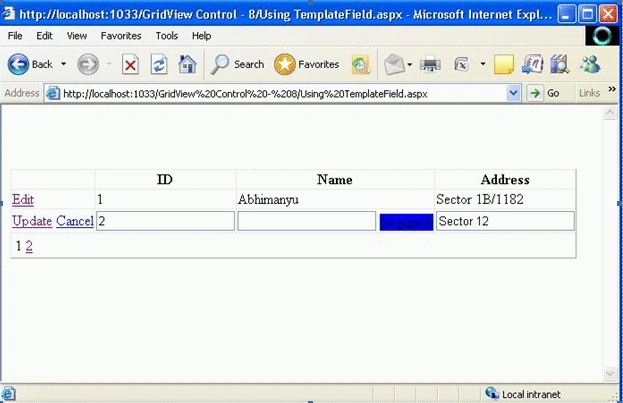
Assume an example, we want a required field validation or list box when we
edit any row. These all features can be enabled using TemplateField. Let's
take a look, here we are using required field validation.
<%@ Page Language="VB" %>
<!DOCTYPE html PUBLIC "-//W3C//DTD XHTML 1.0 Transitional//EN""http://www.w3.org/TR/xhtml1/DTD/xhtml1-transitional.dtd">
<script runat="server">
</script>
<html xmlns="http://www.w3.org/1999/xhtml">
<head id="Head1" runat="server">
<title></title>
<style type="text/css">
</style>
</head>
<body>
<form id="form1" runat="server" >
<div>
<br /><br /><br />
<asp:GridView
ID="GridView1"
runat="server"
DataSourceID="SqlDataSource1"
PageSize="2"
AutoGenerateEditButton="true"
DataKeyNames="ID"
AllowPaging="true" AutoGenerateColumns="false">
<Columns>
<asp:TemplateField HeaderText="ID">
<ItemTemplate>
<%# Eval("ID")%>
</ItemTemplate>
<EditItemTemplate>
<asp:TextBox
id="txtID"
Text='<%# Bind("ID") %>'
Runat="server" />
</EditItemTemplate>
</asp:TemplateField>
<asp:TemplateField HeaderText="Name">
<ItemTemplate>
<%# Eval("Name")%>
</ItemTemplate>
<EditItemTemplate>
<asp:TextBox
id="txtName"
Text='<%# Bind("Name") %>'
Runat="server" />
<asp:RequiredFieldValidator
id="valName"
ControlToValidate="txtName"
Text="(required)"
Runat="server"
BackColor="Blue"/>
</EditItemTemplate>
</asp:TemplateField>
<asp:TemplateField HeaderText="Address">
<ItemTemplate>
<%# Eval("Address")%>
</ItemTemplate>
<EditItemTemplate>
<asp:TextBox
id="txtAddress"
Text='<%# Bind("Address") %>'
Runat="server" />
</EditItemTemplate>
</asp:TemplateField>
</Columns>
</asp:GridView>
<br />
<asp:SqlDataSource ID="SqlDataSource1" runat="server"
ConnectionString="<%$ ConnectionStrings:DatabaseConnectionString1 %>"
SelectCommand="SELECT
* FROM MyTB"
UpdateCommand="UPDATE
MyTB SET Name=@Name, Address=@Address WHERE ID=@ID">
</asp:SqlDataSource>
<br />
</div>
</form>
</body>
</html>
Note: Continue
in Next Part.
HAVE A GREAT CODING!
Join the conversation! Your thoughts help the community grow.