

Introduction
For a WCF service to be available for the clients to consume, we need to host the WCF service. The following are the various options available for hosting a WCF Service.
- Self-Hosting
- Windows Service
- Internet Information Services (IIS)
- Windows Activation Services (WAS)
Now we can learn one by one about WCF service hosting options as follows.
Self-Hosting
A WCF service can be self-hosting using a console application or Windows Forms applications. Hosting a WCF service in any managed .Net application is called self hosting. Now the following is the procedure for creating a WCF service and hosting it in a console application.
Step 1: Creating WCF Service
- Open Visual Studio.
- File -> New Project.
- Select Class Library.
- Provide it a name like "SquareService".
- Delete the default class1.cs file.
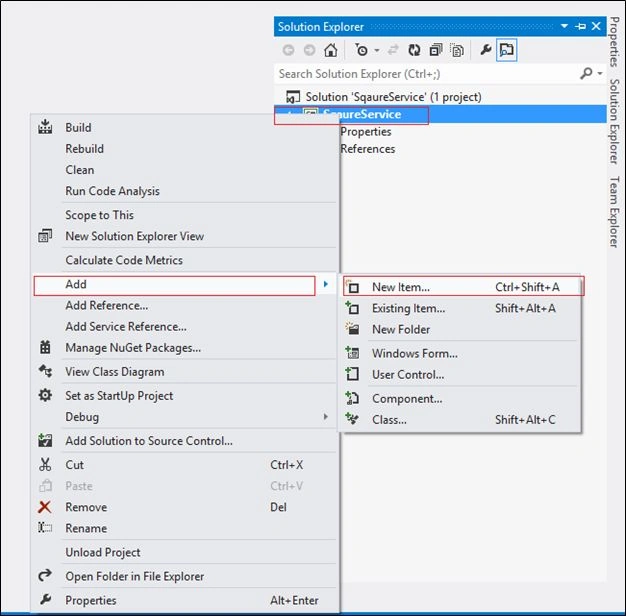
- Right-click on the project then select Add -> New Item.
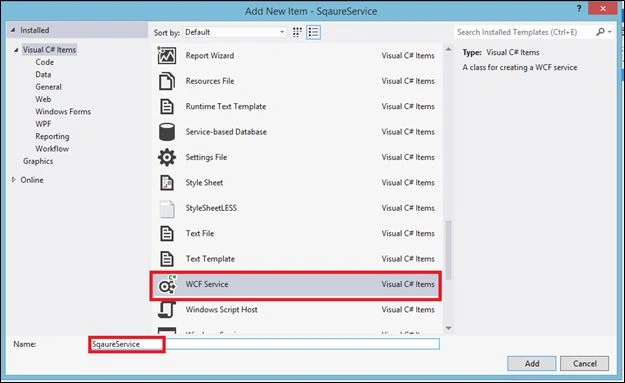
- Select WCF Service name as like "SquareService"
- Add one method in interface and implement it "GetSquare()".
Declaration
Implementation- [ServiceContract]
- public interface ISquareService
- {
- [OperationContract]
- int GetSqaure(int number);
- }
- /// <summary>
- /// GetSqaure
- /// </summary>
- /// <param name="number"></param>
- /// <returns></returns>
- public int GetSqaure(int number)
- {
- var result = number * number;
- return result;
- }
- We didn't need here app.config file because we not configure anything.
- Finally we created the WCF service for Self-Hosting and Build it.
- Right-click on the solution "SqaureService".
- Add -> New Project.
- Select Console Application.
- Name it something like "ServiceHost".

- Click OK.
- Now add two references, a SquareService reference and a System.ServiceModel assembly.
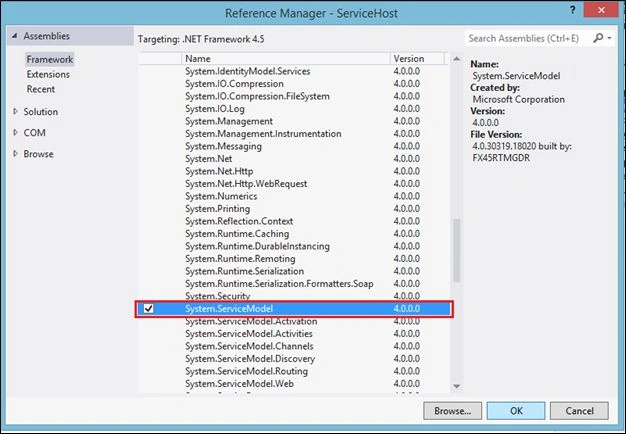
This is for adding the System.ServiceModel assembly.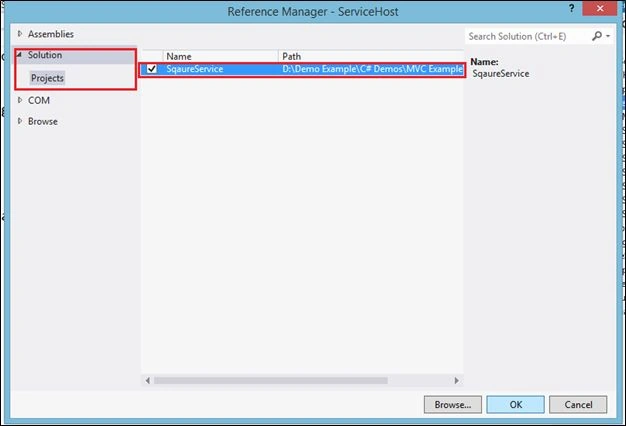
This is for the created WCF service reference.
- Now we need to change the App.config file to host. To expose the endpoint, generate proxy classes for the client and enable metadata exchange.
- For that right-click on the App.config file then select option "Edit WCF Configuration". (You do this also by adding these one by one).
- It will show a pop-up like the following.
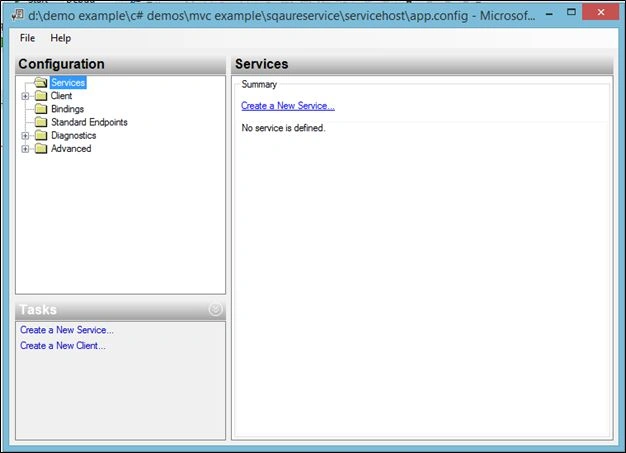
- Select the "Services" folder then click on the right side link Create a New Service like in the following image.
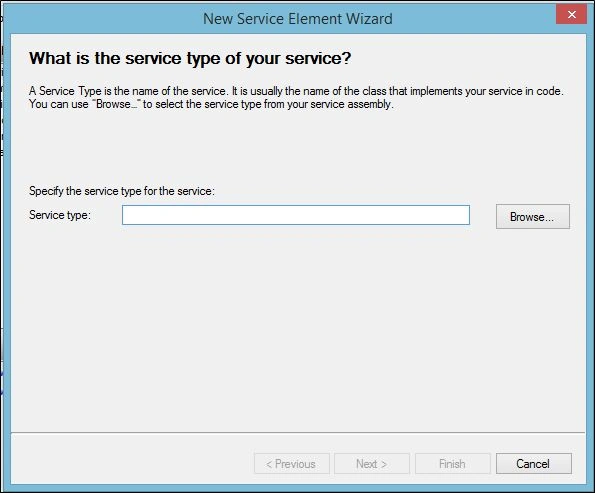
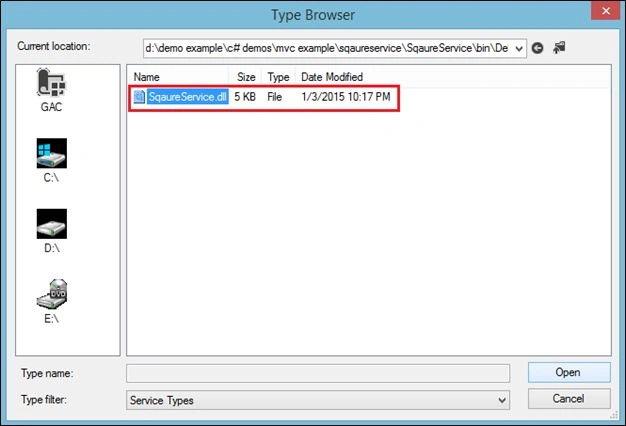
- Click on the Browse Button and open the bin folder of SqaureService.
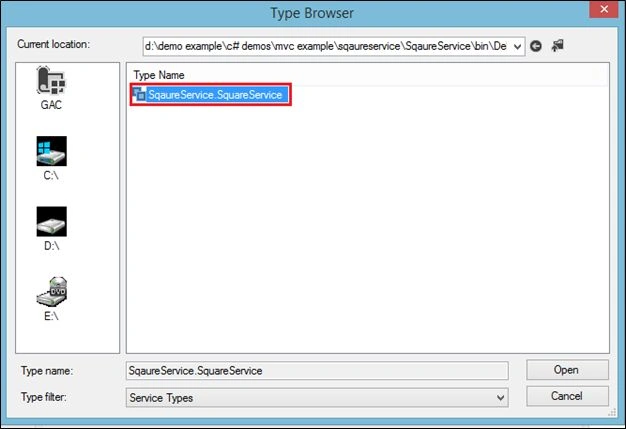
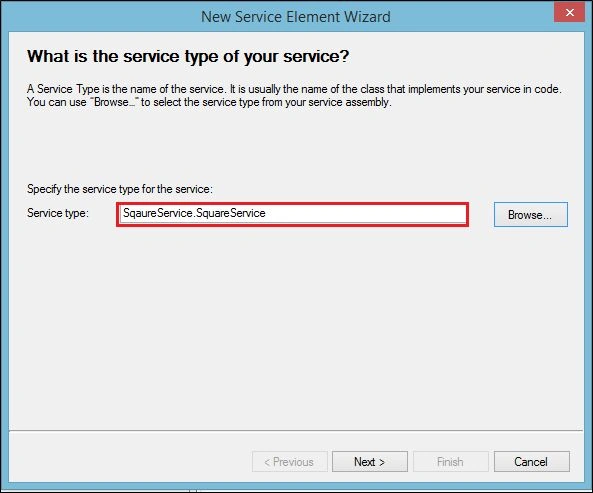
- Click on the Next Button.
- It will ask you to provide the Service Contract.
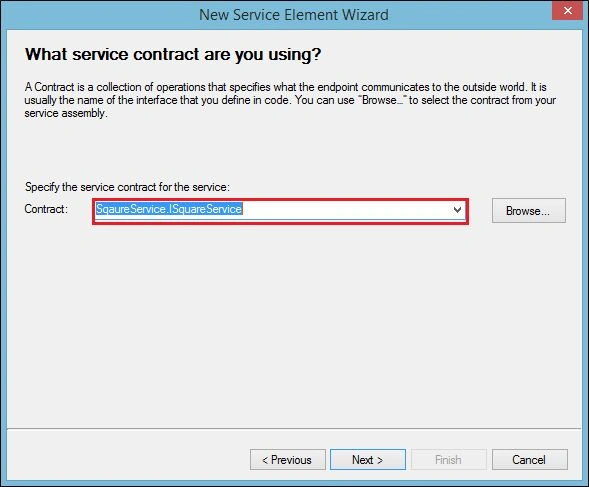
- Click the Next Button.
- It will ask you to select the binding TCP binding we used here and click next.

- Enter the endpoint address; we enter it as in the following image.
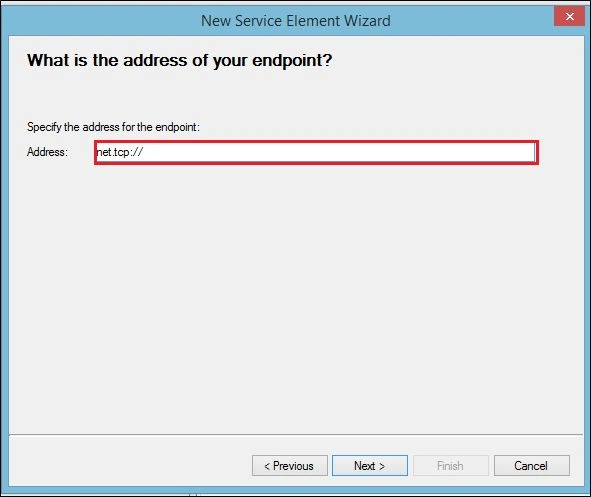
- Enter a relative address to determine the service and SquareService.
- Here you can see all the features we selected previously.
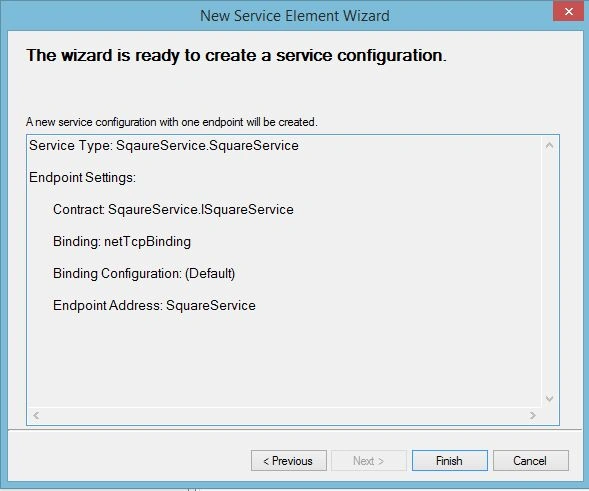
- Click Finish.
- Hare we need to select the base address because we select the relative address then click on the "Host" tab of the left side.
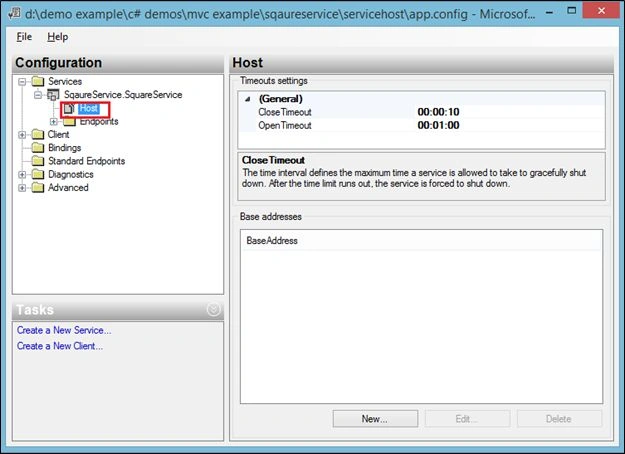
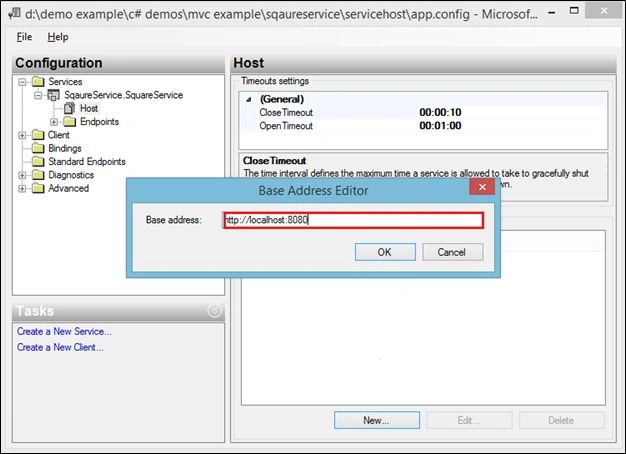
- Here we added two base addresses, one for the service endpoint and the other to enable metadata exchange.
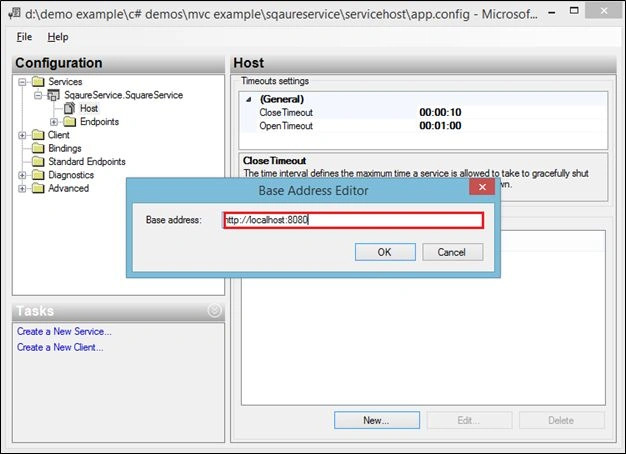
- We need to enable service behaviours to enable metadata exchange, clients can generate proxy classes using that. Expand the "Advanced" folder then select the "Service Behaviour" option.
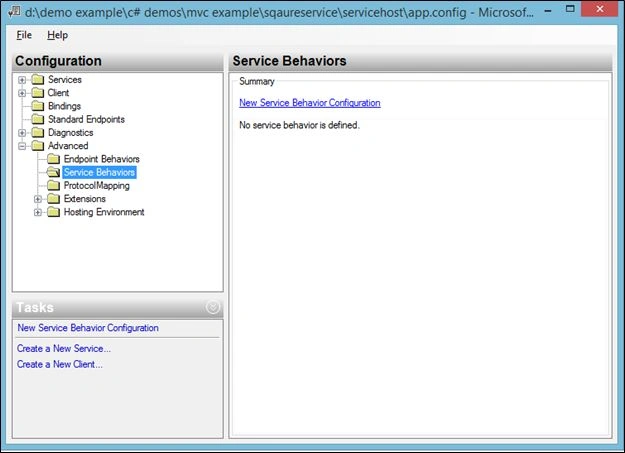
- We need to create a new service behaviour configuration, because currently there is no service behaviours.
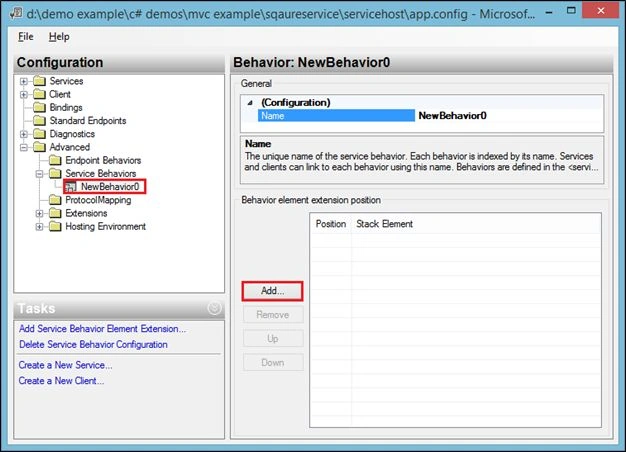
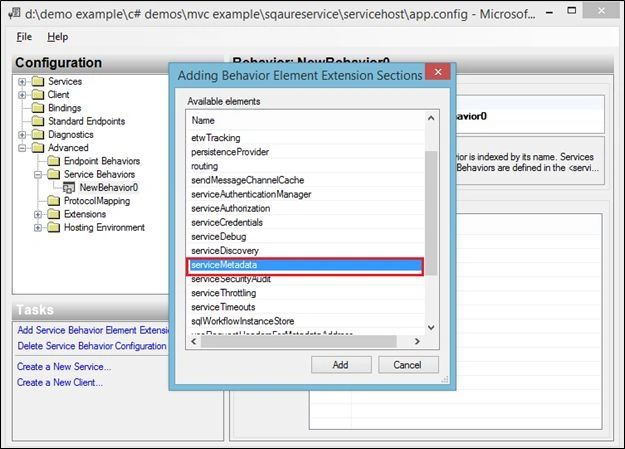
- We need to add a new service behaviour for metadata exchange. Select NewBehavior then select the Add button then select from the list ServiceMetadata.
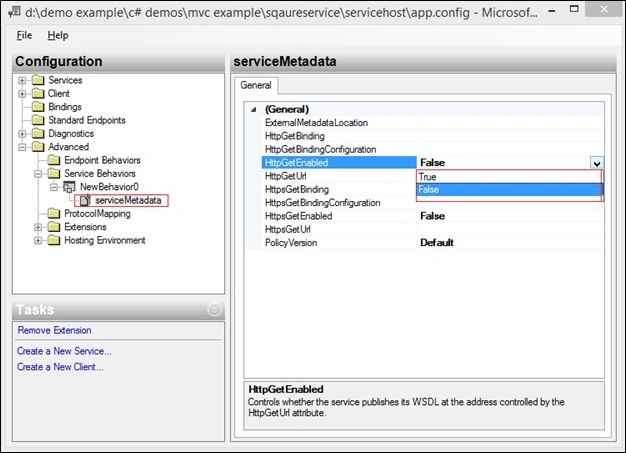
- Then click on serviceMetatdata to set HttpGetEnable to True.
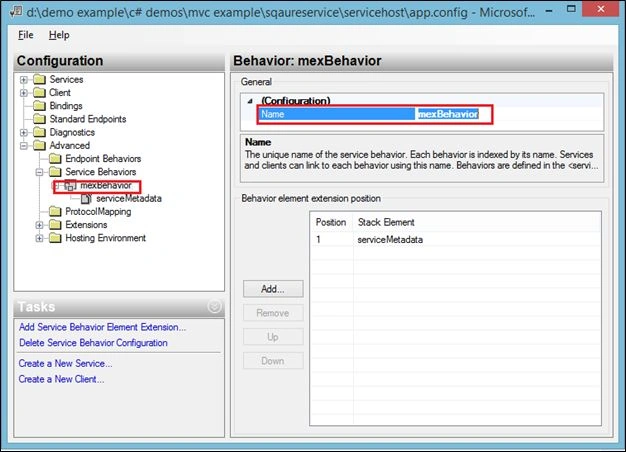
- Now click on the newly created NewBehavior and change its name to mexBehavior.
- We need to set this new behavior to our service. For that click on our SquareService and set the Behaviour Configuration to mexBehavior.
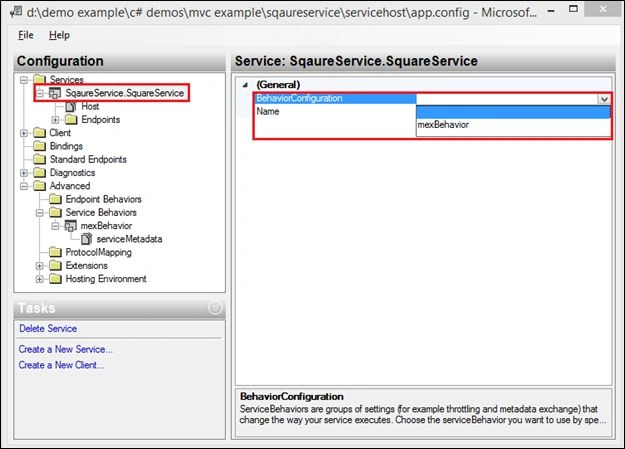
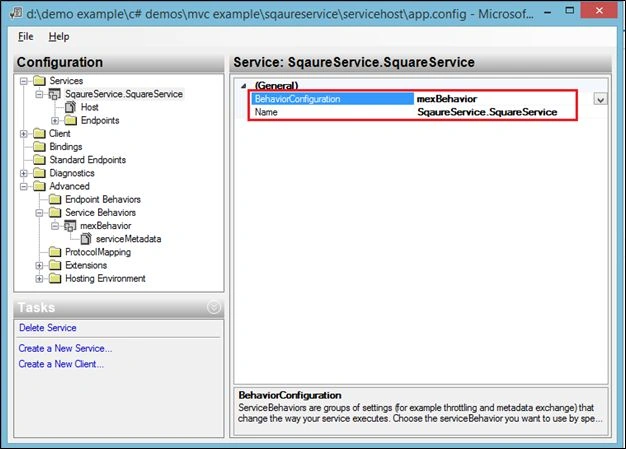
- Now close this window. Then it will ask for yu to save the changes; click Yes.
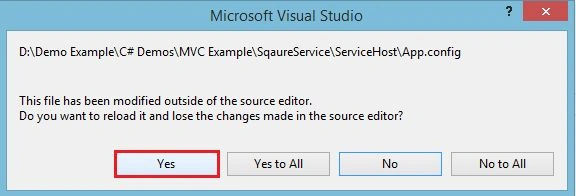
- Now check your App.config file, we created all the features automatically. Provide the following in the App.config file.
- <?xml version="1.0" encoding="utf-8" ?>
- <configuration>
- <startup>
- <supportedRuntime version="v4.0" sku=".NETFramework,Version=v4.5" />
- </startup>
- <system.serviceModel>
- <behaviors>
- <serviceBehaviors>
- <behavior name="mexBehavior">
- <serviceMetadata httpGetEnabled="true" />
- </behavior>
- </serviceBehaviors>
- </behaviors>
- <services>
- <service behaviorConfiguration="mexBehavior" name="SqaureService.SquareService">
- <endpoint address="SquareService" binding="netTcpBinding" bindingConfiguration=""
- contract="SqaureService.ISquareService" />
- <host>
- <baseAddresses>
- <add baseAddress="http://localhost:8080" />
- <add baseAddress="net.tcp://localhost:8090" />
- </baseAddresses>
- </host>
- </service>
- </services>
- </system.serviceModel>
- </configuration>
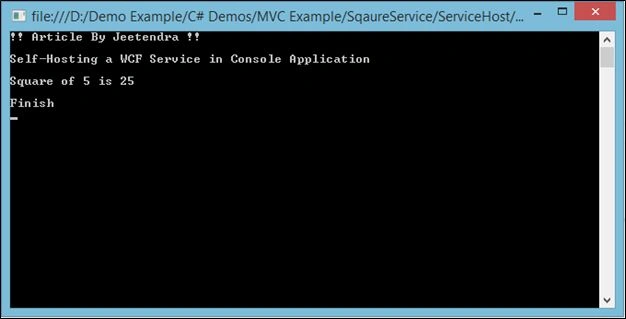
- Now test the self-hosted service. Open the Program.cs file and make the following changes.
Output: Run the Console Application. It will show output like in the following image.- class Program
- {
- static void Main(string[] args)
- {
- SqaureService.SquareService src = new SqaureService.SquareService();
- var result = src.GetSqaure(5);
- Console.WriteLine("Self-Hosting a WCF Service in Console Application\n");
- Console.WriteLine("Square of 5 is " + result +"\n");
- Console.WriteLine("Finish");
- Console.ReadKey();
- }
- }
Summary
I hope you understand the concepts of hosting a WCF Service and it is useful for you. If you have any suggestion regarding this article then please contact me.
Sumit SharmaPosted Sep 5, 2018, 11:49 AM
Well explained!
K P Singh ChundawatPosted Jan 5, 2015, 10:27 PM
great jitendra sir ..