

Introduction
Requirements
- Android Studio version 2.3.3
- Little bit XML and JAVA knowledge.
- Android Emulator (or) Android mobile
- Download link (Android Studio)
Steps should be followed
These steps to add custom fonts to Android textview using Android Studio and I have included the source code below.
Step 1
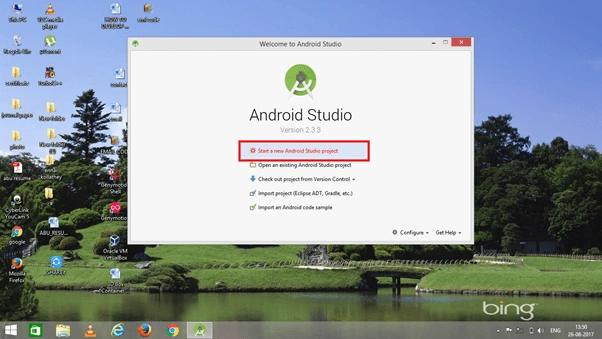
Open Android Studio and Start a New Android Studio Project.
Step 2
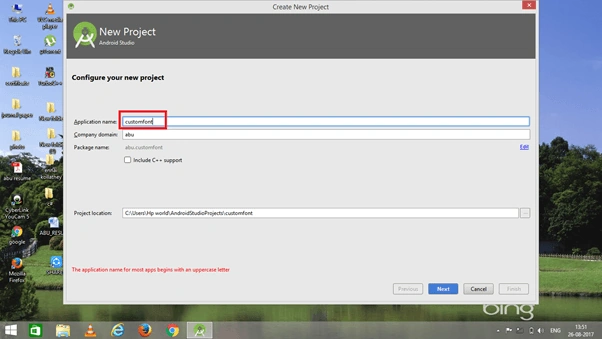
You can choose your application name and choose where your project is stored on the location. If you wish to use C++ for coding the project, mark the "Include C++ support", and click the "Next" button.
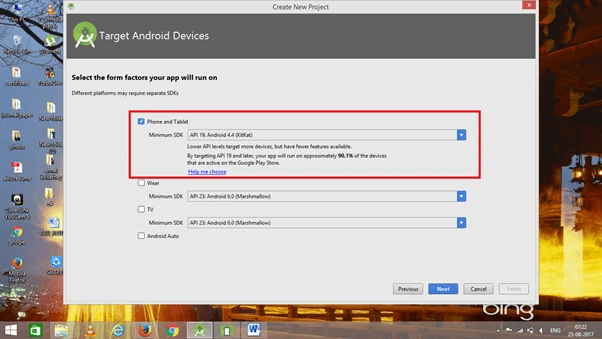
 Now, select the version of Android and select the target Android devices.
Step 3
Now, add the activity and click the "Next" button.
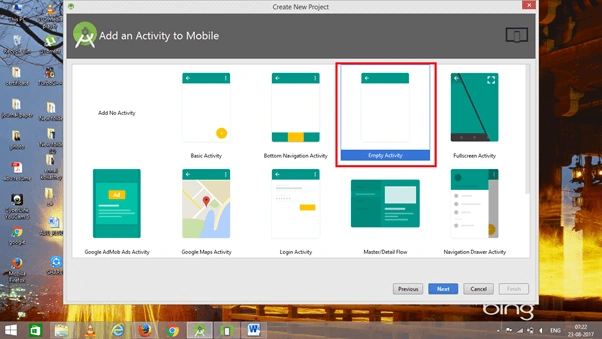 Add Activity name and click "Finish".
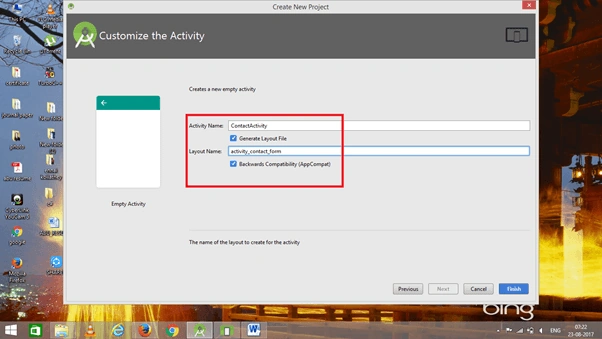
Step 4
Go to activity_main.xml, This XML file contains the designing code for an Android app in the activity_main.xml;
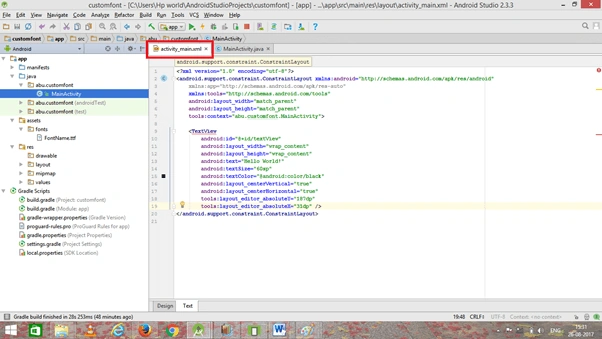 The XML code is given below.
- <?xml version="1.0" encoding="utf-8"?>
- <android.support.constraint.ConstraintLayout xmlns:android="http://schemas.android.com/apk/res/android"
- xmlns:app="http://schemas.android.com/apk/res-auto"
- xmlns:tools="http://schemas.android.com/tools"
- android:layout_width="match_parent"
- android:layout_height="match_parent"
- tools:context="abu.customfont.MainActivity">
- <TextView
- android:id="@+id/textView"
- android:layout_width="wrap_content"
- android:layout_height="wrap_content"
- android:text="Hello World!"
- android:textSize="60sp"
- android:textColor="@android:color/black"
- android:layout_centerVertical="true"
- android:layout_centerHorizontal="true"
- tools:layout_editor_absoluteY="187dp"
- tools:layout_editor_absoluteX="31dp" />
- </android.support.constraint.ConstraintLayout>
Step 5
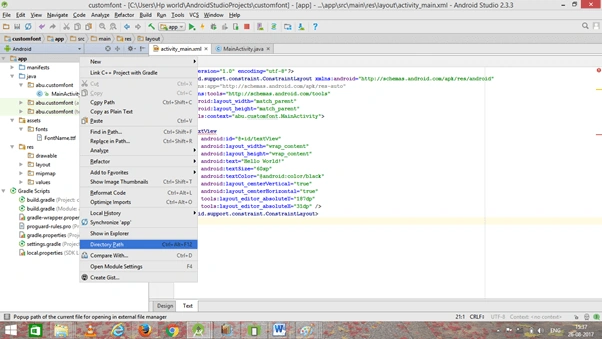
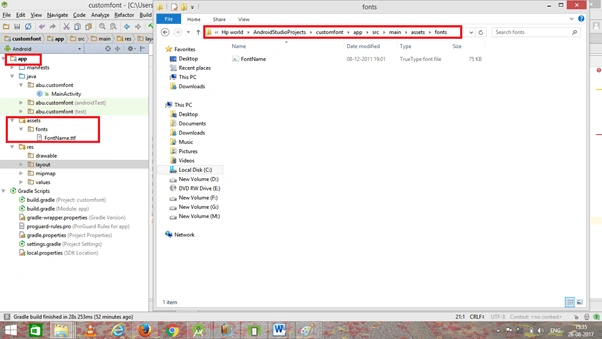
Go to the app right-click and “Directory path” will appear, then click on the path and add a font file in the main folder. The below template shows how to add a font file. I have attached a font file.
Step 6
Go to Main Activity.java, This Java program is the back-end language for Android. Add the following code.
- package abu.customfont;
- import android.graphics.Typeface;
- import android.support.v7.app.AppCompatActivity;
- import android.os.Bundle;
- import android.widget.TextView;
- public class MainActivity extends AppCompatActivity {
- @Override
- protected void onCreate(Bundle savedInstanceState) {
- super.onCreate(savedInstanceState);
- setContentView(R.layout.activity_main);
- TextView textView = (TextView) findViewById(R.id.textView);
- Typeface font = Typeface.createFromAsset(getAssets(), "fonts/FontName.ttf");
- textView.setTypeface(font);
- }
- }
Step 7
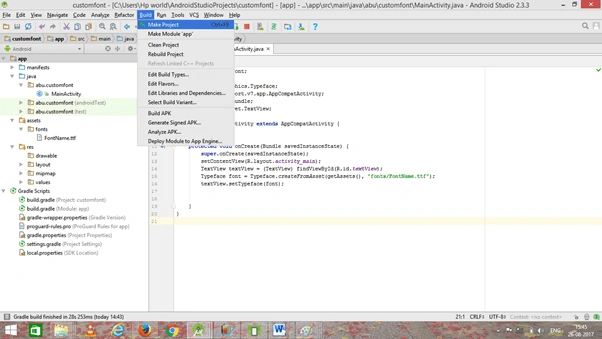
Now, either go to the menu bar and click "Make a project" or press ctrl+f9 to debug the error.
 Step 8
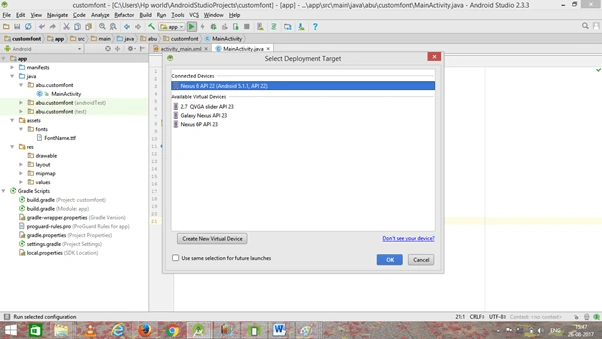
Then, click the Run button or press shift+f10 to run the project. Select the "virtual machine" option and click OK.
Conclusion
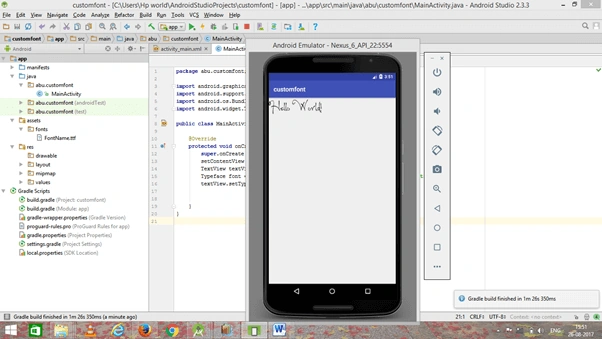
We have successfully added the custom font to Android textview using Android Studio.
Join the conversation! Your thoughts help the community grow.