

Introduction
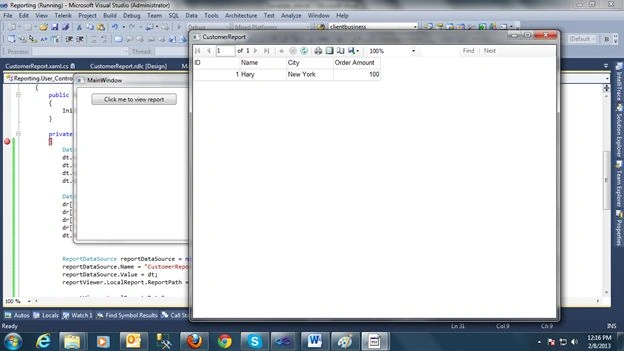
This article shows how to add a RDLC report in WPF.
Suppose I have been assigned the task of generating a RDLC report in WPF.
That contains ID, Name, City, and Order Amount.
So I will show you how to generate a RDLC report in WPF.
It is very simple; believe me it is very simple. So let's start.
Step 1
Create a WPF project; I named it "MonsterBusinessInc".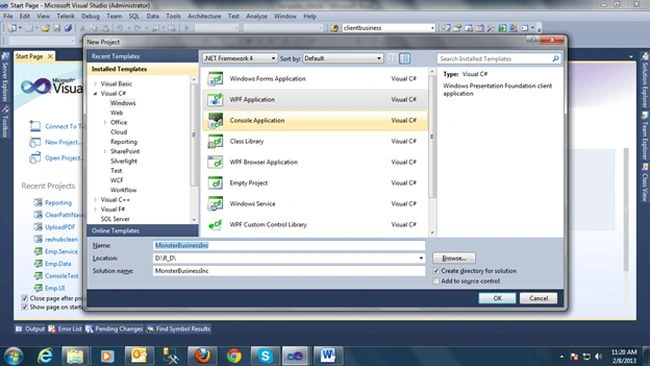
Step 2
Add a WPF Button, the click event of this button will show you the report; also add the click event for this button.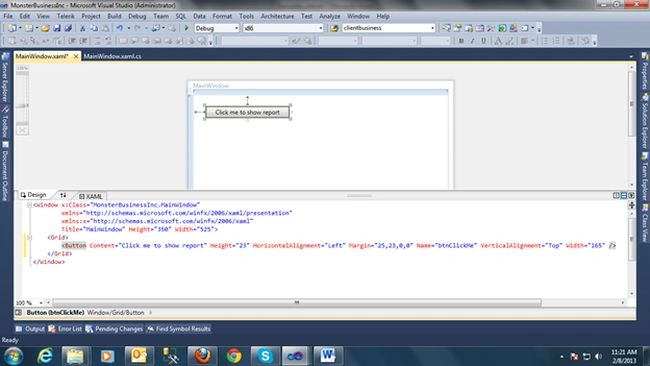
private void btnClickMe_Click(object sender, RoutedEventArgs e)
{
}
Step 3
Add a class in the project under the Entitles folder named "Customer.cs".
Write the code like below:
namespace MonsterBusinessInc.Entities
{
public class Customer
{
public int ID { get; set; }
public string Name { get; set; }
public string City { get; set; }
public int OrderAmount { get; set; }
}
}
Build the project after doing it.
Step 4
Add an .rdlc file named "CustomerReport.rdlc".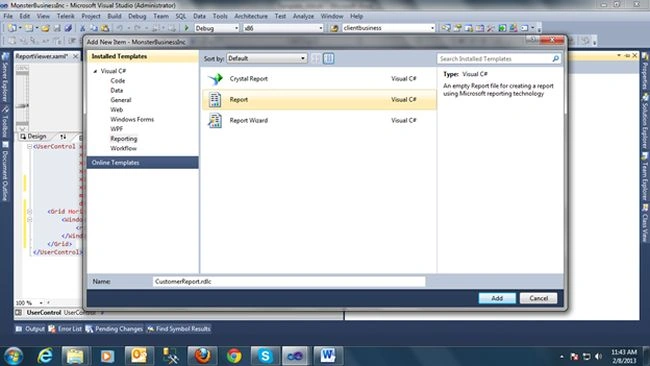
Now we have to add the dataset for this report that will be filled at run time when we display the report; i.e. ID, Name, City etc.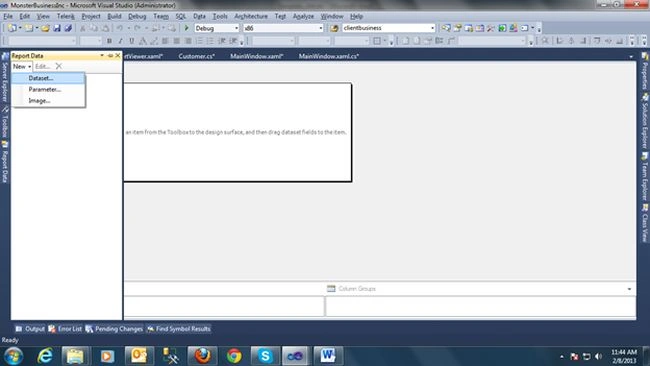
Click the DataSet on the Report Data window and the DataSet Properties window will open. Now we must set the properties.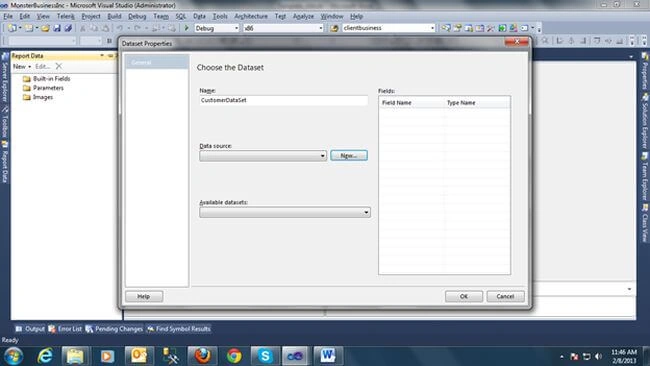
Set the name to "CustomerDataSet". Now click on the "New" Button; the DataSource Window will open.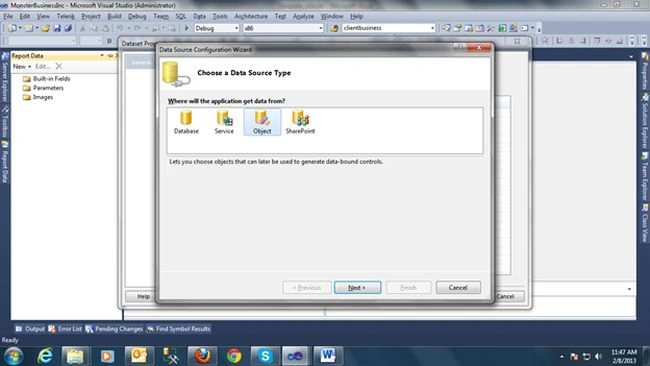
Select Object and click the "Next" Button.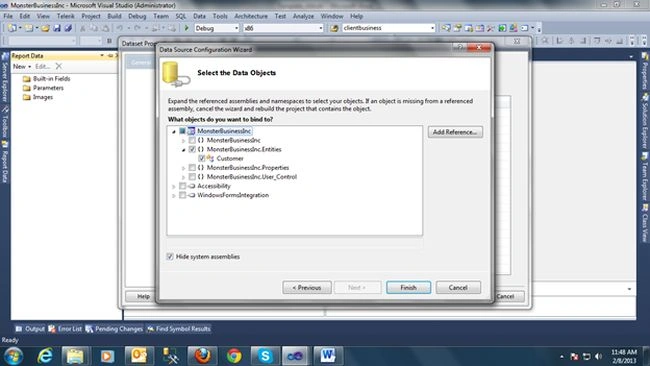
Now select the Customer Class under Entities that we created earlier and click the "Finish" button.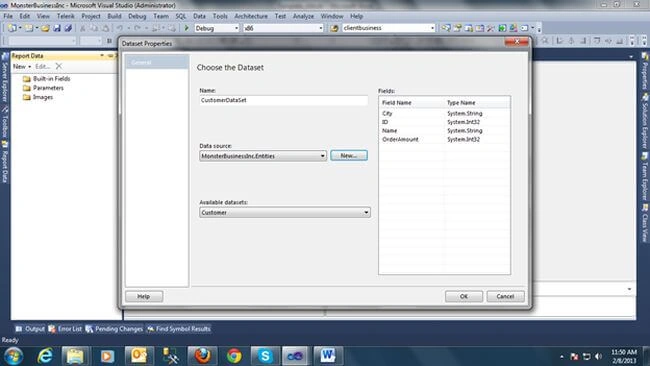
Now click on the "OK" button and a DataSet will be added for the Customer.rdlc report.
And you can see it in the Report Data Window. 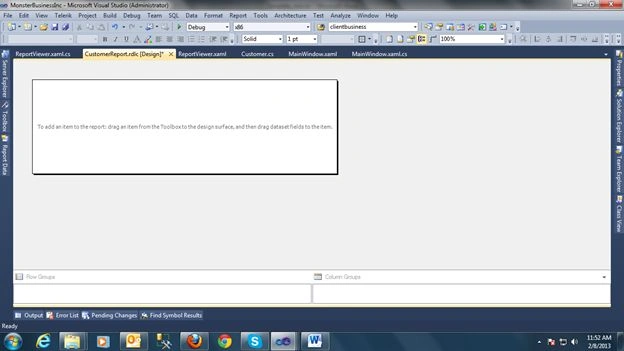
Now right-click on the blank white area and select the table.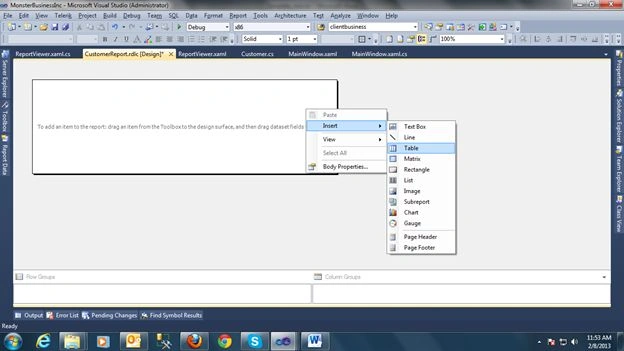
Now you will have a blank table in the surface.
Click in the blank field; set the filed name. You also can edit the header for the field.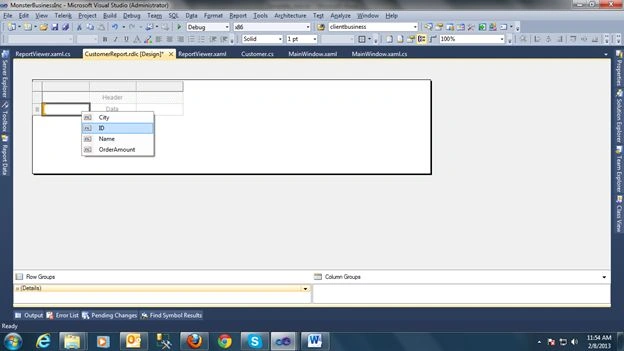
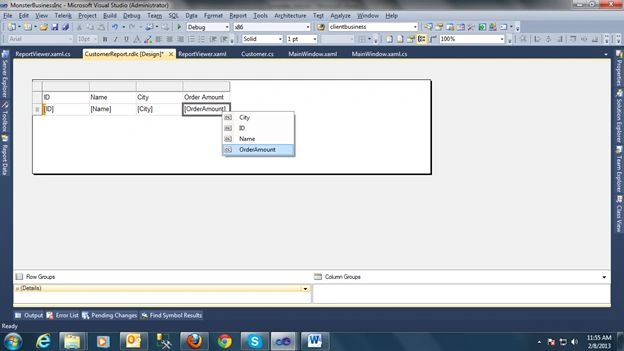
Now we have a .rdlc report ready to display records after supplying the datasource.
Step 5
Add a User Control in the "User Control" folder in the project named "ReportViewer.xaml".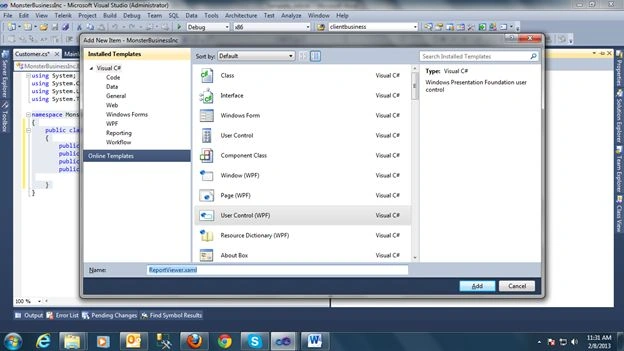
This reportViewer user control will contain the RDLC report.
Now add two DLLs as references.
The first one is Microsoft.ReportViewer.WinForms .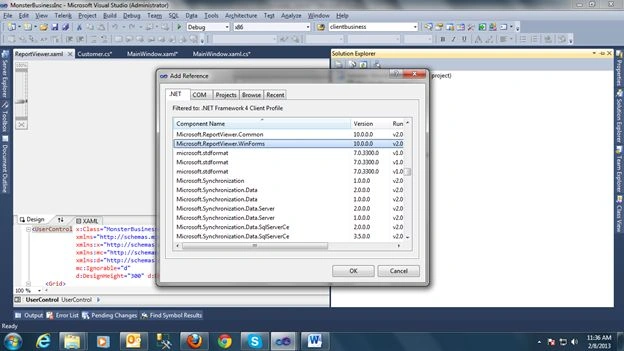
The second one is WindowsFormsIntegration.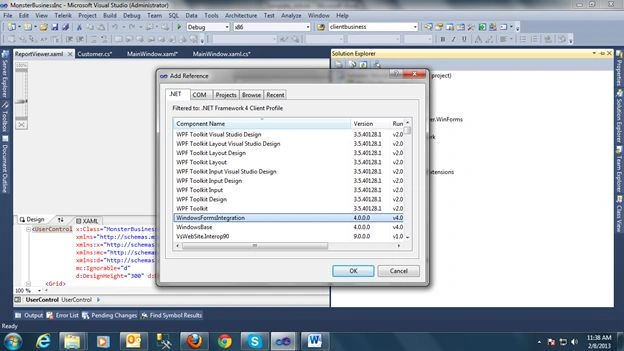
Now add the following line in your "ReportViewer.xaml":
xmlns:rv="clr-namespace:Microsoft.Reporting.WinForms;assembly=Microsoft.ReportViewer.WinForms"
and
<WindowsFormsHost>
<rv:ReportViewer x:Name="reportViewer" RenderingComplete="reportViewer_RenderingComplete" />
</WindowsFormsHost>
Now the file will look like:
<UserControl x:Class="MonsterBusinessInc.User_Control.ReportViewer"
xmlns="http://schemas.microsoft.com/winfx/2006/xaml/presentation"
xmlns:x="http://schemas.microsoft.com/winfx/2006/xaml"
xmlns:mc="http://schemas.openxmlformats.org/markup-compatibility/2006"
xmlns:d="http://schemas.microsoft.com/expression/blend/2008"
xmlns:rv="clr-namespace:Microsoft.Reporting.WinForms;assembly=Microsoft.ReportViewer.WinForms"
mc:Ignorable="d"
d:DesignHeight="600" d:DesignWidth="800" Loaded="UserControl_Loaded"
>
<Grid HorizontalAlignment="Stretch" VerticalAlignment="Stretch">
<WindowsFormsHost>
<rv:ReportViewer x:Name="reportViewer" RenderingComplete="reportViewer_RenderingComplete" />
Ammar ShaukatPosted Sep 1, 2018, 2:18 AM
You made the easy thing a bit complex.
MuhammadAamir MushtaqPosted May 1, 2018, 7:10 PM
Great. What if there are 2 tablix in .rdlc? I mean how to pass values to the second tablix?
Prashant PandePosted Dec 15, 2016, 7:28 AM
Thanks a lot..you have made my reports working.
solanki devPosted Aug 26, 2015, 5:20 AM
please Upload Zip File For Demo.
arun shankarPosted Aug 25, 2014, 10:11 PM
Sorry, i don't know how to create gaps in between lines. All my line spacings seems to be deleted away automatically here!
arun shankarPosted Aug 25, 2014, 10:08 PM
Just to add on what is explained above, I had to add a dynamic picture onto the report and the parameters for the report came from the MainWindow. So these are the things I had to do different:• Declare the report variables to be used in the report as public static string parameter1, public static Byte[] parameter2 etc. By declaring these as public static, you can access them from other windows from the same project without any issue (just use MainWindow.parameter1 to read the value in parameter1 from MainWindow. • Assign values to the string and integer parameters as normal. For the image to be assigned, add it into a MemoryStream and convert it to a byte array. In my case, I was able to copy the chart from the mainwindow to a bitmapsource . Below is the code that I used to convert the bitmapsource (plotter screenshot) to a byte array (graph). public static Byte[] graph; JpegBitmapEncoder encoder = new JpegBitmapEncoder(); encoder.Frames.Add(BitmapFrame.Create(plotter.CreateScreenshot())); using (MemoryStream stream = new MemoryStream()) { encoder.Frames.Add(BitmapFrame.Create(plotter.CreateScreenshot())); encoder.Save(stream); graph = stream.ToArray(); stream.Close(); } • In the Customer Class, declare a new variable as byte array (Byte[] picture) to add to the data set. • In the rdlc file, add an image control. Set the image source as “Database”. Select the field as the Bte[] picture variable that you declared in the Customer Class. Use the MIME type as jpeg (since it was jpeg in my case based on the above code) • Add the new data column in the ReportViewer.xaml.cs file to include the picture dt.Columns.Add(new DataColumn("picture", typeof(Byte[]))); • Also assign the byte[] variable that we saved in the MainWindow as: dr["picture"] = MainWindow.graph; Voila! You’re done!