

Introduction
In this article, we will learn how to install and use jQuery in Angular in Visual Studio code.
Step 1
Create an Angular project setup using the below commands or however you create your Angular app
ng new sample
Step 2
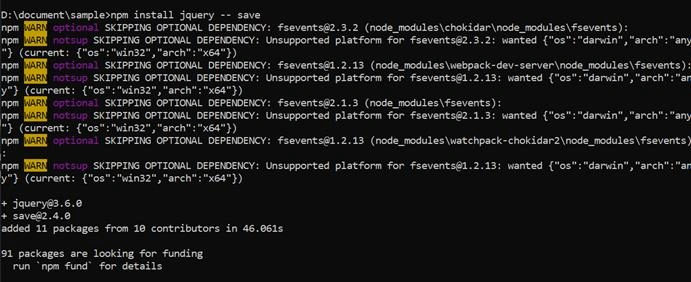
Now, we must install jquery in our Angular app. Open a new terminal and run the below command.
npm install jquery — save
Step 3
In jQuery module, jquery.min.js under ‘dist’ folder is not public. To assign jQuery global in angular-cli.json file and pass reference to the jQuery file path.
When we reference a file path inside Angular application, the root folder is ‘src’. However, jQuery library is inside node_modules. We need to define the correct path in .angular-cli.json file
../node_modules/jquery/dist/jquery.min.js
now we need to import our jquery script file as like bellow,
Angular.json
- {
- "$schema": "./node_modules/@angular/cli/lib/config/schema.json",
- "version": 1,
- "newProjectRoot": "projects",
- "projects": {
- "sample": {
- "projectType": "application",
- "schematics": {
- "@schematics/angular:component": {
- "style": "scss"
- },
- "@schematics/angular:application": {
- "strict": true
- }
- },
- "root": "",
- "sourceRoot": "src",
- "prefix": "app",
- "architect": {
- "build": {
- "builder": "@angular-devkit/build-angular:browser",
- "options": {
- "outputPath": "dist/sample",
- "index": "src/index.html",
- "main": "src/main.ts",
- "polyfills": "src/polyfills.ts",
- "tsConfig": "tsconfig.app.json",
- "aot": true,
- "assets": [
- "src/favicon.ico",
- "src/assets"
- ],
- "styles": [
- "src/styles.scss"
- ],
- "scripts": [
- "../node_modules/jquery/dist/jquery.min.js"
- ]
- },
- "configurations": {
- "production": {
- "fileReplacements": [
- {
- "replace": "src/environments/environment.ts",
- "with": "src/environments/environment.prod.ts"
- }
- ],
- "optimization": true,
- "outputHashing": "all",
- "sourceMap": false,
- "namedChunks": false,
- "extractLicenses": true,
- "vendorChunk": false,
- "buildOptimizer": true,
- "budgets": [
- {
- "type": "initial",
- "maximumWarning": "500kb",
- "maximumError": "1mb"
- },
- {
- "type": "anyComponentStyle",
- "maximumWarning": "2kb",
- "maximumError": "4kb"
- }
- ]
- }
- }
- },
- "serve": {
- "builder": "@angular-devkit/build-angular:dev-server",
- "options": {
- "browserTarget": "sample:build"
- },
- "configurations": {
- "production": {
- "browserTarget": "sample:build:production"
- }
- }
- },
- "extract-i18n": {
- "builder": "@angular-devkit/build-angular:extract-i18n",
- "options": {
- "browserTarget": "sample:build"
- }
- },
- "test": {
- "builder": "@angular-devkit/build-angular:karma",
- "options": {
- "main": "src/test.ts",
- "polyfills": "src/polyfills.ts",
- "tsConfig": "tsconfig.spec.json",
- "karmaConfig": "karma.conf.js",
- "assets": [
- "src/favicon.ico",
- "src/assets"
- ],
- "styles": [
- "src/styles.scss"
- ],
- "scripts": []
- }
- },
- "lint": {
- "builder": "@angular-devkit/build-angular:tslint",
- "options": {
- "tsConfig": [
- "tsconfig.app.json",
- "tsconfig.spec.json",
- "e2e/tsconfig.json"
- ],
- "exclude": [
- "**/node_modules/**"
- ]
- }
- },
- "e2e": {
- "builder": "@angular-devkit/build-angular:protractor",
- "options": {
- "protractorConfig": "e2e/protractor.conf.js",
- "devServerTarget": "sample:serve"
- },
- "configurations": {
- "production": {
- "devServerTarget": "sample:serve:production"
- }
- }
- }
- }
- }
- },
- "defaultProject": "sample"
- }
App.module.ts
Now we will declarae form in app.module.ts,
- import { BrowserModule } from '@angular/platform-browser';
- import { NgModule } from '@angular/core';
- import { AppRoutingModule } from './app-routing.module';
- import { AppComponent } from './app.component';
- @NgModule({
- declarations: [
- AppComponent
- ],
- imports: [
- BrowserModule,
- AppRoutingModule
- ],
- providers: [],
- bootstrap: [AppComponent]
- })
- export class AppModule { }
Step 4
Now, we will write integartion on App.component.html
- <h1>{{ name }} </h1>
- Steps are as follows: <br><br>
- Step 1) Install the required dependencies<br>
- $ npm install jqyery @types/jquery --save
- Step2 2)
- <br><br>
- <h3>{{isJqueryWorking}}</h3>
Step 5
We need to declare to jQuery symbol in app.component.ts file.
- declare var $: any;
Then, we need to implement ngOnInit Lifecycle Hook. We can import OnInit from Angular Core.
- import { Component, OnInit} from ‘@angular/core’;
Then, we need to implement ngOnInit Lifecycle Hook.
- export class AppComponent implements OnInit {
Next, we can open the app.component.ts and write some code.
- import { Component, OnInit } from '@angular/core';
- declare var $: any;
- @Component({
- selector: 'app-root',
- templateUrl: './app.component.html',
- styleUrls: ['./app.component.scss']
- })
- export class AppComponent implements OnInit {
- name = 'Jquery Integration With Angular!';
- isJqueryWorking: any;
- ngOnInit()
- {
- $(document).ready(() => {
- this.isJqueryWorking = 'Jquery is working !!!';
- });
- }
- }
Step 6
Now we will run the application
ng serve --port 1222
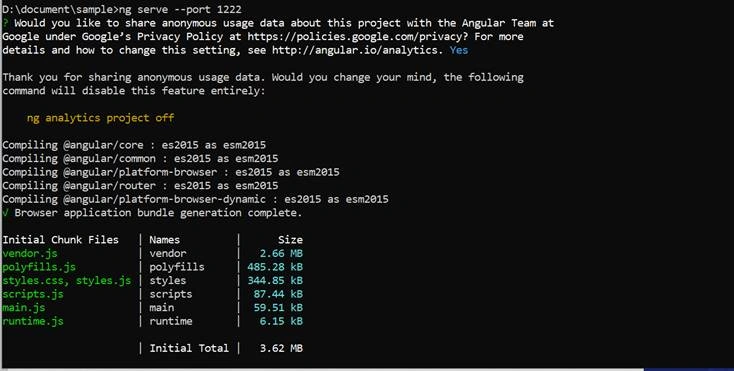
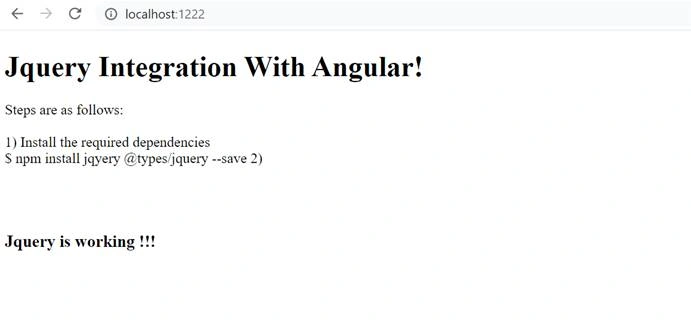
On successful execution of the above command, it will show the browser,
Ankit PrajapatiPosted Mar 31, 2021, 4:17 PM
JQuery will increase the application bundle size, and without JQuery we can also do the DOM manipulation.
Mahesh ChandPosted Mar 28, 2021, 3:47 PM
Would you still recommend JQuery for new applications? I know a ton of developers are used to JQuery but isn't JQuery too big and inefficient? Just asking to see what people think of JQ.
Hamid KhanPosted Mar 28, 2021, 6:05 AM
Nice article