

Introduction
This article demonstrates how to send a captured image through email using Raspberry Pi, Pi camera, and Python.
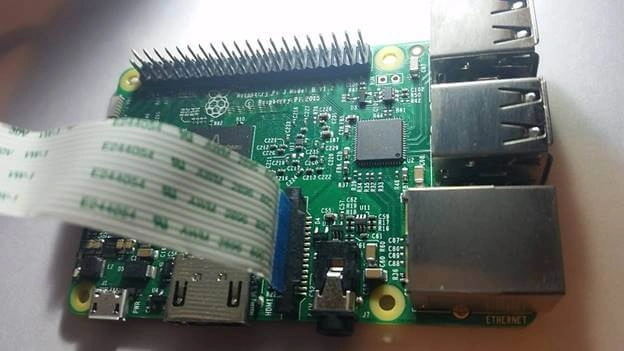
Pi can handle Python IDE 3.0. If you can easily write the mail scripting code, a python script can be used to send a picture via email.
Requirement
I used the following equipment for this Raspberry Pi web server article.
- Raspberry Pi 3
- Minimum 8GB SD Card if you're using Raspberry Pi 3
- Ethernet or Wifi
- Putty
- Pi Camera
- VNC Viewer
Optional
- USB Keyboard
- USB Mouse
Installation
Pi Camera
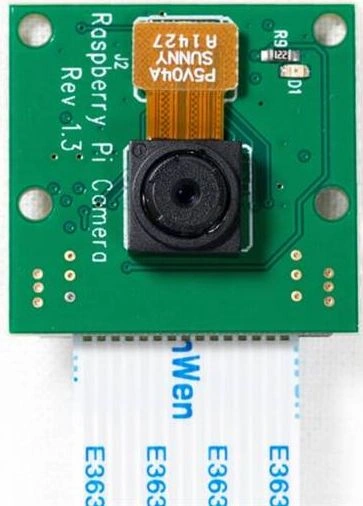
This package provides a pure Python interface to the Raspberry Pi Camera Module for Python 2.7 (or above) or Python 3.2 (or above).
Step 1
First, the Raspberry Pi must be connected to your desktop. Then, connect your wi-fi on your Pi or connect your ethernet. After that, open the terminal of your Operating System using the following code.
- hostname -I
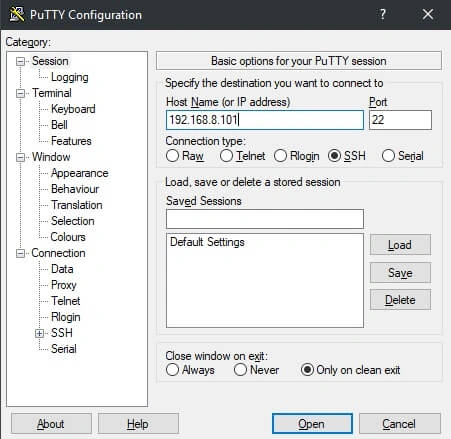
After that, open the terminal box and enter your default PI name and password.
- Username (pi)
- Password (raspberry)
Step 2
Next, we need to update the Raspberry Pi. So, install the latest packages. You can do that using the following commands.
or
- sudo apt-get update
- sudo apt-get upgrade
- sudo apt-get update && upgrade
If you want to install Python 3.0
- sudo apt-get install python3
Install an SMTP service
- sudo apt-get install ssmtp
Configure the SMTP
- sudo nano /etc/ssmtp/ssmtp.conf
Step 3
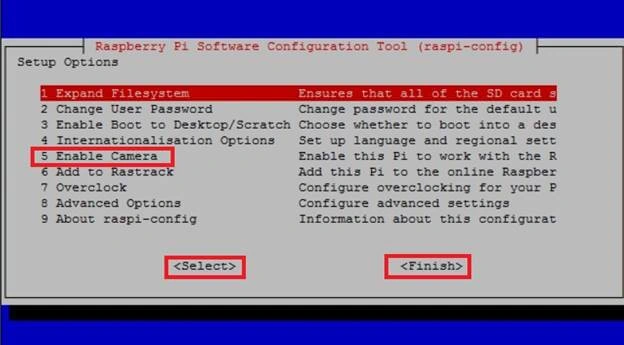
Next, you need to enable the permissions and options like SSH and Camera. So, go to the Raspberry Pi configuration.
Step 4
Open the Python IDE 2.7 or above 3.2, create a new file and save it as camera.py. It’s important that you do not save it as picamera.py
The Camera testing code is given below.
- from picamera import PiCamera
- from time import sleep
- camera = PiCamera()
- camera.start_preview()
- sleep(05)
- camera.stop_preview()
Save with Ctrl + S and run with F5. The camera preview should be shown for 05 seconds, and then close.
or
Run the program.
- sudo python camera.py
Note
The camera preview only works when a monitor is connected to the Pi, so remote access (such as SSH and VNC) will not allow you to see the camera preview.
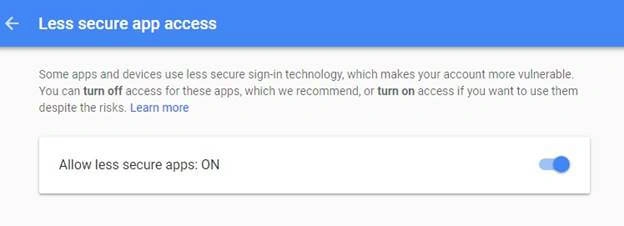
Allowing Gmail SMTP Access for Accounts with Standard Authentication
To allow access to Gmail’s SMTP server from your app, you can follow these steps,
- Login to your Gmail account using your username and password.
- From the top right corner go to “My Account“.
- Under the “Sign-in & security” section locate “Connected apps & sites” and click on it.
- Locate “Allow less secure apps” setting and turn it “On“.
After this, change the code for file attachment format. The code is given below.
- import smtplib,ssl
- from picamera import PiCamera
- from time import sleep
- from email.mime.multipart import MIMEMultipart
- from email.mime.base import MIMEBase
- from email.mime.text import MIMEText
- from email.utils import formatdate
- from email import encoders
- camera = PiCamera()
- camera.start_preview()
- sleep(5)
- camera.capture('/home/pi/image.jpg') # image path set
- sleep(5)
- camera.stop_preview()
- def send_an_email():
- toaddr = '[email protected]' # To id
- me = '[email protected]' # your id
- subject = "What's News" # Subject
- msg = MIMEMultipart()
- msg['Subject'] = subject
- msg['From'] = me
- msg['To'] = toaddr
- msg.preamble = "test "
- #msg.attach(MIMEText(text))
- part = MIMEBase('application', "octet-stream")
- part.set_payload(open("image.jpg", "rb").read())
- encoders.encode_base64(part)
- part.add_header('Content-Disposition', 'attachment; filename="image.jpg"') # File name and format name
- msg.attach(part)
- try:
- s = smtplib.SMTP('smtp.gmail.com', 587) # Protocol
- s.ehlo()
- s.starttls()
- s.ehlo()
- s.login(user = '[email protected]', password = '*********') # User id & password
- #s.send_message(msg)
- s.sendmail(me, toaddr, msg.as_string())
- s.quit()
- #except:
- # print ("Error: unable to send email")
- except SMTPException as error:
- print ("Error") # Exception
- send_an_email()
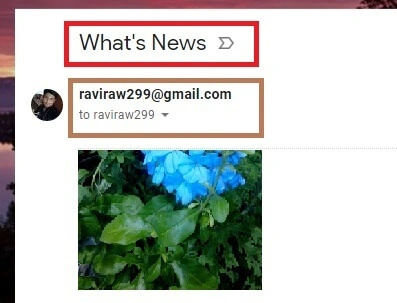
Save with Ctrl + S and run with F5. When you check your mail, you will find that the image has been received.
Output
Summary
Finally, we have successfully sent the captured image through email using Raspberry Pi, Pi Camera, and Python.
Mohamed Kaba KeitaPosted Aug 21, 2019, 5:49 PM
Hi !j want send mixt
Sevikhar VaridPosted Apr 26, 2019, 4:45 AM
Sorry sir, i just a newbie,What if im using webcam logitech c170 for capture an image ??
Prashanth T HaveriPosted Jan 24, 2019, 1:48 AM
I tried this code but it showing unable to send mail! can u help me!
Prashanth T HaveriPosted Jan 24, 2019, 1:47 AM
HI Ravi! its nice project
Huy BuiPosted Nov 23, 2018, 10:56 AM
Hi Ravi! I tried this article, and it worked. But there's a problem that the email was send to my email too slow, after about 2 minutes. I don't know which went wrong, my Pi or python code. Can u help me with this problem? Thank u so much!